DIZME
Framework Console Documentation
Introduction
DIZME Studio is a platform that allow an organization to monitor and manage the status of definition ad verification of credentials.
Dizme Studio provide also some feature useful to configure and test Proof Template for verify request and provide feature to test the issuing of a specific credential. With this tool the organization can also check the status of the economic transactions.
Dizme Studio is intended as an integration support tool, it does not replace or implement specific business logic of an organization.
REFERENCES
For all the references on how Dizme works and on the terminology and basics about the SSI we recommend starting from: https://www.dizme.io/
For all the references about Algorand:TERMS
- OPERATOR : DIZME STUDIO user
- USER : DIZME APP user
- SSI : Self Sovreign Identity
- DID : Decentralized IDentifiers
- Product : DIZME Framework Console
- Version : v 3.0
- Author : eTuitus Srl
- Support : DIZME Support
Overview
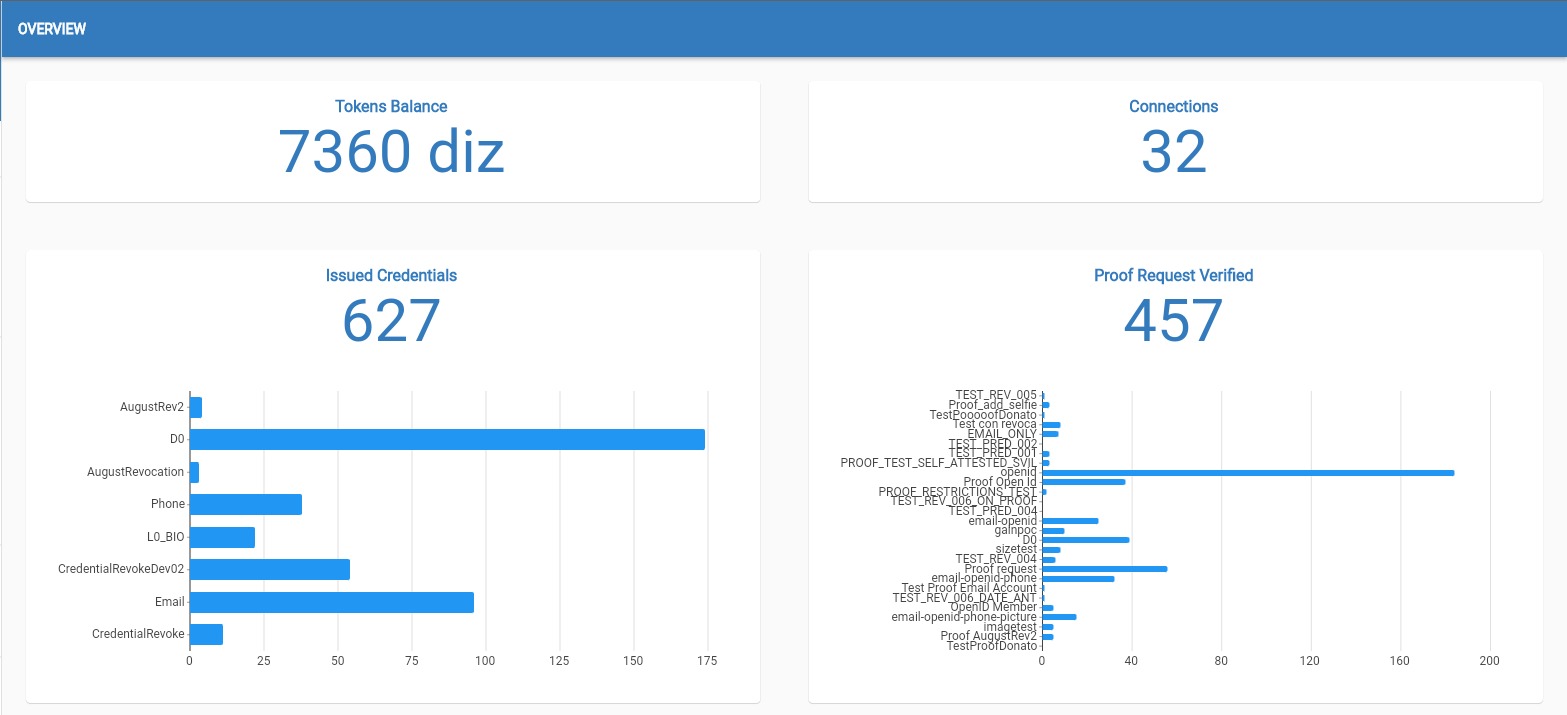
This is the landing page where an organization can see the system data after the login.
Token Balance
Balance of your Dizme token wallet that is bought or earned tokens minus spent tokens.
ConnectionsNumber of total active connections:
First time that a user interacts with the organization will create a connection.
In the Dizme scenario, the first interaction is to obtain an "account credential" with username as attribute.
Number of total issued credentials grouped by Credential.
Number of total proof request verified grouped by Proof Template.
Credential Definition
Credentials act as an attestation or a digital representation of a credential such as an ID, a
passport, driver’s license or a club membership card.
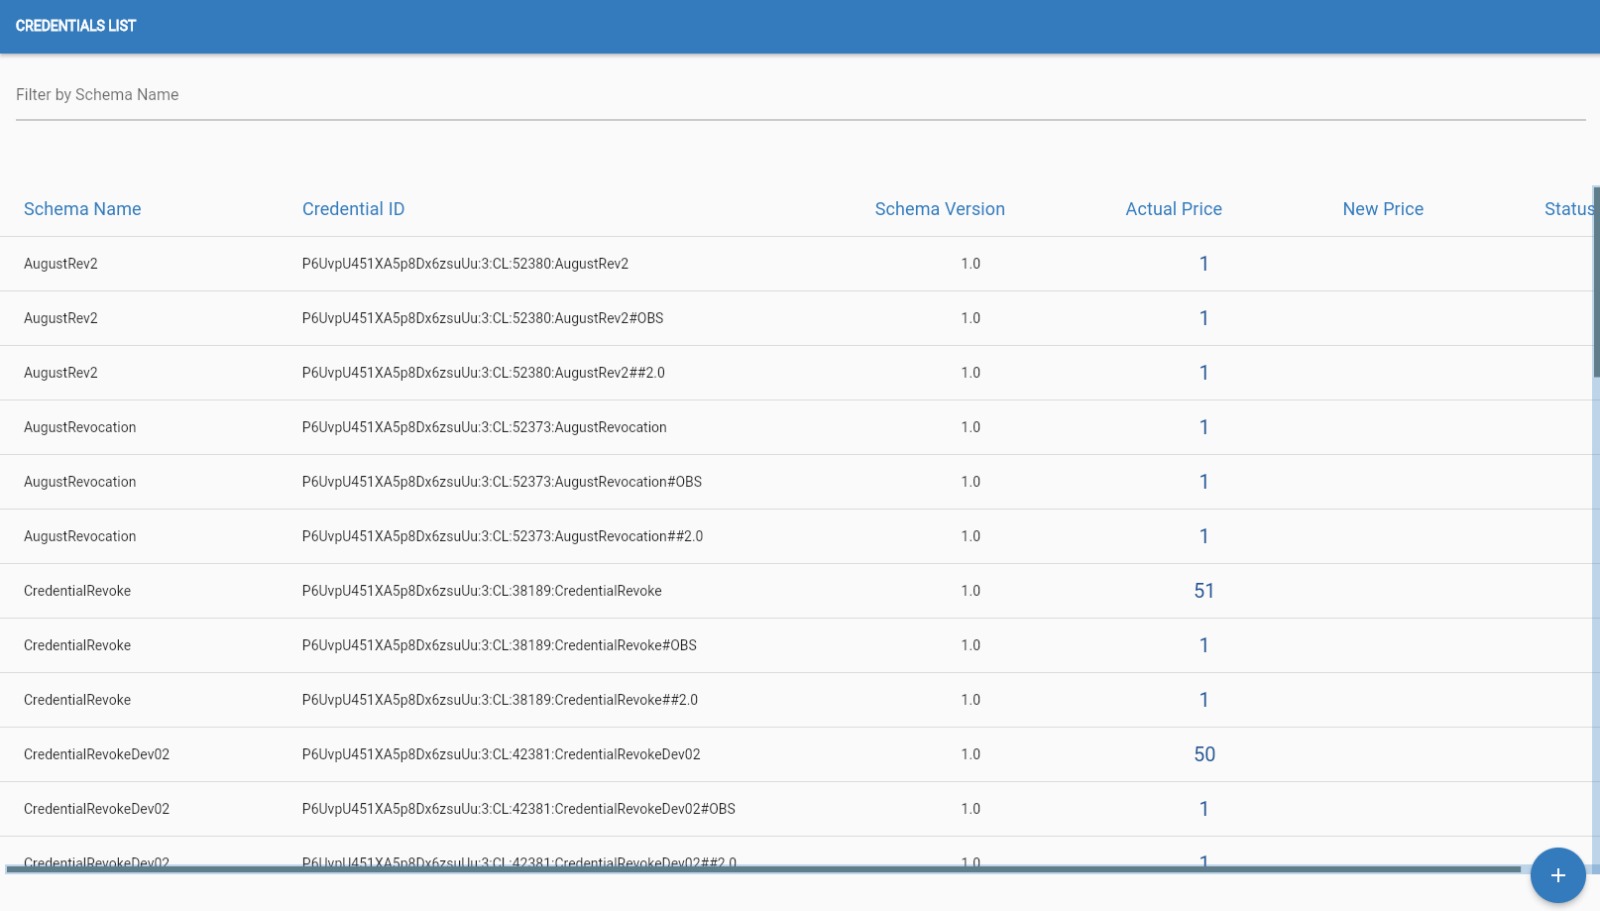
The OPERATOR can interact with the credential in following ways:
Define New Credential
Using a schema, given to the organization, the OPERATOR can define a new credential
Edit PriceThe OPERATOR can request a change the price of a defined credential
Credential OfferThe OPERATOR can generate a credential offer link which can be used to initiate the issuing of a credential.
It is recommended to use it for a purely test/debug purpose.
Credential Definition
The OPERATOR must click on this button in the bottom right corner of the screen of the "Credential list" page,

after that the OPERATOR will be shown the list of all the undefined schemes that he can use.
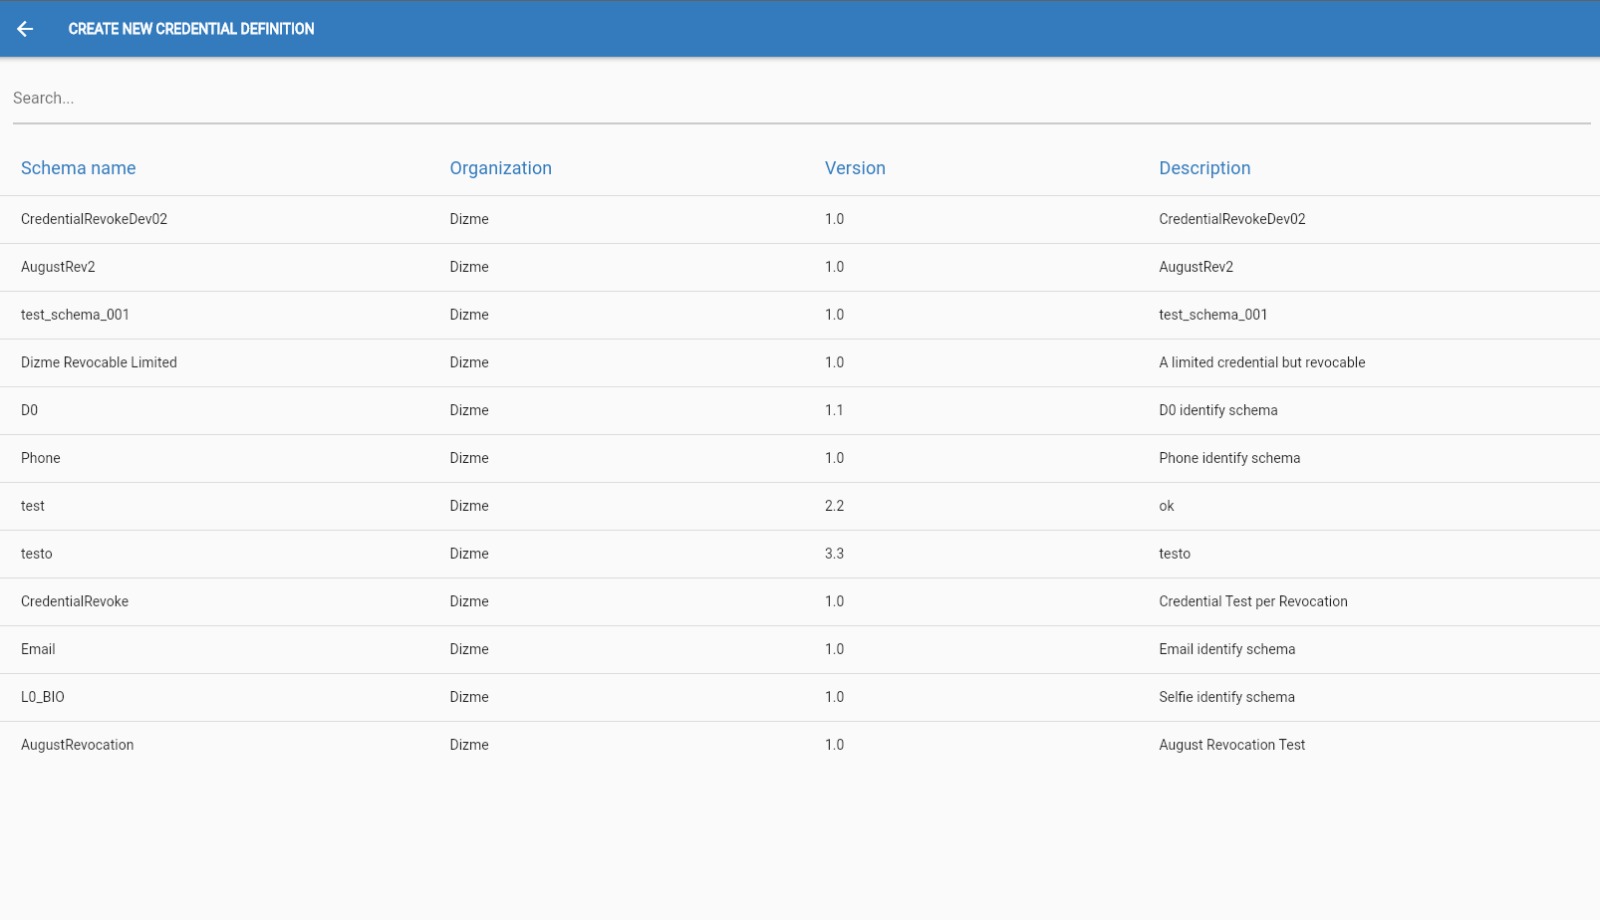
The OPERATOR must select one schema or credential and will be redirected to the screen Schema, with displayed attributes of that schema:
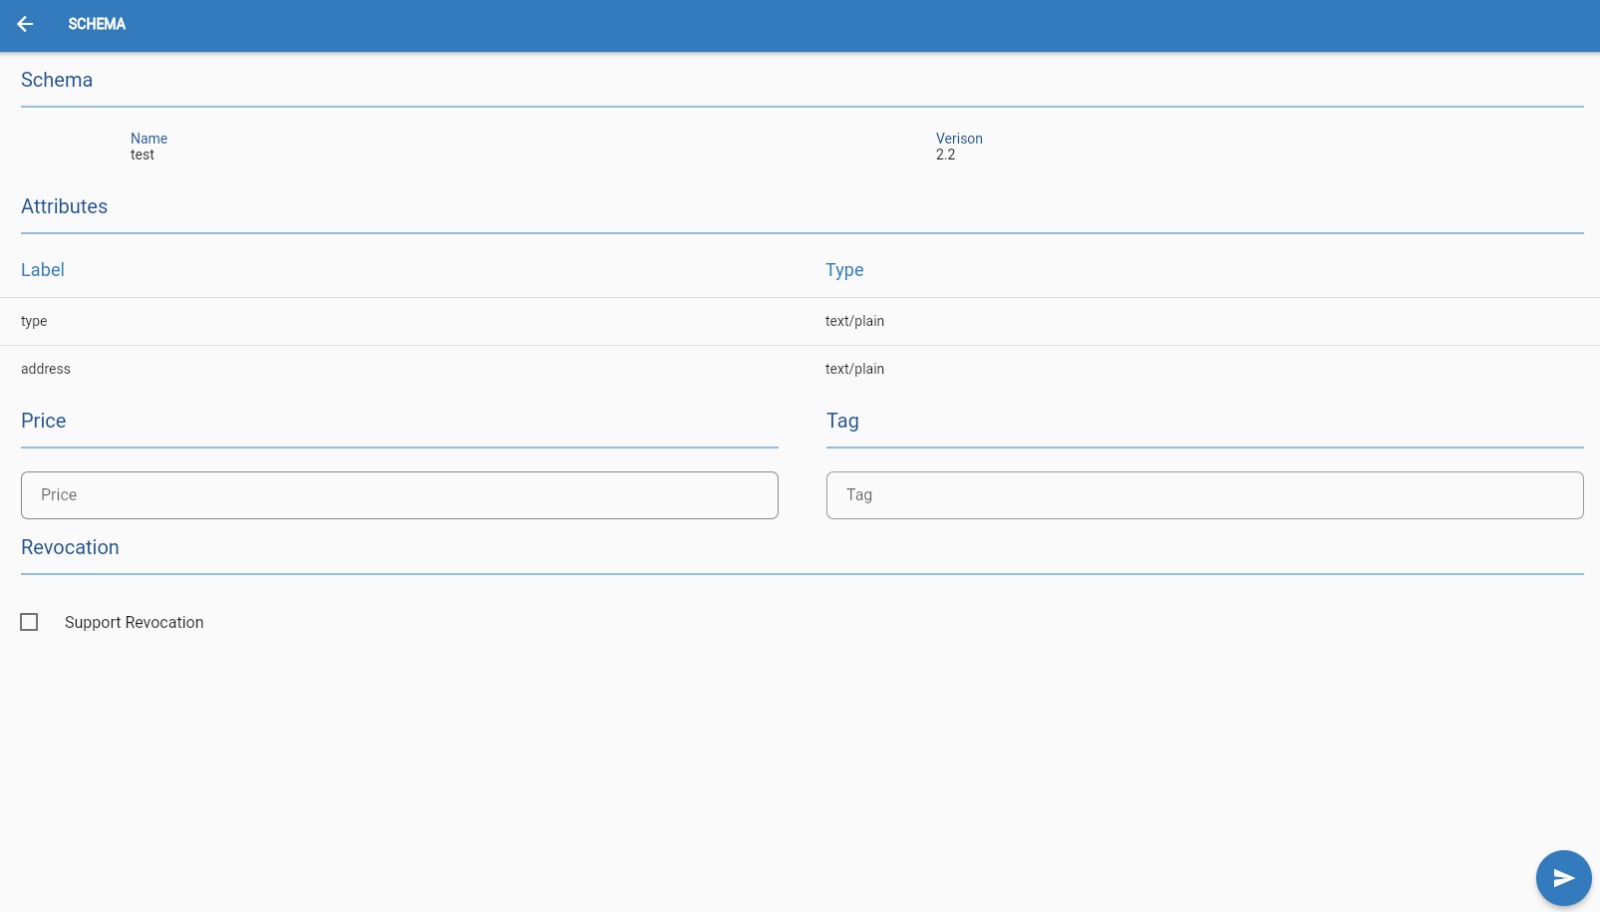
The OPERATOR must select one and set a price for the new credential and then click this button in the bottom right corner of the screen.

If the OPERATOR click on the line with credential or schema data on the Credentials List page, he is redirected to the page with credential details of that specific credential.
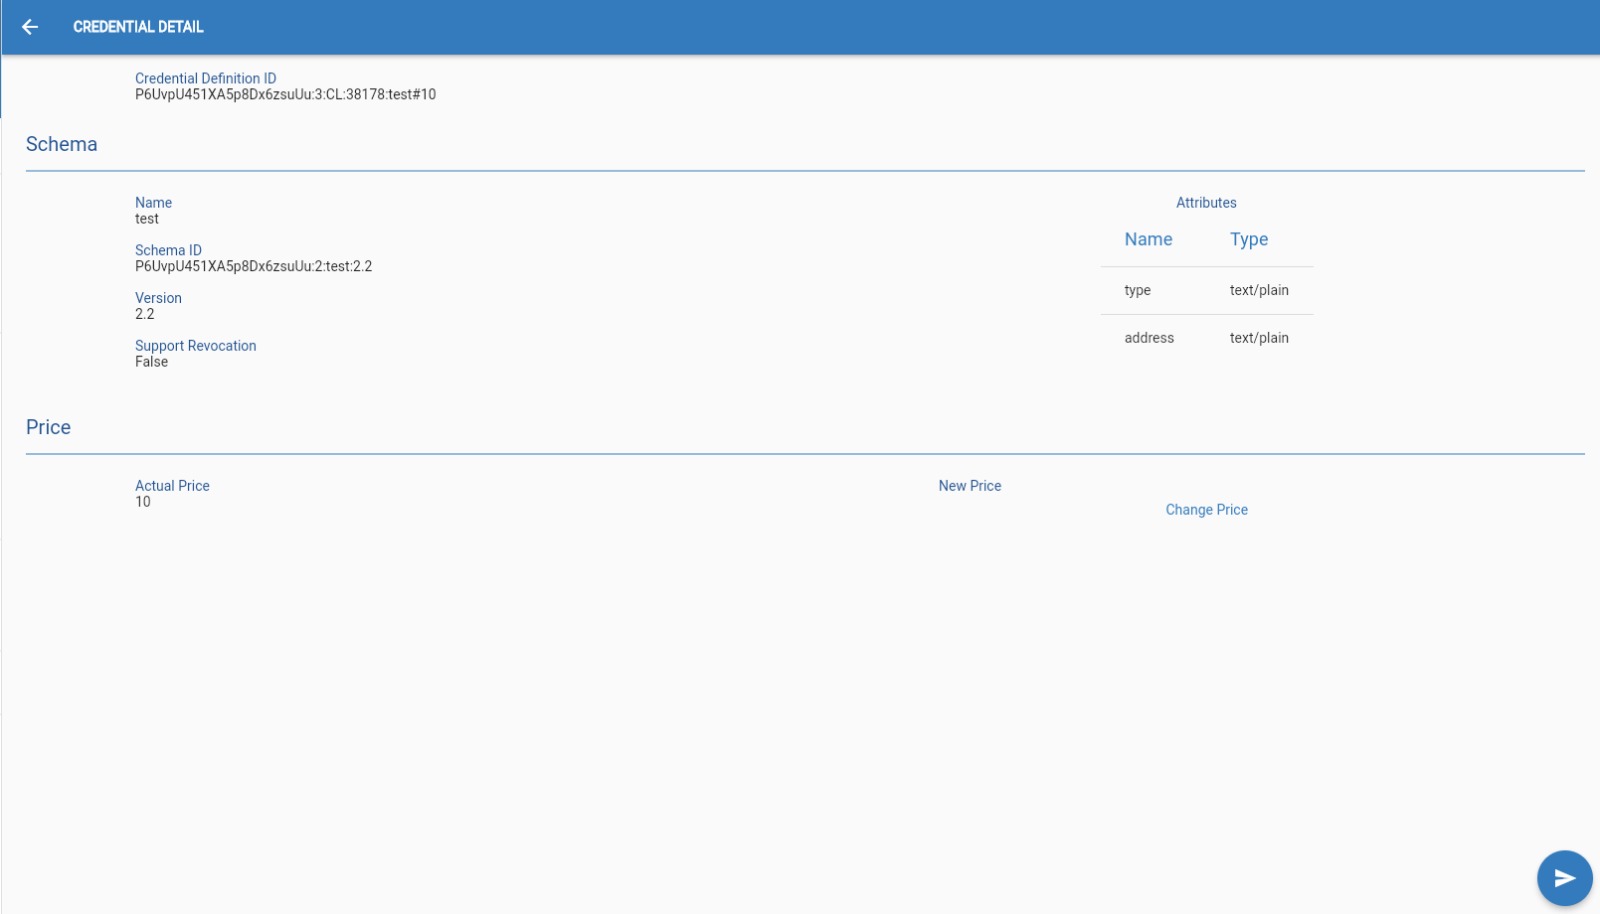
Edit Price
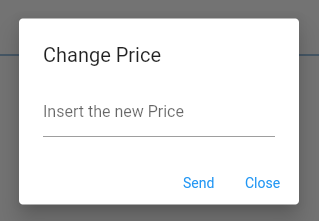
To change the price of a credential the OPERATOR must select the credential from the list and then click on the “Edit price” button of the "Credential Detail" page, this will allow him/her to edit the price. This change will take a day to be applied.
Credential Offer
Once a credential is defined the OPERATOR can generate the credential offer link,
which can be used to initiate the issuing of a credential. It is recommended to use it for a purely test or debug purpose.
To do that the OPERATOR must select the credential from the list of credentials.
The OPERATOR
should click on this button in the bottom right corner of the screen.

Once in the "Credential offer" page the OPERATOR must fill all the fields with the appropriate data type.
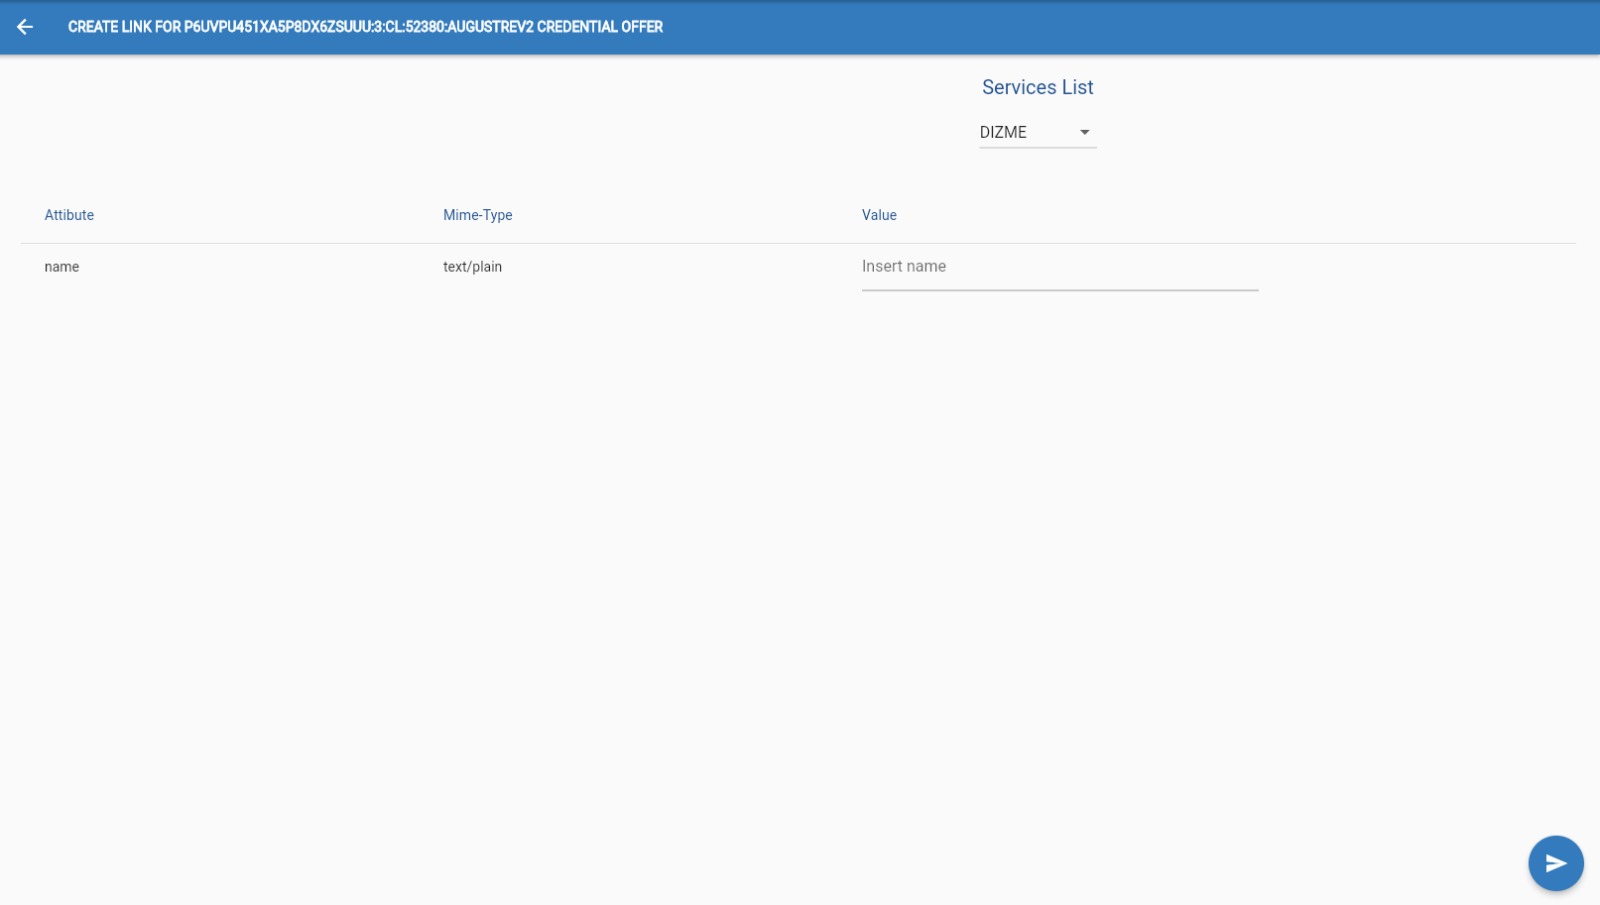 From the dropdown menu can be selected a services to which the request will be associated and which will receive the callbacks of the operations.
Once all fields are filled the OPERATOR must press on this button in the bottom right corner of the screen.
If image file are requested they must be in jpg format.

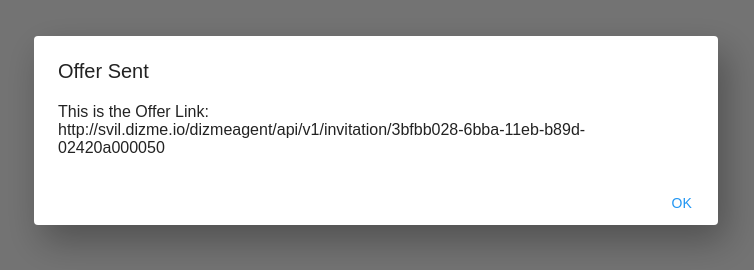
The OPERATOR will see a pop-up on his screen with the link.
Proof Template
The Proof is the answer SSI of the owner to a proof request, if credentials are digital representation of an ID, a proof is the certification that the
OPERATOR has the right credentials needed for the proof request.
Holder of credentials can generate verifiable representations (informally named Proof) once a verifier creates a
Proof request.
Proof requests can be composed by 2 different attributes:
- Restricted
- Self-attested
Restricted attibutes are taken from schemes or credentials connected to the organization. Restricted attributes can be REVEALED or UNREVEALED.
Revealed attributes will notify the USER that the proof will request and check that field, meaning that the USER will send to the Verifier the knowledge of that credential.
Unrevealed, also known as zero-knowledge, won’t show up during the process of proof for the USER and the Verifier will only know the result he need, like:
Self-attested attributes are not conntected to schemas or credentials, this type of attributes are a certification that the USER vouch for, without the need for a specific credential.
Self-attested can have different type and the could be mandatory or not.
If a self-attested attribute is mandatory, the USER is forced to fill the field in the proof request.
If a self-attested attribute is not mandatory, it won’t be necessary fill this field during the proof request.
Proof Create
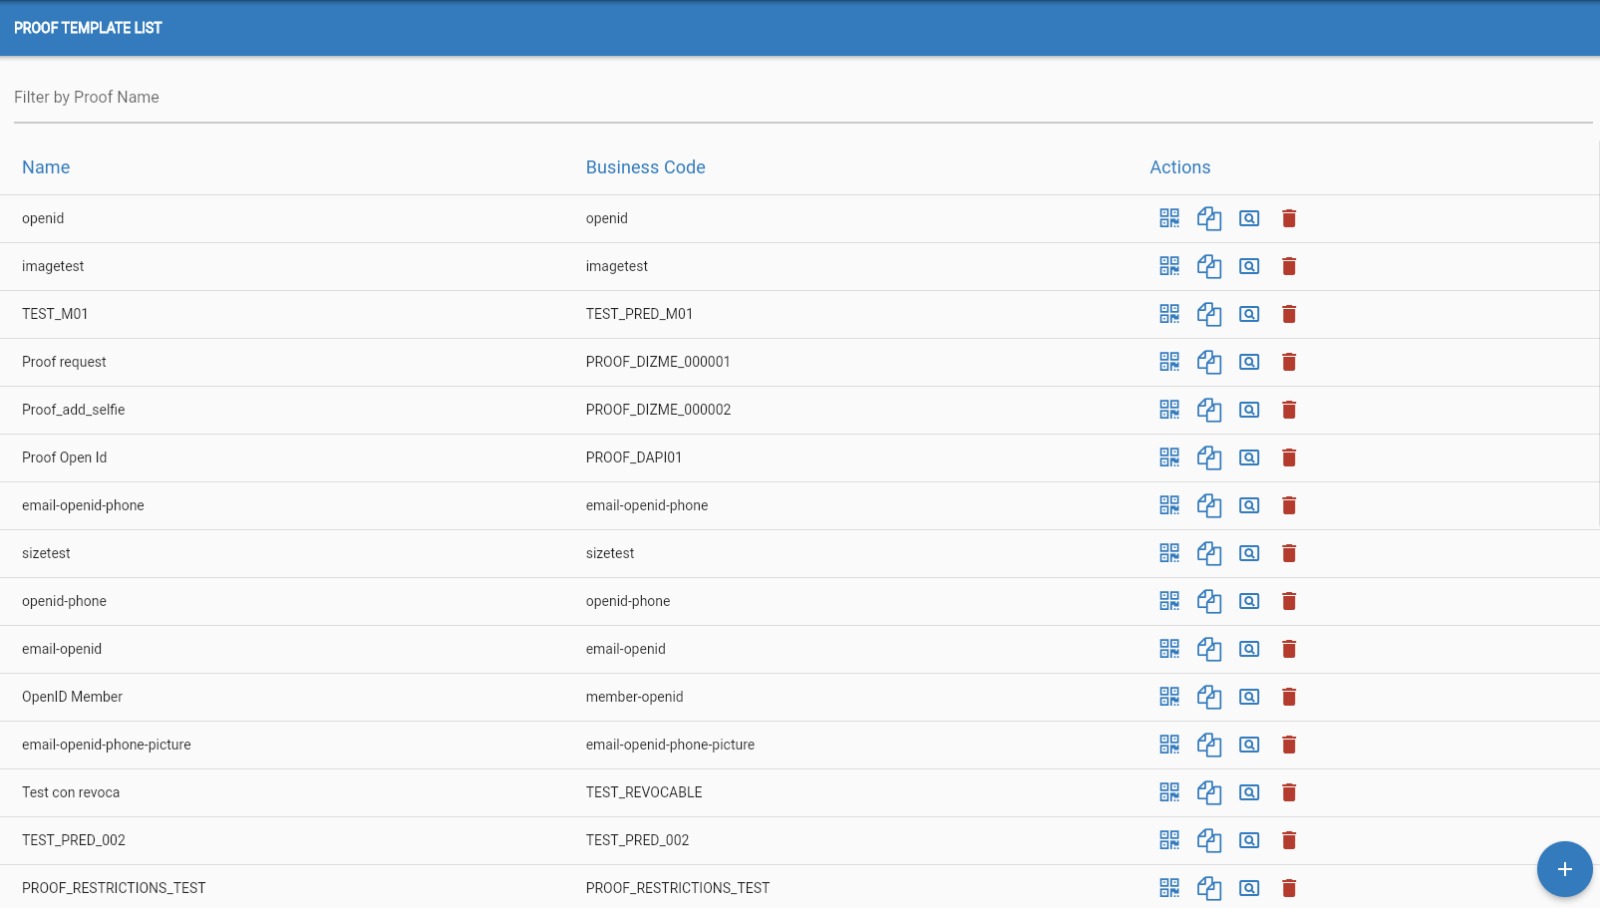
Once the OPERATOR navigate in the "Proof Template List" page he can decide to create a new proof template by clicking on this button in the bottom right corner of the screen.

The OPERATOR will be redirected in the "Create Proof" page.
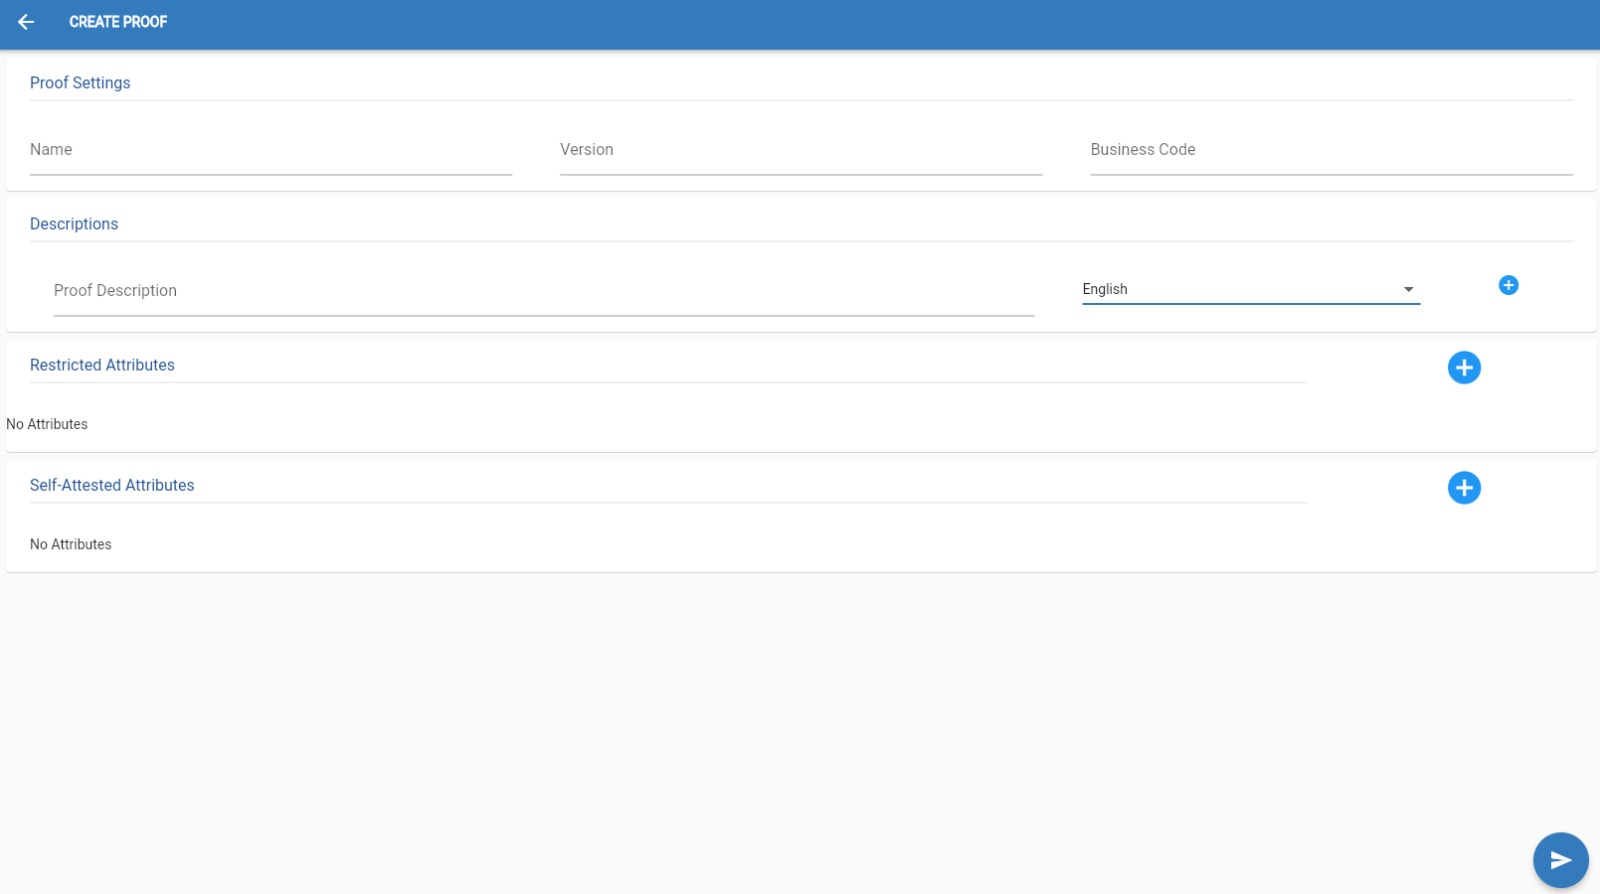
The OPERATOR will need to add all of the attributes and data to the proof:
- Name
- Version
- Business Code
- at least 1 Description in a language of his choice
- Attributes
- Self-attested
- Restricted from Schemes
- Restricted from Credentials
Proof Attributes
The attributes of a proof can be created in multiple ways:
- Self-attested
- Restricted from Schemes
- Restricted from Credentials
- Select the attribute type
- Text
- Selfie
- Document scan
- Choice
- Upload File
- Image
- Photo
- If it’s Mandatory
- The Name
- and at least 1 Description for the attribute in a language of his choice
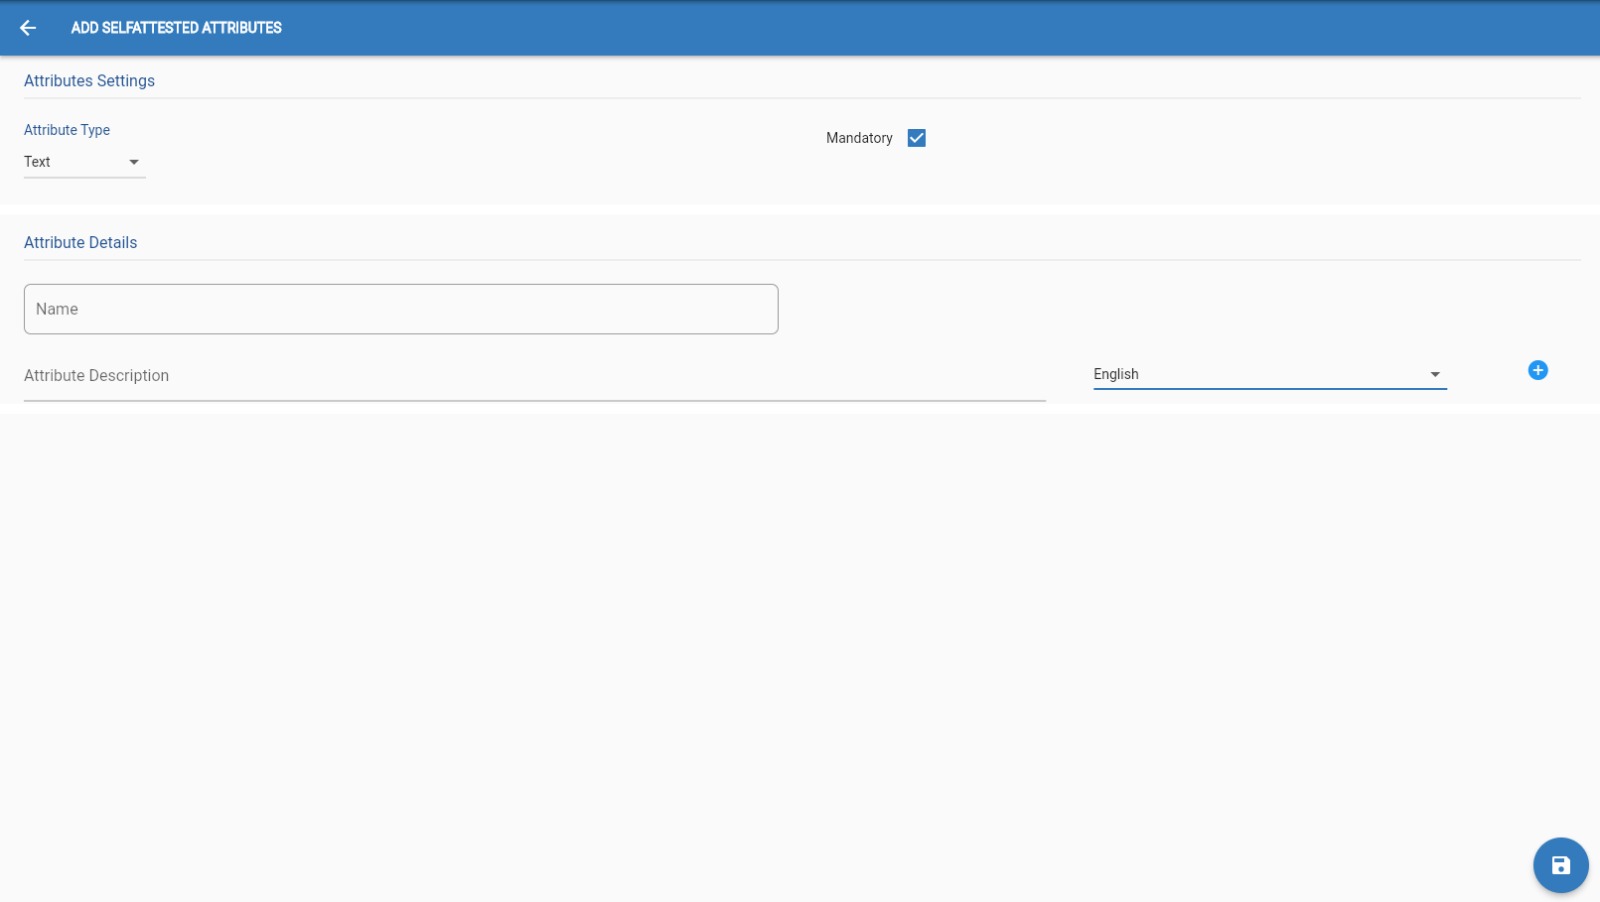
In the case of the RESTRICTED FROM SCHEME the OPERATOR will need to:
- Select the scheme from the list
- Select which of the attributes presented in the scheme will be added into the proof then:
- Click Add/Remove attribute
- Tell if the attribute is Revealed or not.
- Add at least one Description
- Decide if the attribute/s must be Grupped
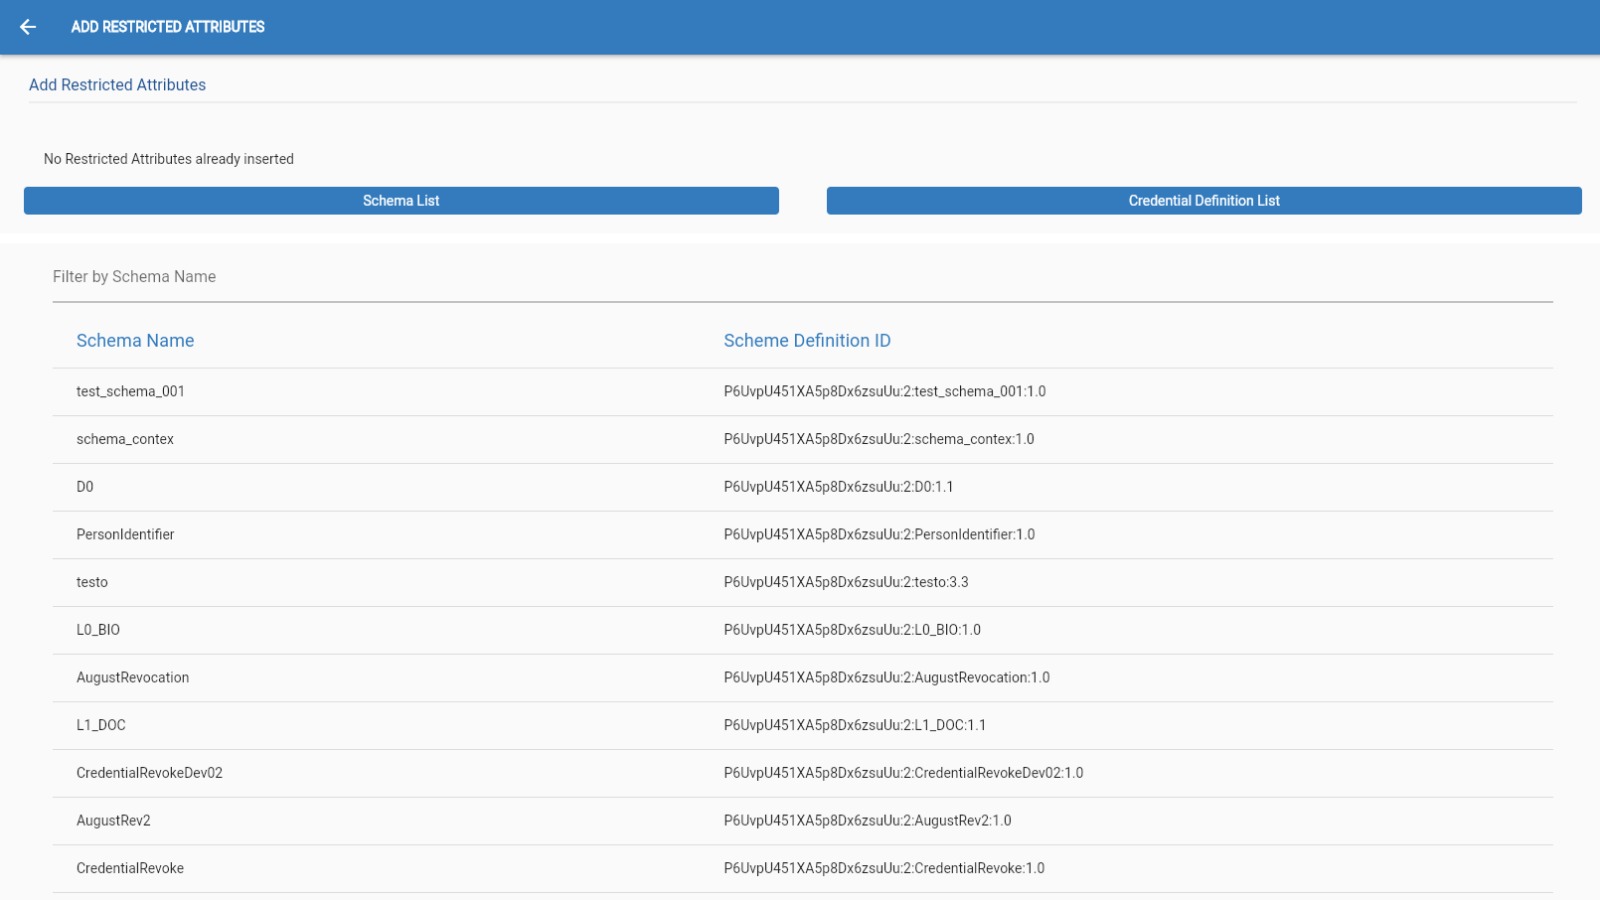
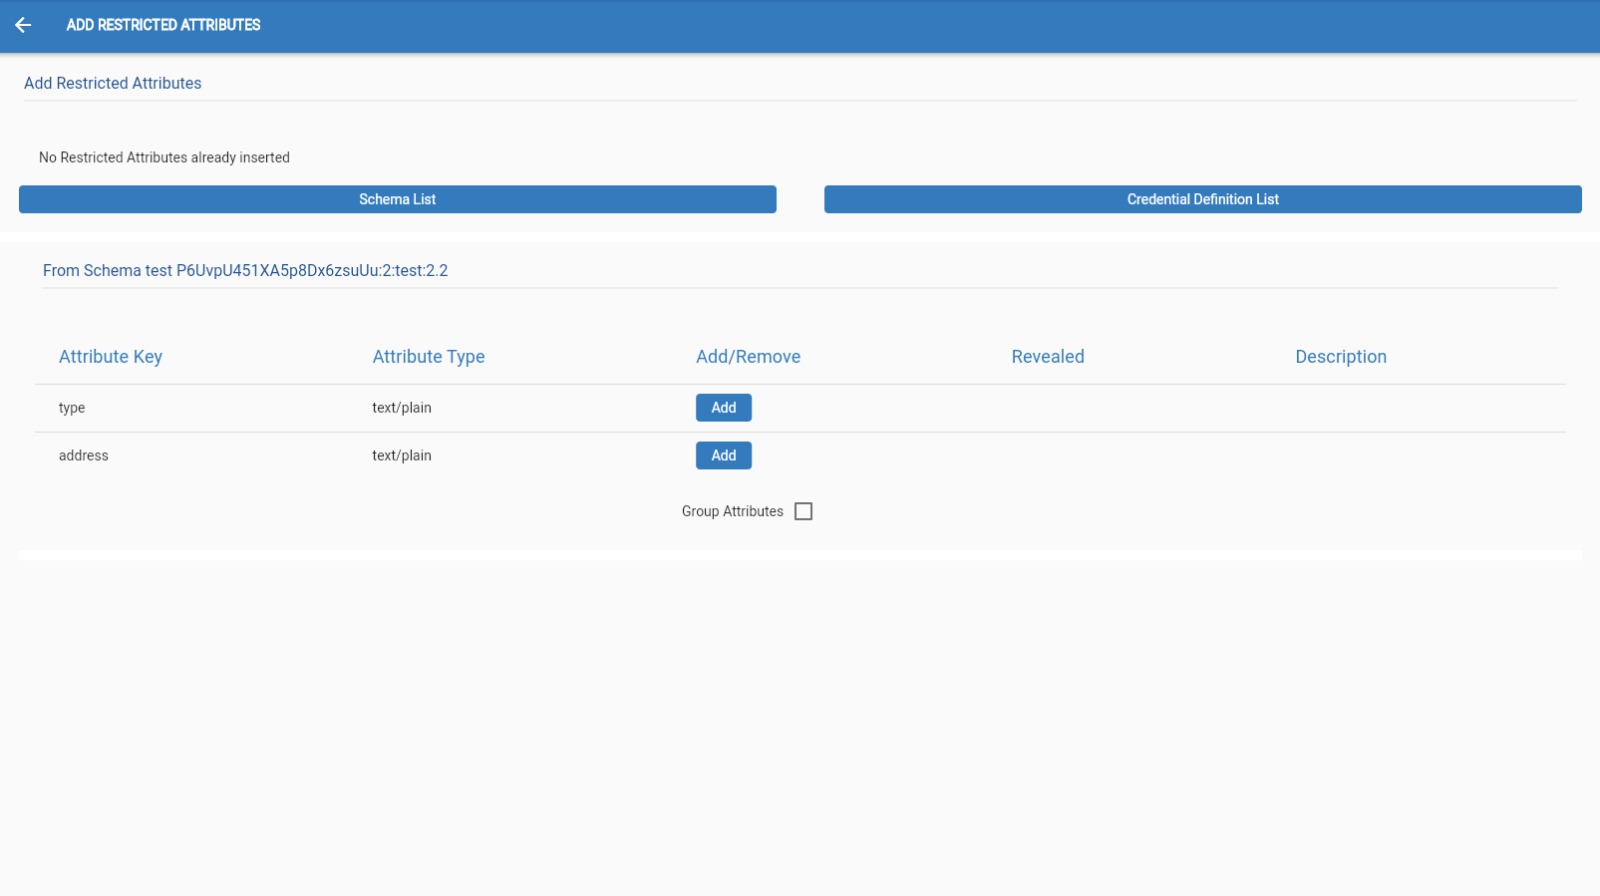
In the case of the RESTRICTED FROM CREDENTIAL the OPERATOR will need to:
- Select the credential form the list
- Select which of the attributes present in the credential will be added into the proof then:
- Click Add/Remove attribute
- Tell if the attribute is Revealed or not.
- Add at least one Description
- Decide if the attribute/s must be Grupped
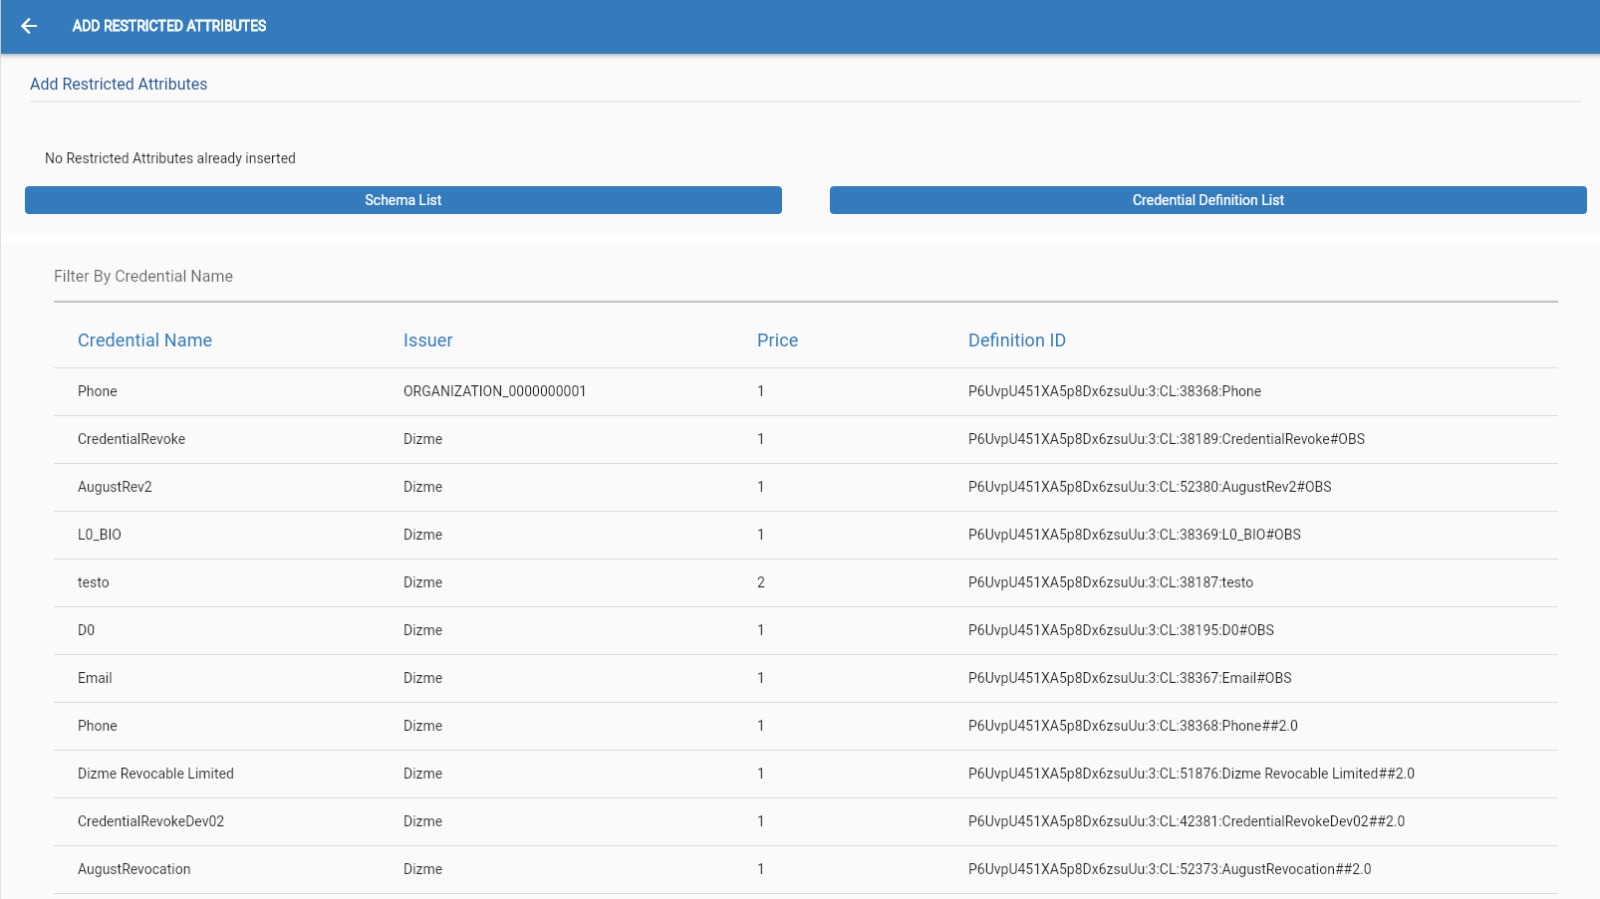
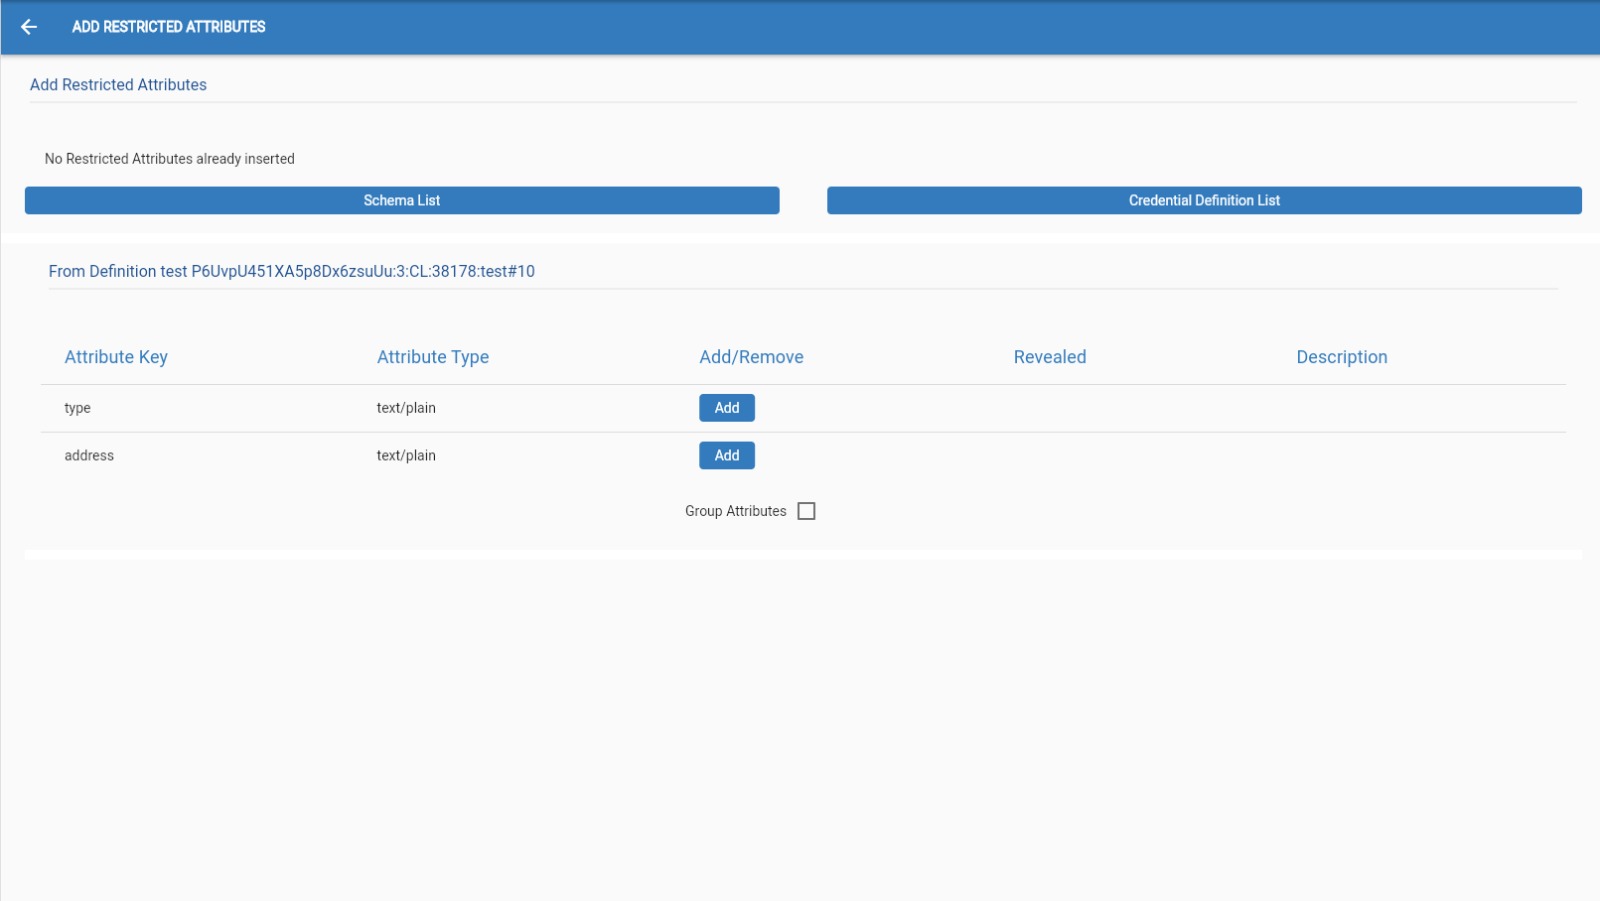
Once the OPERATOR is satisfied by the attributes, the OPERATOR must click on the arrow on the top left of the page to go back to the page where all the details and attributes are now showing.
If the OPERATOR is satisfied with the proof OPERATOR can go on and click on this button in the bottom right corner of the screen.

Remember that every field must be filled.
This pop-up will appear if the Proof was created successfully.
Proof Edit
Here the OPERATOR can edit every part of the proof. Most of the steps are the same as for proof create.
The only part that
can't be modified is the Business Code.
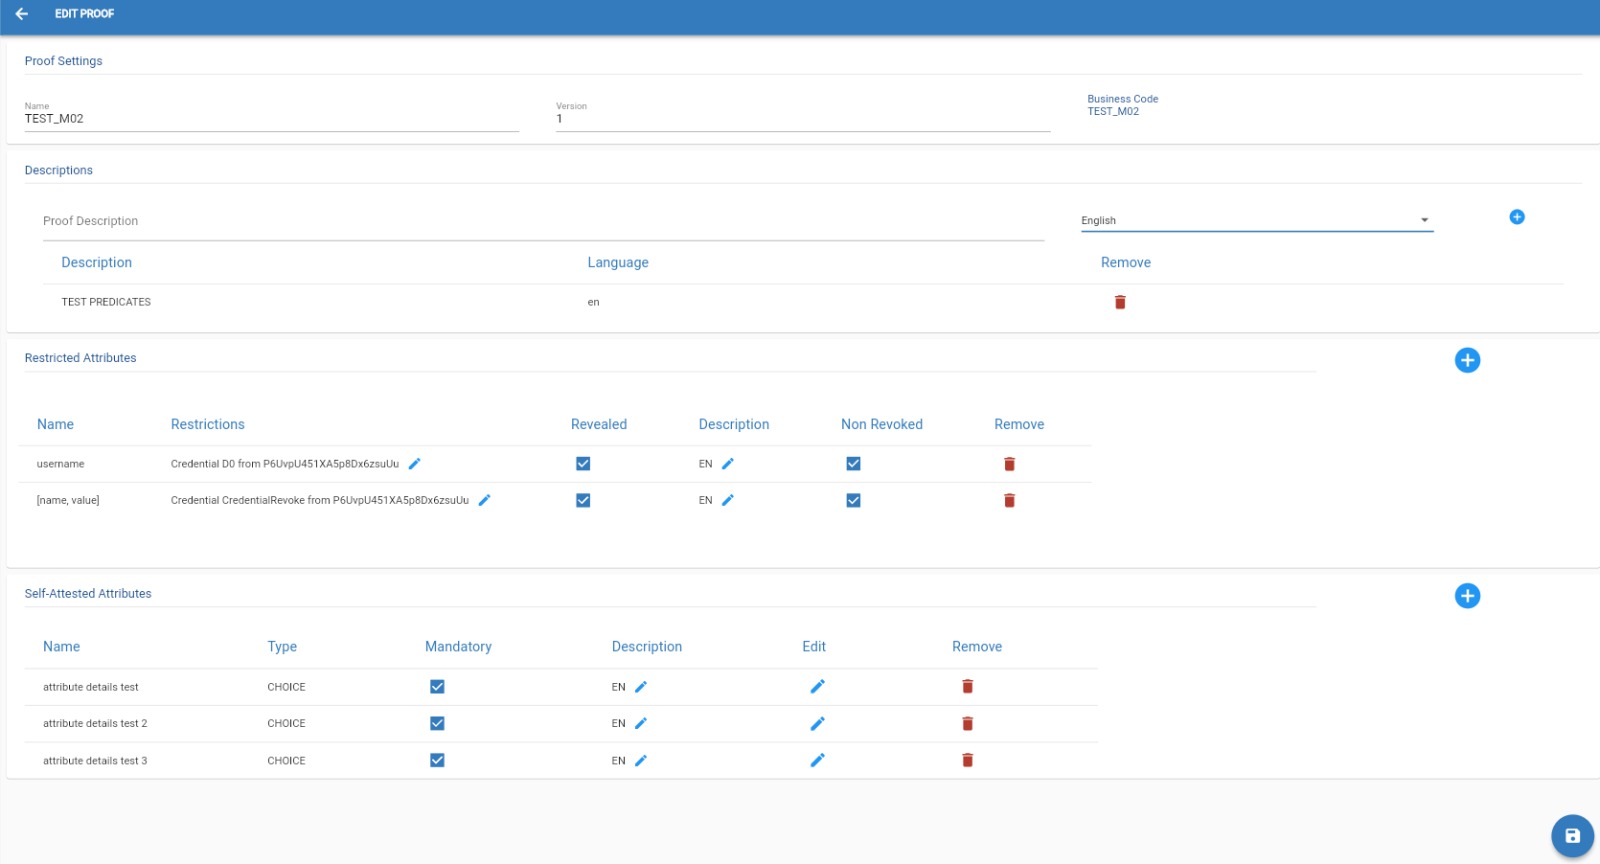
Remember that every field must be filled.
Once satisfied with the changes,the OPERATOR can go on and click on this button in the bottom right corner of the screen.

This pop-up will appear if the Proof was created successfully.

Proof QR
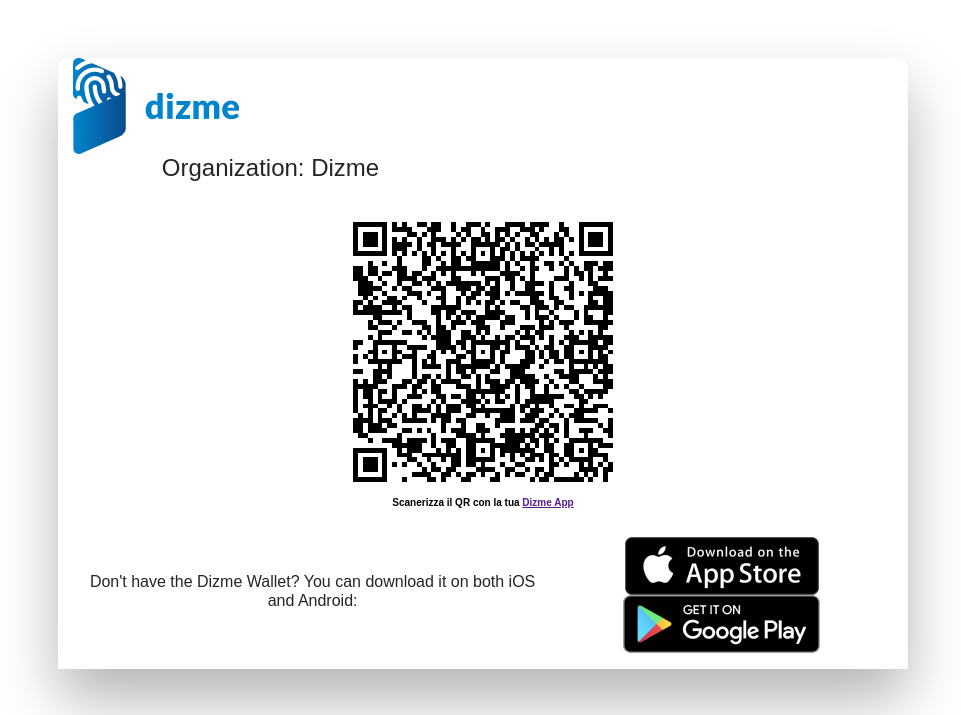
To get the Qr code of a Proof the OPERATOR must click on this button next to chosen proof.

Once clicked the OPERATOR will be redirected to the other page where he need to select Service for the prrof that will receive the callback "confirm verify".
Once he choose it and click to Generate button, he will be redirected to the next page where Qr code will be visible and can be scanned with the app.
It is recommended to use it for test or debug purpose.
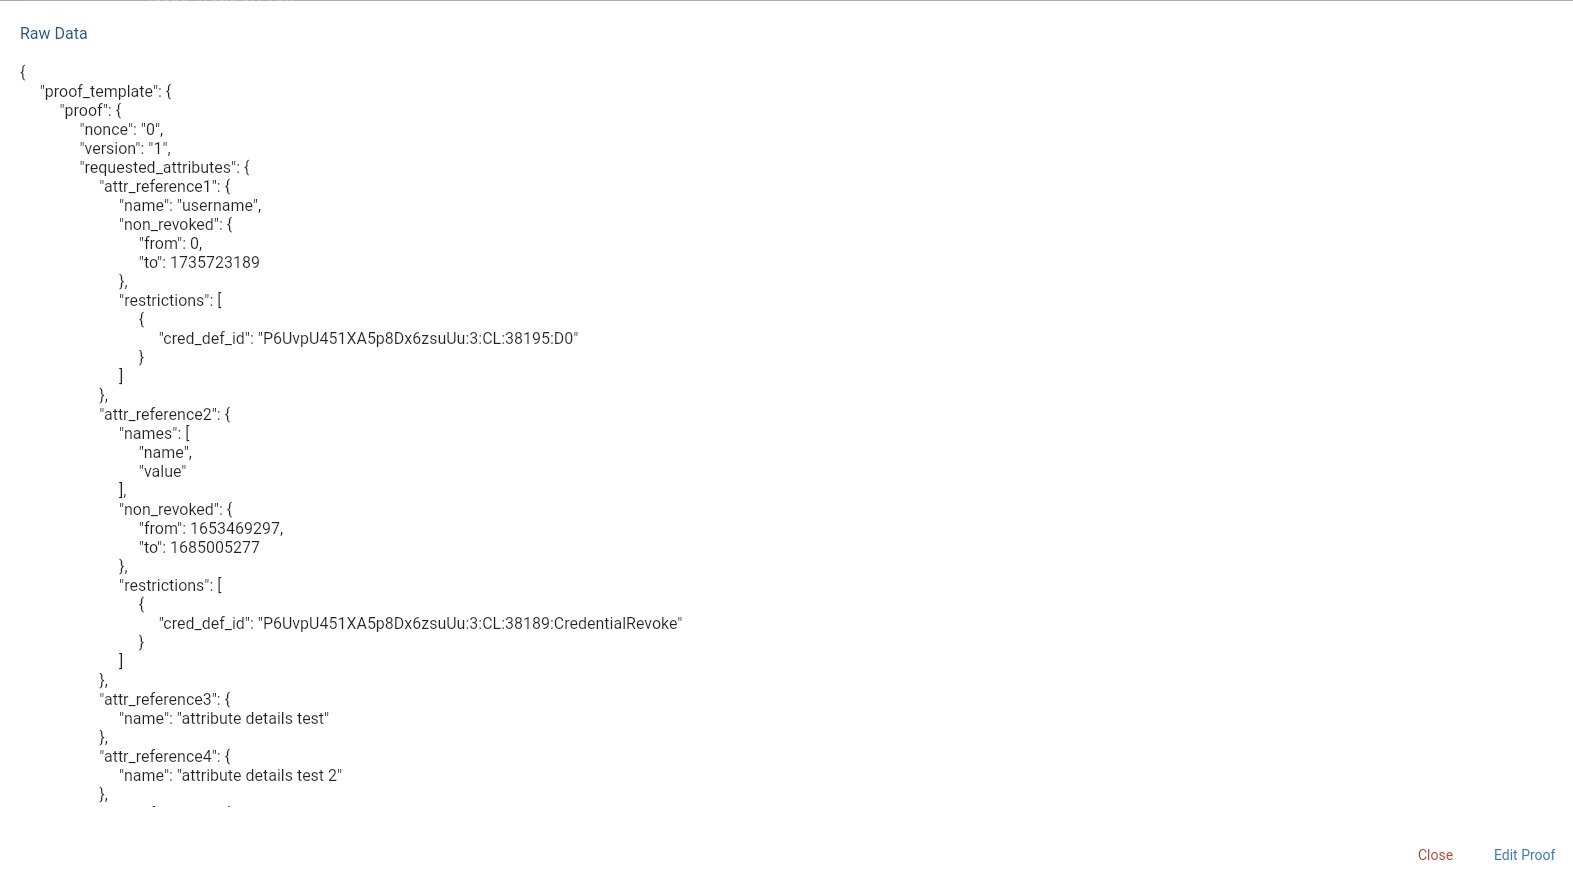
Proof Raw Data
Proof Delete
To get Delete a Proof the OPERATOR must click on this button in the bottom on the right side of the proof.

Once clicked the OPERATOR will be shown a pop-up that will make sure that the delete is intentional,
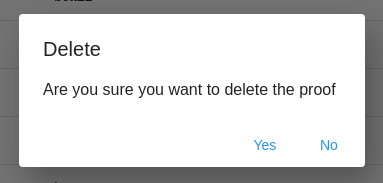
if the answer is Yes the proof will be deleted.
Proof Duplicate
To fast the creation of a new proof template is possible to Duplicate an existent proof template and then change some of specific data.

To Duplicate a Proof the OPERATOR must click on this button next to chosen proof.

Once clicked the OPERATOR will be redirected in the "Create proof" page where all the data is already
filled in.
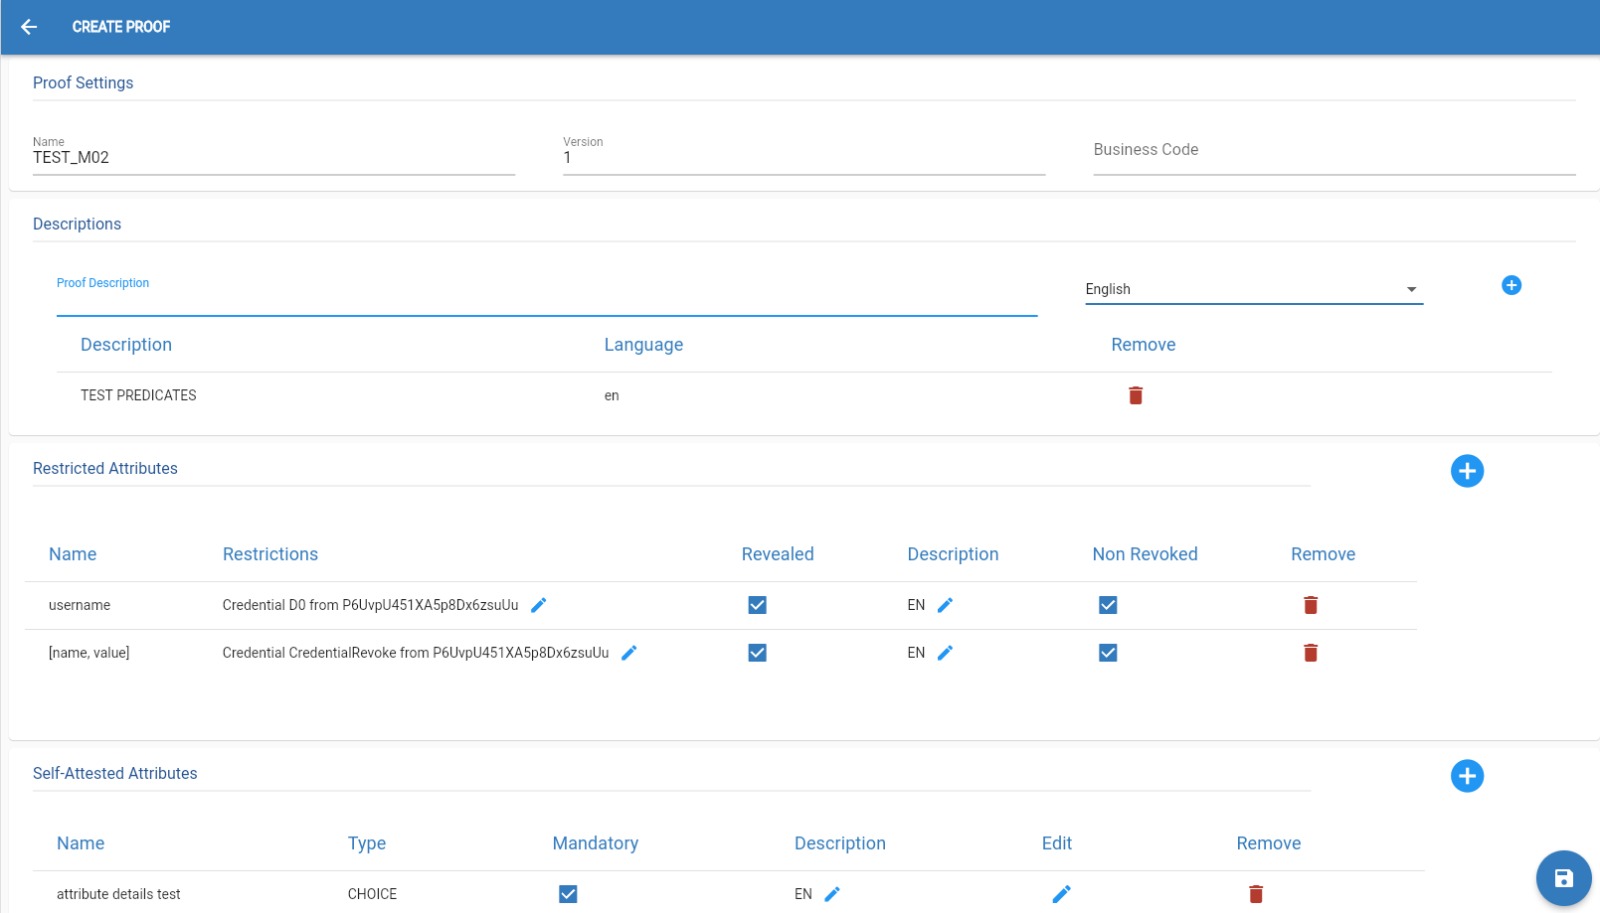
Remember that every field must be filled.

Connections
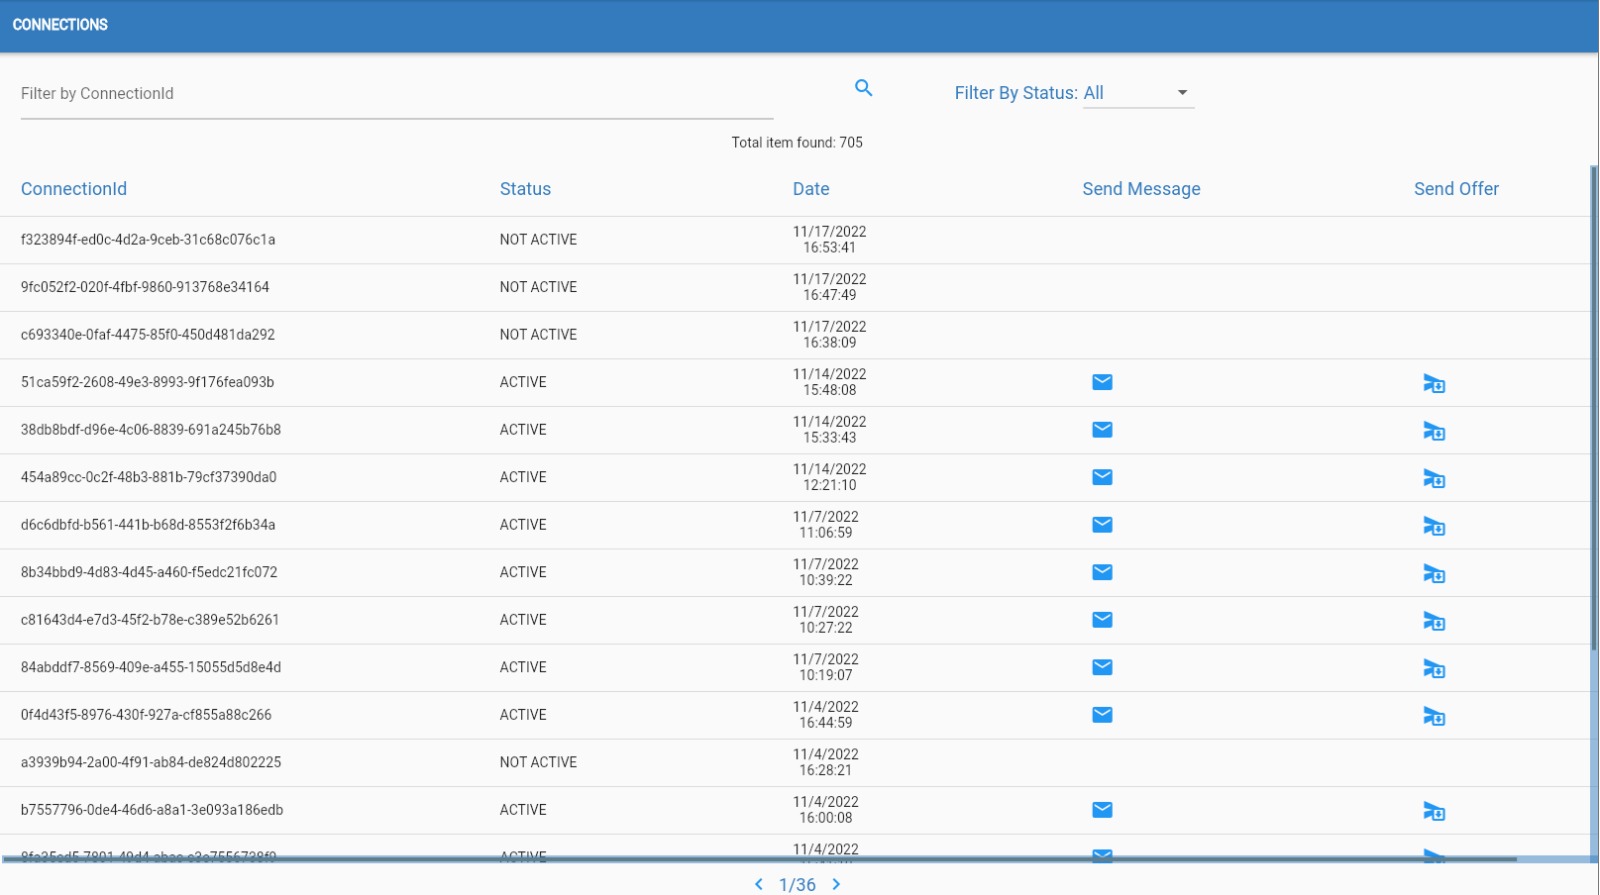
Every time an USER interact with the organization for a credential or a proof, a connection will be created.
This connection can be used to send the USER notification or credential offer.
The status ACTIVE will indicate that the connection activity with the user is completed with Success.
The status NOT ACTIVE will indicate that the connection activity with the user is started but not completed.
In this page the organization can interact with the USER and send him notification through the button "Send message" or a credential offer through the button "Send offer".
Send Message
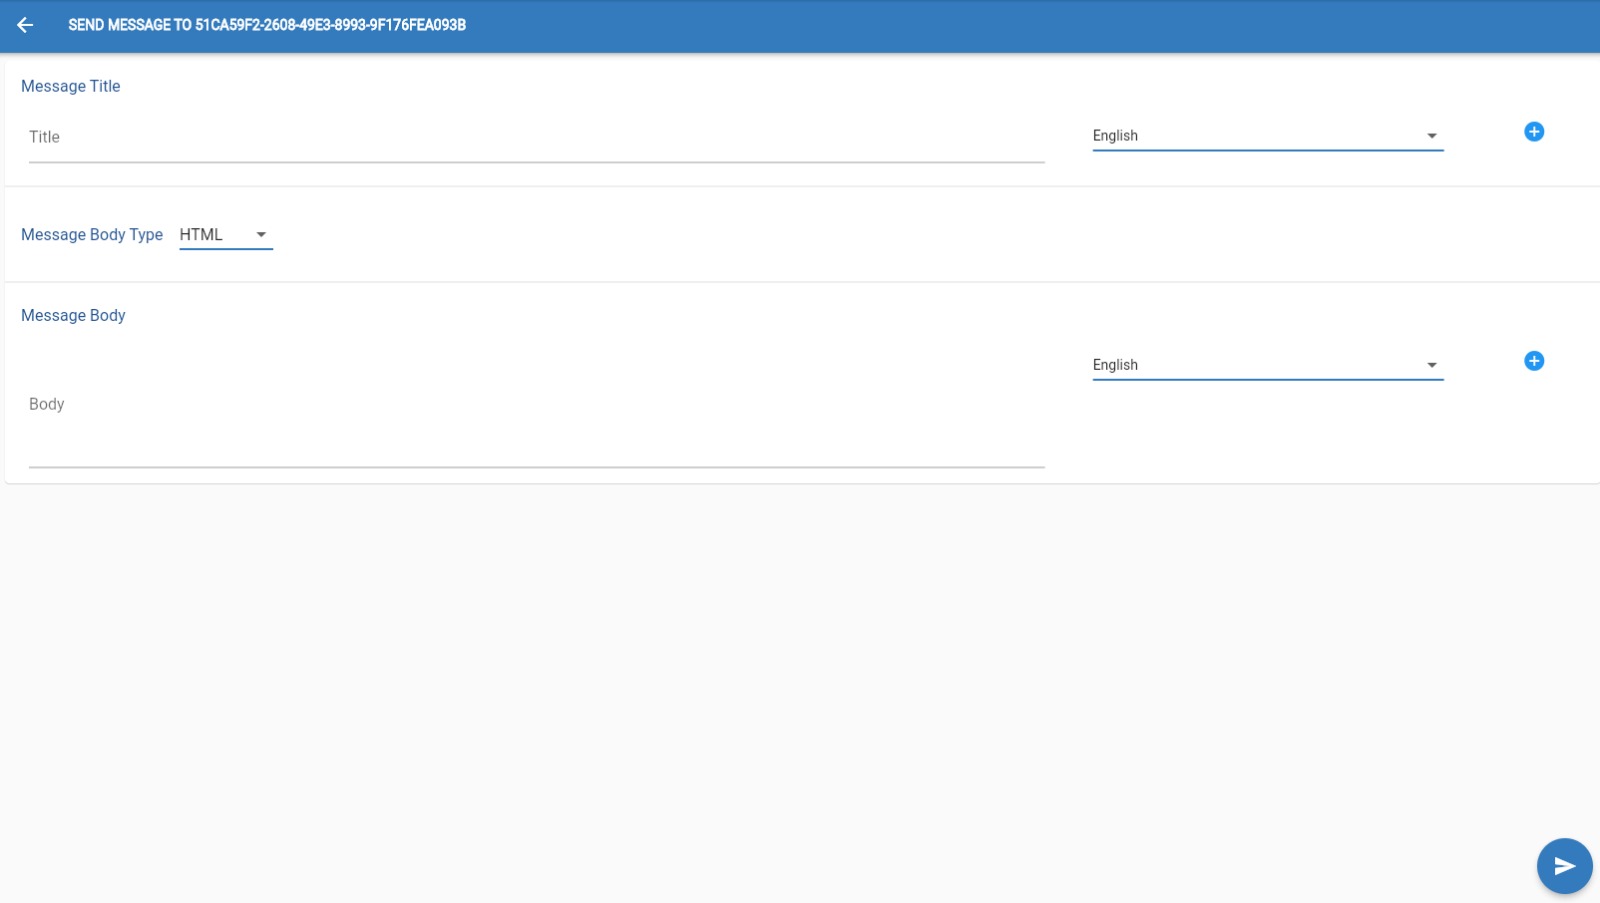
The OPERATOR can send a message to a "connected" USER.
To do that the OPERATOR must click on this button next to chosen connection.

Once here make sure to add at list 1 Message Title and 1 Message Body in a language of your choice.
Remember to click this button on the rigth to add this 2 parameters

Once satisfied with the message,the OPERATOR can go on and click on this button in the bottom right corner of the screen.

Send Offer
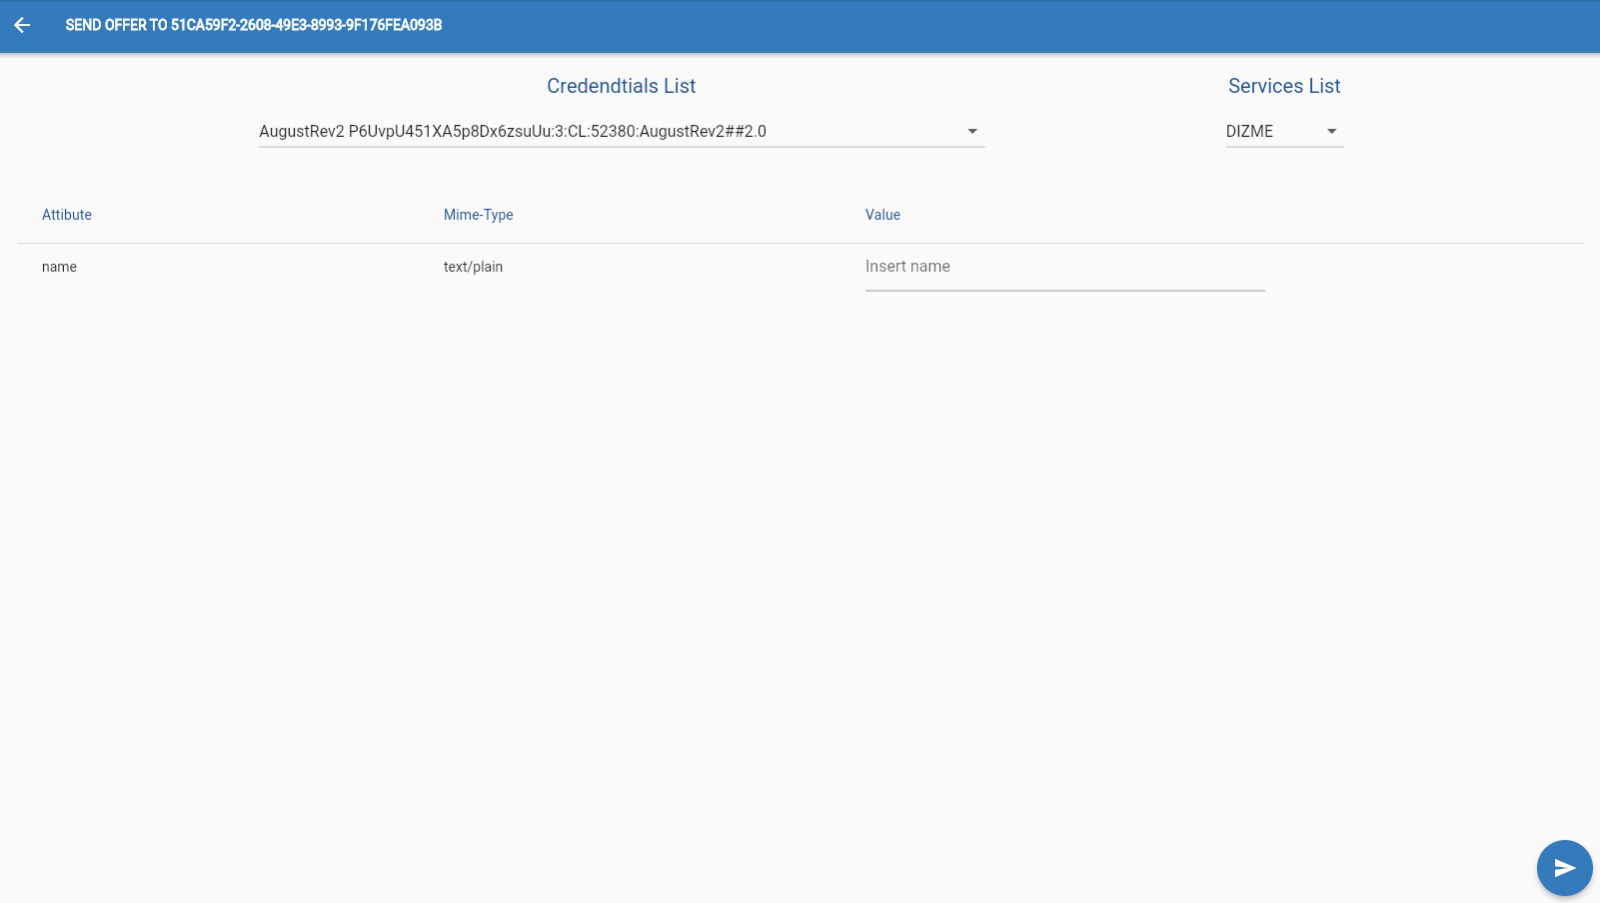
The OPERATOR can send an offer to a "connected" USER.
To do that the OPERATOR must click on this button next to chosen connection.

Once here make sure to fill all the fields.
IMAGES MUST BE IN JPG FORMAT
Once satisfied with the offer, the OPERATOR can go on and click on this button in the bottom right corner of the screen.

Issue Requests Activity
This page shows the list of total Issue requests made by the organization.
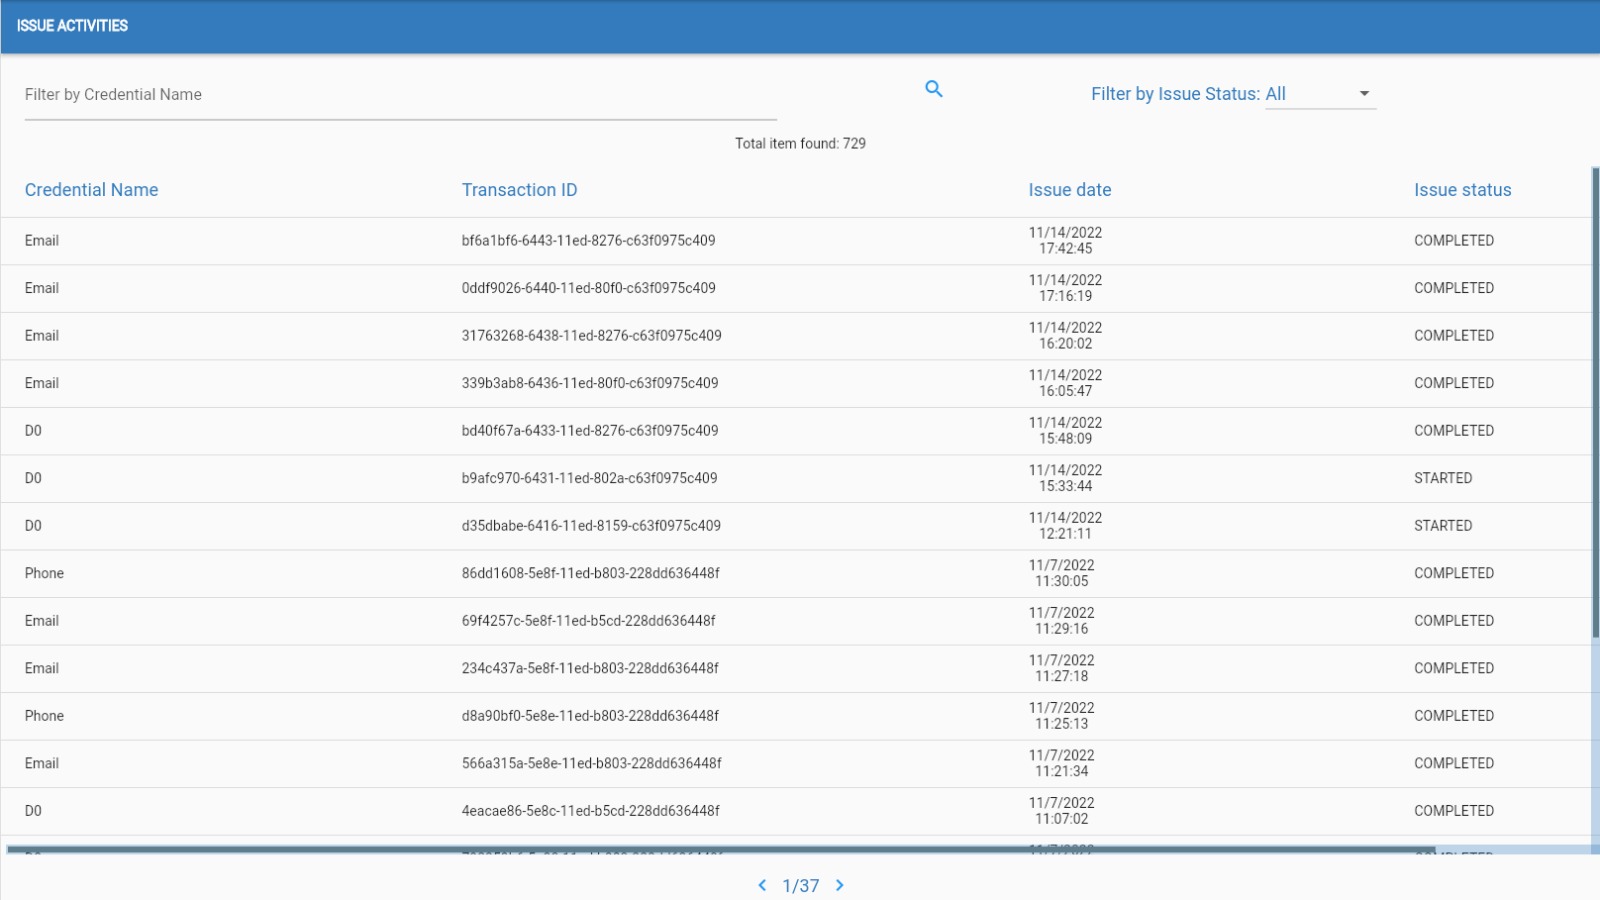
Each time an organization asks for a credential offer a new row is shown on this list.
Transaction ID
Is generated by the system to identify a specific issue operation.
Allowed status:
- STARTED : a new issue request is made from the organization but it was not consumed from a wallet or not completed by the user.
- COMPLETED : the issue request is completed so the credentials was successfully issued to the user.
Verify Requests Activity
This page shows the list of total Verified activity made by the organization.
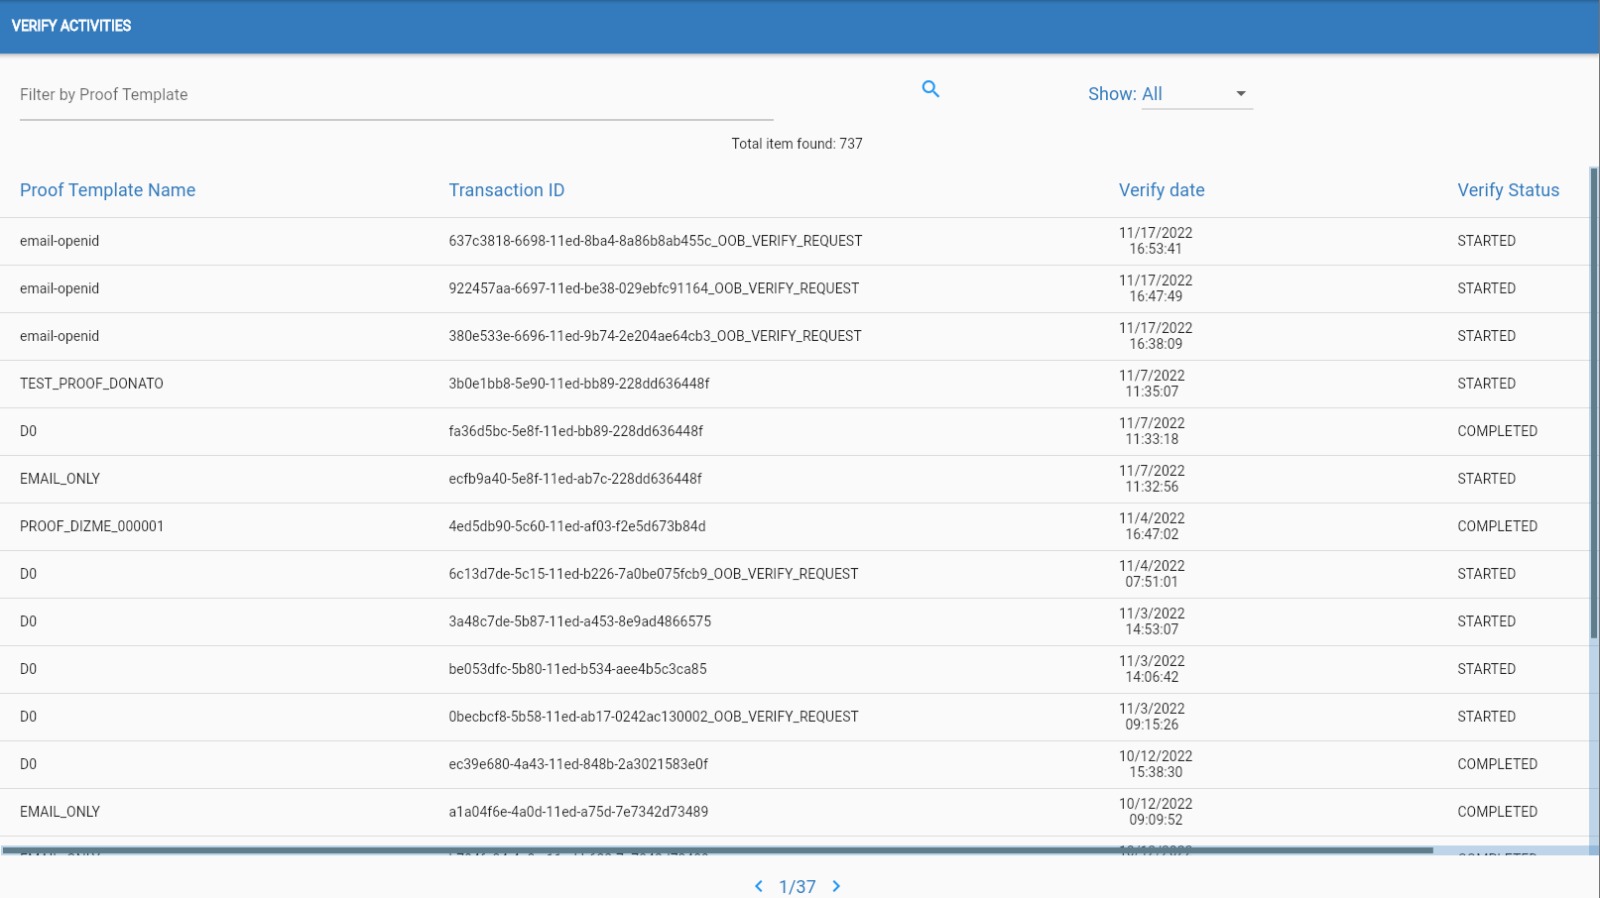
Each time an organization asks for a verify request, a new row is shown on this list.
Transaction ID
Is generated by the system to identify a specific issue operation.
Allowed status:
- STARTED : a new verify request is made from the organization but it was not consumed from a wallet or not completed by the user.
- COMPLETED : the verify request is completed so the credentials was successfully issued to the user.
Payment Activity
To view the list of economic transactions relating to this instance, the operator is redirected outside Dizme Studio on the pages of the Algorand Explorer platform.
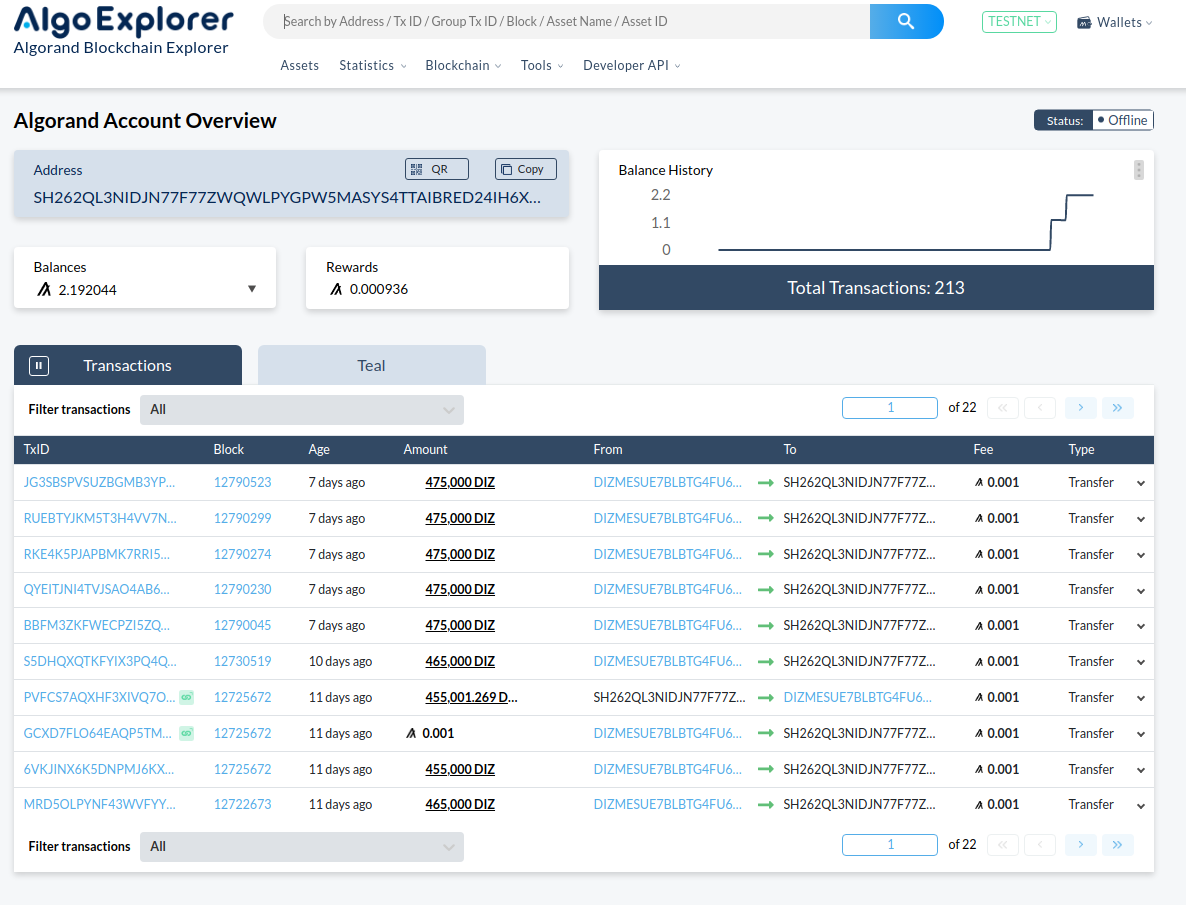
All the transactions of the "Algorand" wallet address associated with the Dizme instance will be visible in real time.
Algorand Explorer is a free software supported by Algorand Foundation.
It doesn’t make part of Dizme Stack, but is still official software for monitoring publick blockchain.
Algorand Explorer shows all coins associated with Algorand Address, including Algorand Token and Dizme Asset Token.
The Algorand Explorer interface contains information, including Rewards. In the Algorand ecosystem, users who takes considerable amount of Algorand are rewarded, but in our use case this information is not relevant.
Using Algorand Explorer internal search, it is possible to search a specific transaction using its Algorand transaction ID, but search is quite limited, for example it is not possible to select transactions of a specific type, data, ecc. Actually the Dizme Framework doesn’t have APIs for transaction lookup.
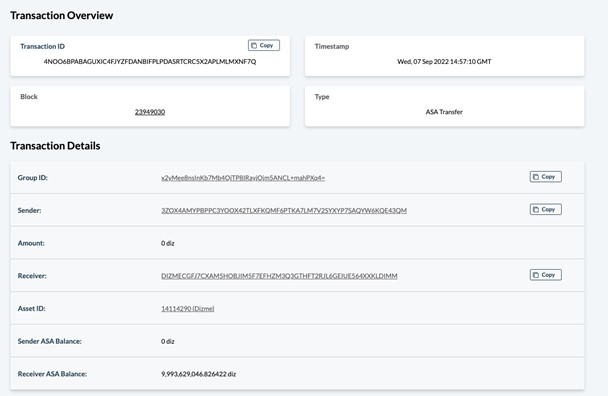
The Algorand transactions that took place within the verification processes of the Dizme ecosystem will contain a description of the operation that took place in the notes field.
In the case of a payment transaction to an Issuer, the verifier will find an identifier of the Proof invoked and information relating to which issuer the payment will be made.

The report file accessible from the link in the appropriate field will explain which attributes have been used for each credential present within the proof.
In the case of payment by a verifier, the notes will contain the credentials used by the verifier and the related fee.
For other information about Algorand Explorer please follow the link reference : https://algoexplorer.io/
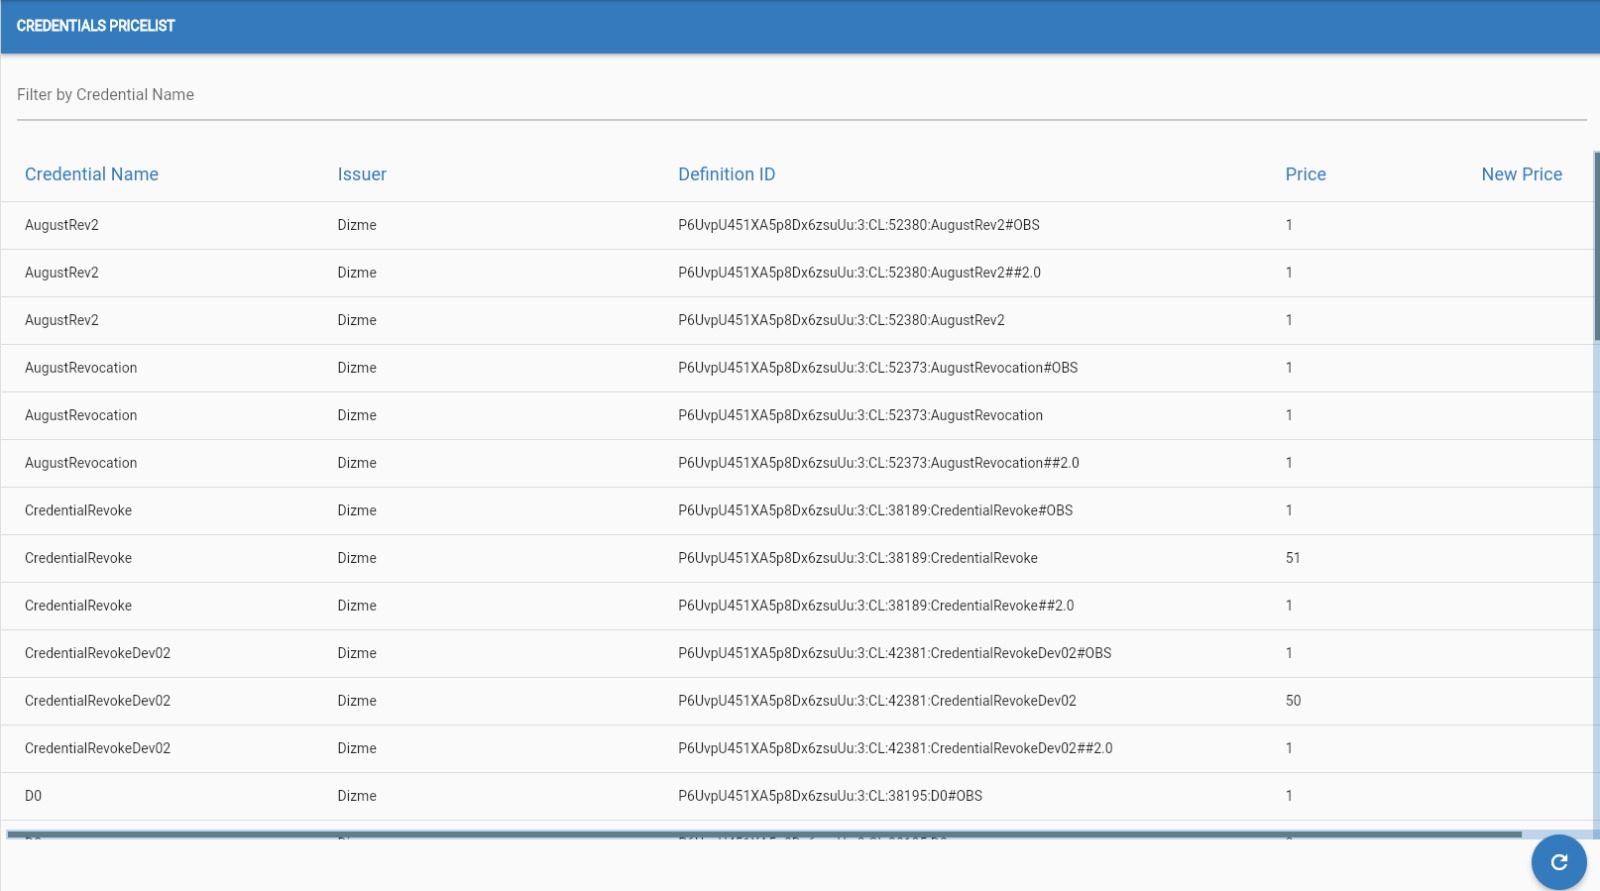
Pricelist
This page shows the list of all the credentials prices and their changes.
The list covers prices of all available credentials int he ecosystem.
This section is only with display rights (no changes of prices here).
Services
On this page it is possible to configure the references for a single service.
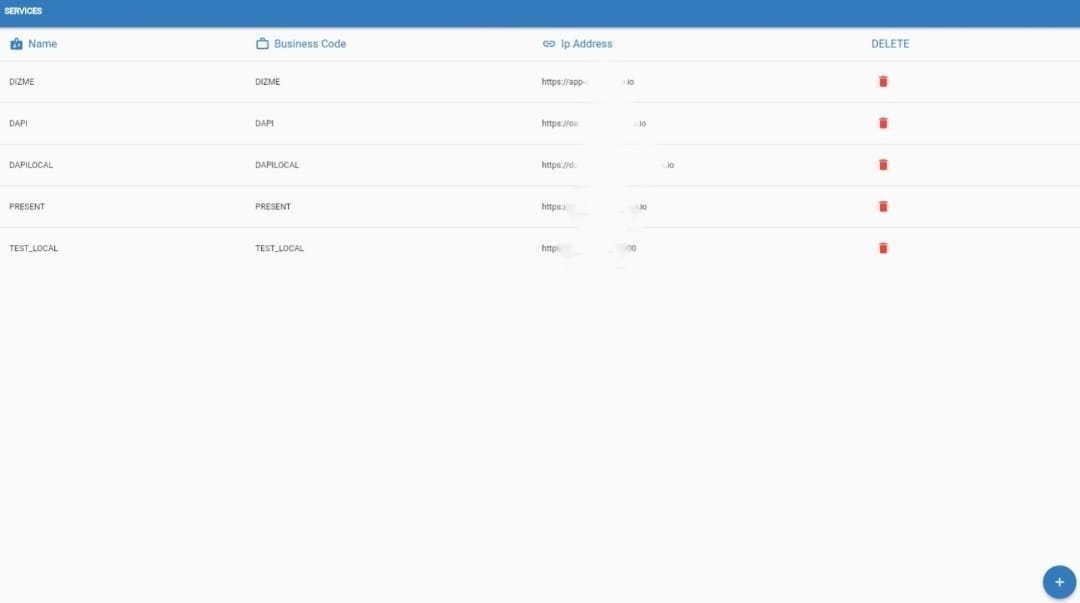
A service is a component of the organization that interfaces with Dizme services (es. Backend1, Backend2, Webshop, ...).
Based on the requests made, it will then receive callbacks through the configured endpoints.
.
Edit Services
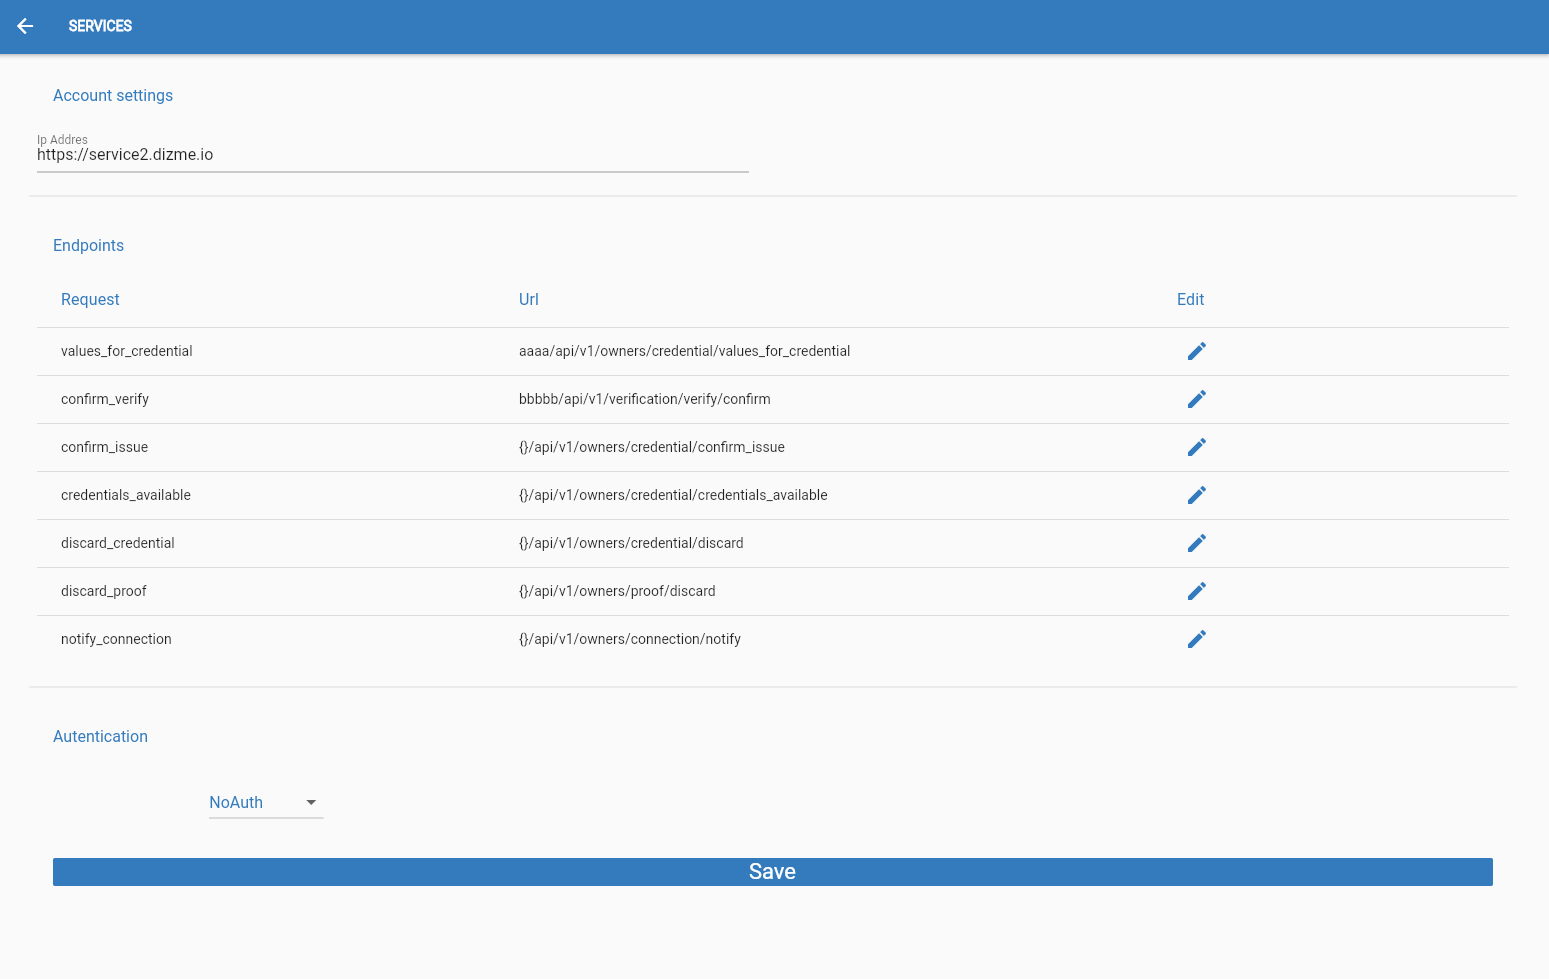
In the "Edit Services" page the OPERATOR can edit the service related information:
- Endpoints for callbacks
- Ip Address: service base path to receive callback
- Request: identify a specific callback
- discard_proof: is sent when the user reject a verify request
- discard_credential: is sent when the user reject a credential offer
- message_service: is sent when the wallet app send a service request (ex. request_username, request_email, request_phone)
- notify_connection: is sent when a connection between a user (wallet) and Dizme Agent is completed
- credentials_available: deprecated
- confirm_issue: is sent when a issue of a credential to a user is completed by the Dizme Agent
- confirm_verify: is sent when a proof sent by the user is completed by the Dizme Agent
- values_for_credential: deprecated
- Autentication
The authentication method supported are the following:
- No Auth, no autentication
- BasicAuth, this will require an username and password
- ApiKey, where the OPERATOR can add one or multiple (name ,value) entry
- Bearer Token, this will require a string (token)
- Payload, this will require a string (payload)
Once satisfied with the service,the OPERATOR can go on and click on the SAVE button.
Add Services
The OPERATOR can create a new services by clicking on this button in the bottom right corner of the screen.

Than the OPERATOR need to fill all field to create a new service.
- Name
- Business Code
- Endpoint
- Ip Address
- Autentication
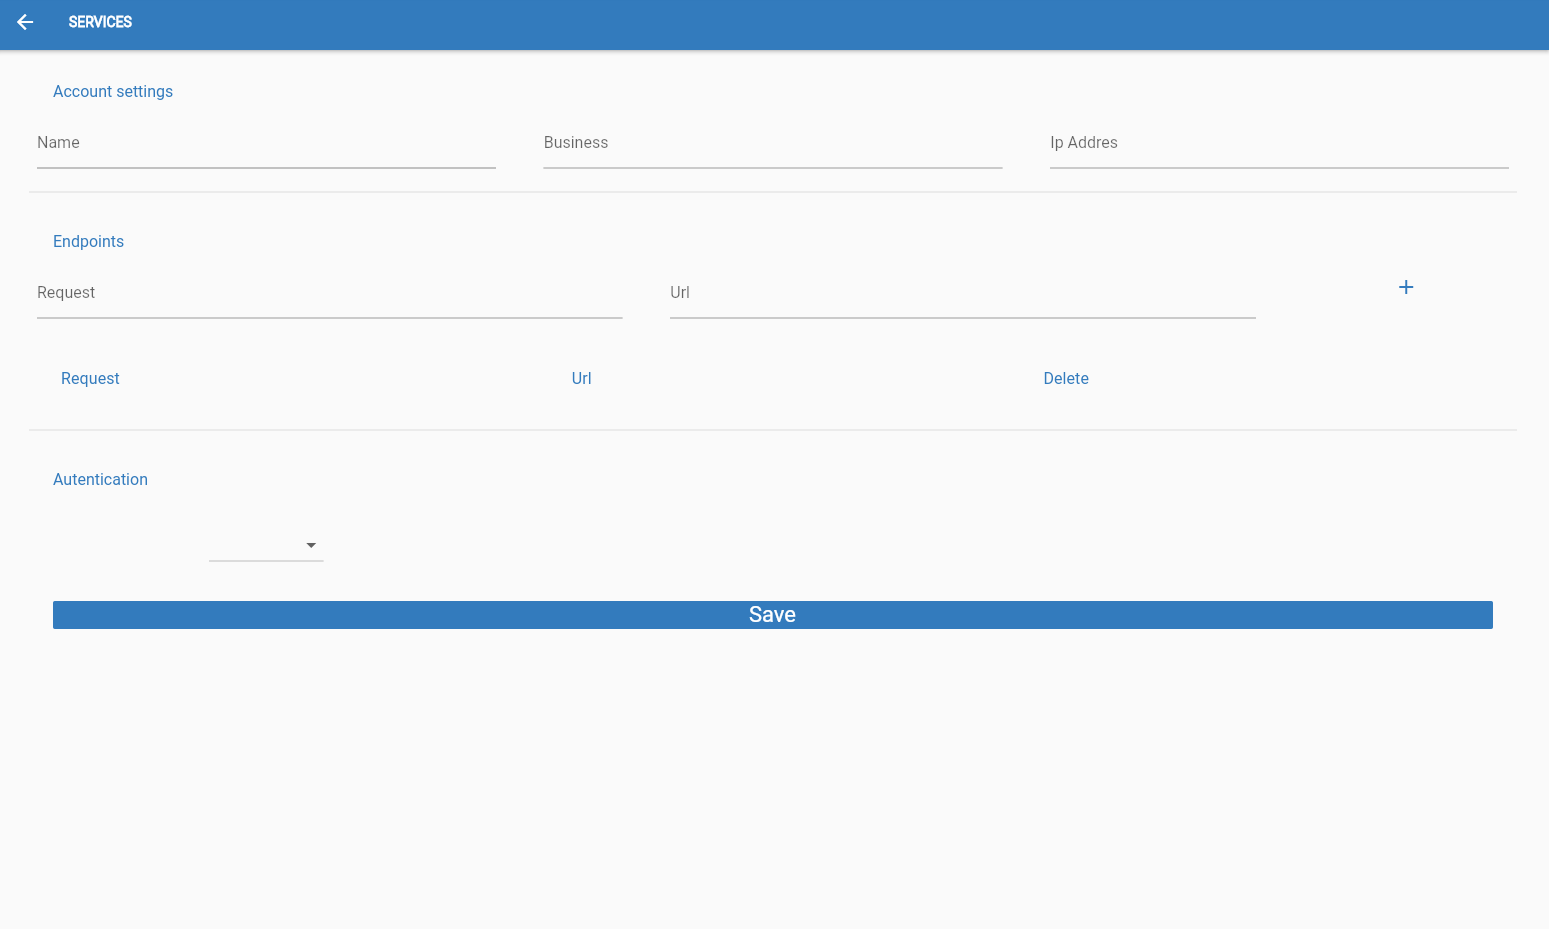
Once satisfied with the new service,the OPERATOR can go on and click on the SAVE button.
Settings
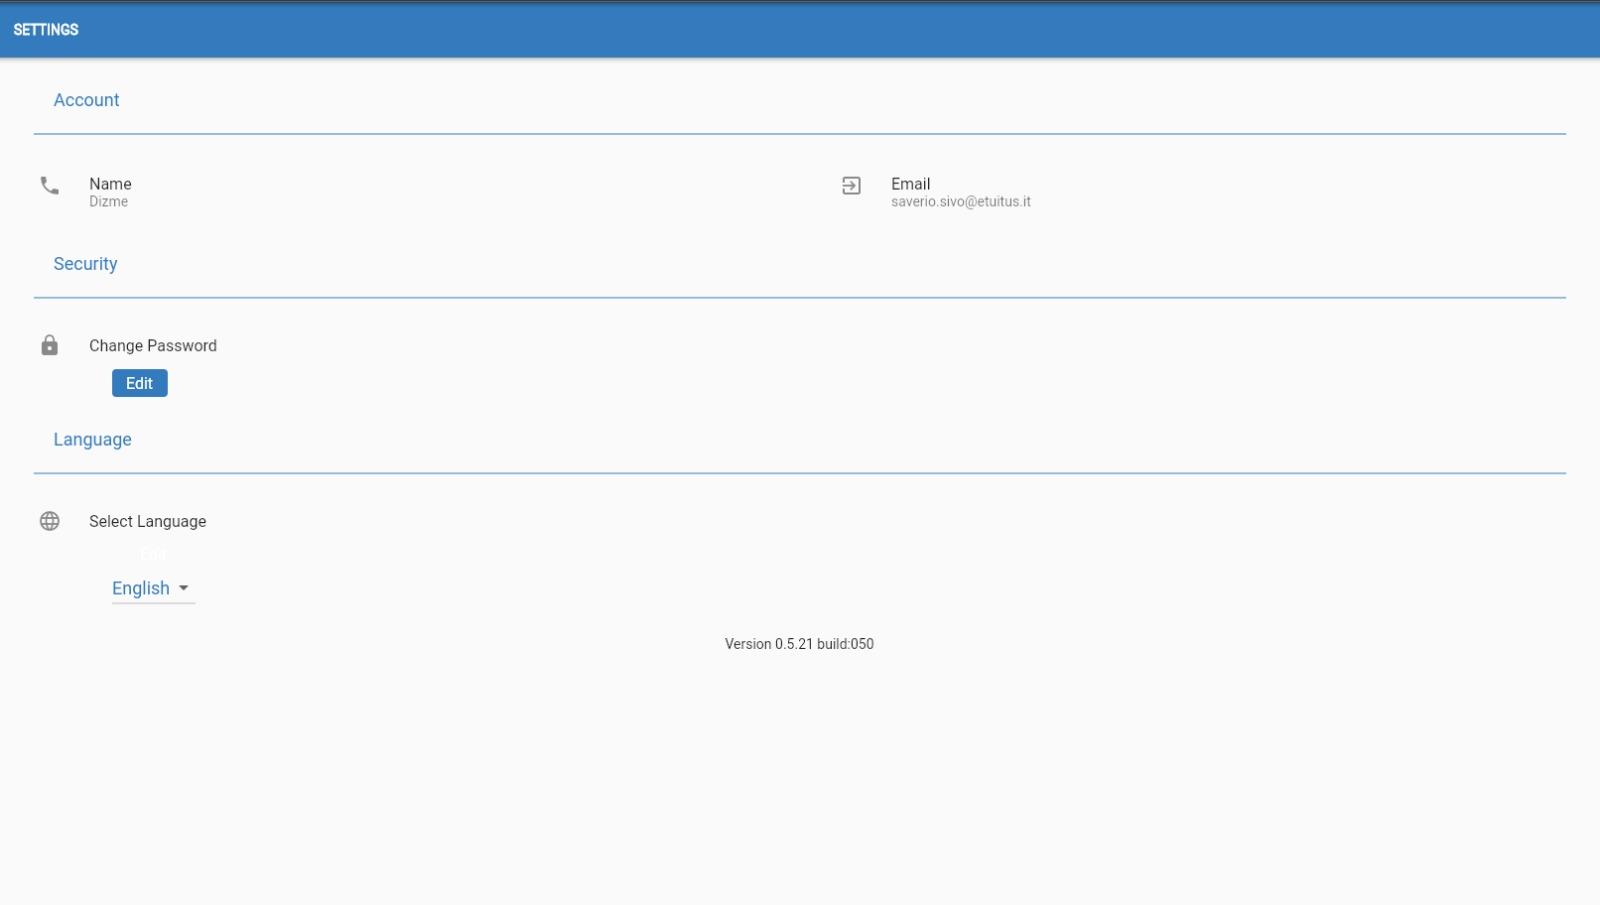
In the settings page the OPERATOR can edit the account information:
- Password
- Language
Change Password
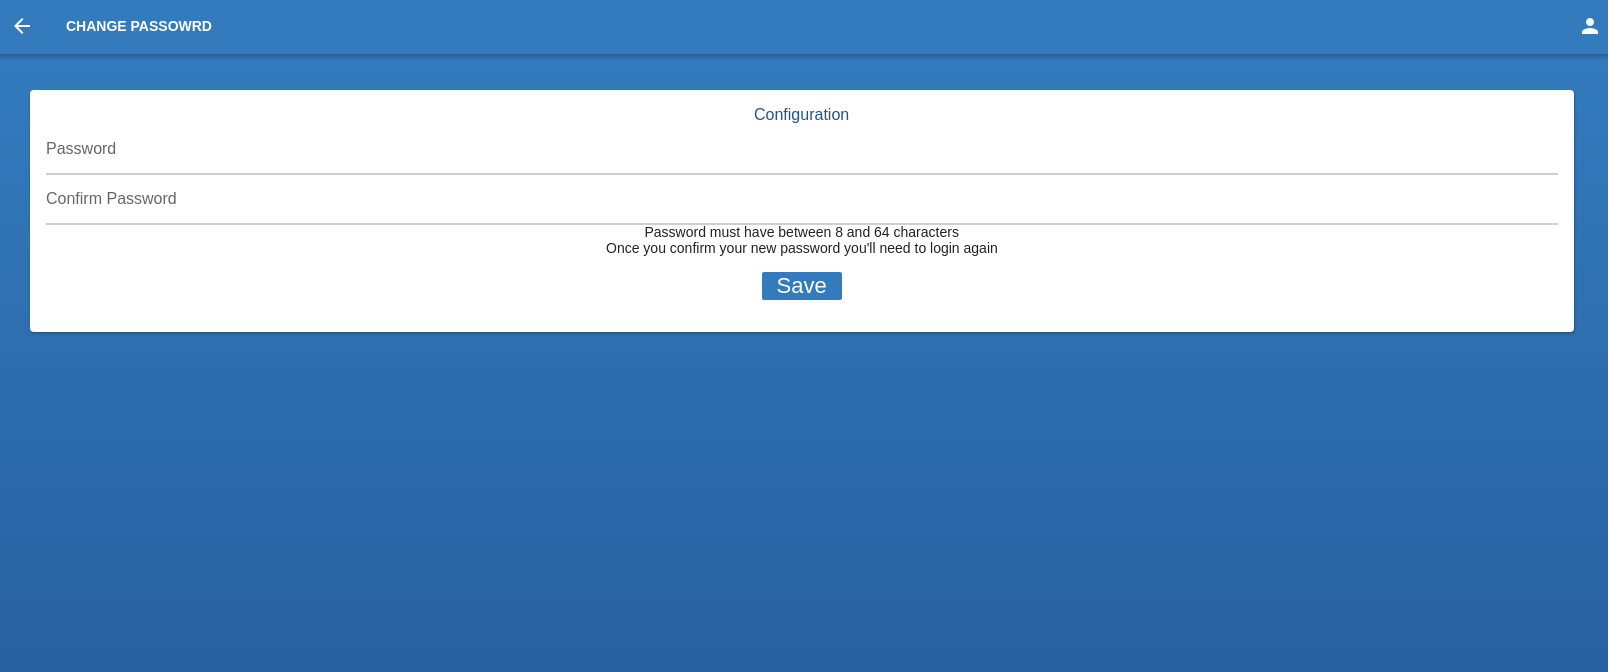
Here the OPERATOR can change the account password, the new password must have between 8 and 64 characters.
Once satisfied with the new password,the OPERATOR can go on and click the button "SAVE".
PS: THIS ACTION WILL FORCE
THE OPERATOR TO LOGOUT
Change Language
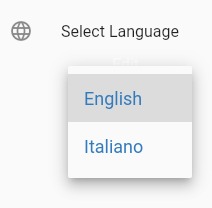
Here the OPERATOR can change the language choosing between English and Italian.
