DIZME
Framework Console Documentation
Introduction
DIZME Studio is a platform that allow an organization monitor and manage the status of definition ad verify of credentials. With this tool the organization can also check the status of the economic transactions.
TERMS
- OPERATOR : DIZME STUDIO user
- USER : DIZME APP user
- SSI : Self Sovreign Identity
- DID : Decentralized IDentifiers
- Product : DIZME Framework Console
- Version : v 1.0
- Author : eTuitus Srl
- Support : DIZME Support
Overview
This is the landing page where an organization can see the system data after the login.

Token Balance
Balance of your token wallet
ConnectionsNumber of total connections
Issued CredentialNumber of total issued credential
Proof Request VerifiedNumber of total proof request verified
Credential Definition
Credentials act as an attestation or a digital representation of a credential such as an ID, a driver’s license or a club membership card. A credential consists of three main values:
- The issuer’s DID and signature
- The entity’s DID
- The information that is attached
Schemas will be given by DIZME during the onboarding. Once the schema is used to define a credential it can't be used again for the same purpose, meaning one schema can define only one credential.
Define New Credential
Using a schema, given to the organization, the OPERATOR can define a new credential
Edit PirceThe OPERATOR can always change the price of a defined credential
Credential OfferThe OPERATOR can get a credential offer link to send to USER
Credential Definition
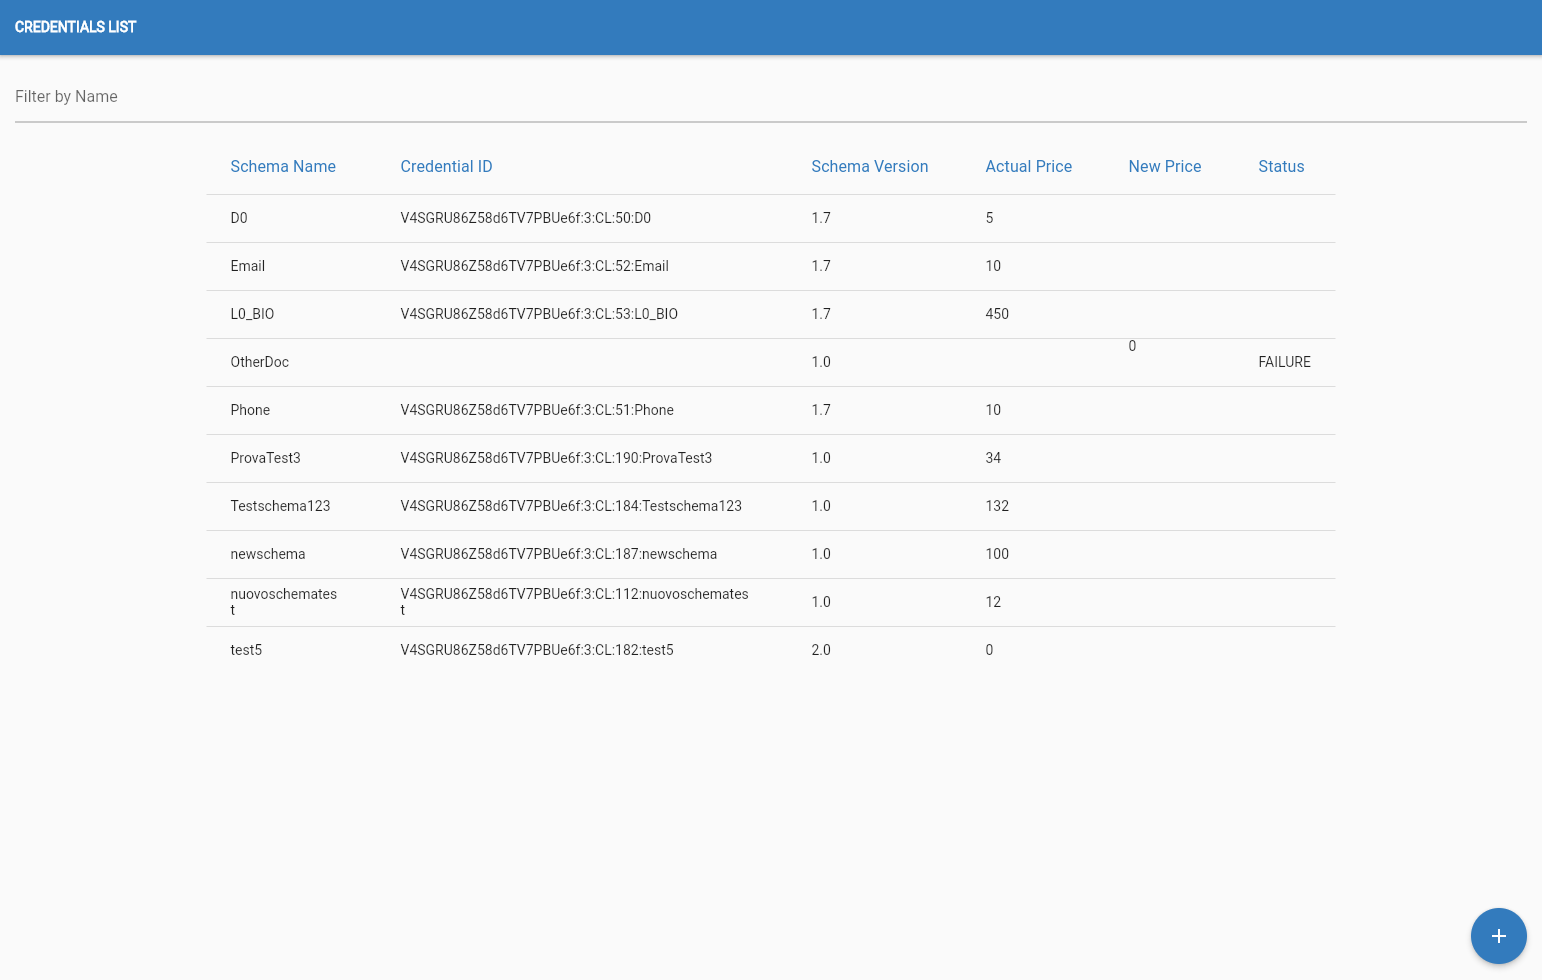
To define a new credential the OPERATOR must have a schema not used for a definition in his account.
The OPERATOR must click on this button in the bottom right corner of the screen of the "Credential list" page,

after that the OPERATOR will be shown the list of all the undefined schemes that he can use.
The OPERATOR must select one and set a price for the new credential and then click this button in the bottom right corner of the screen.

Edit Price
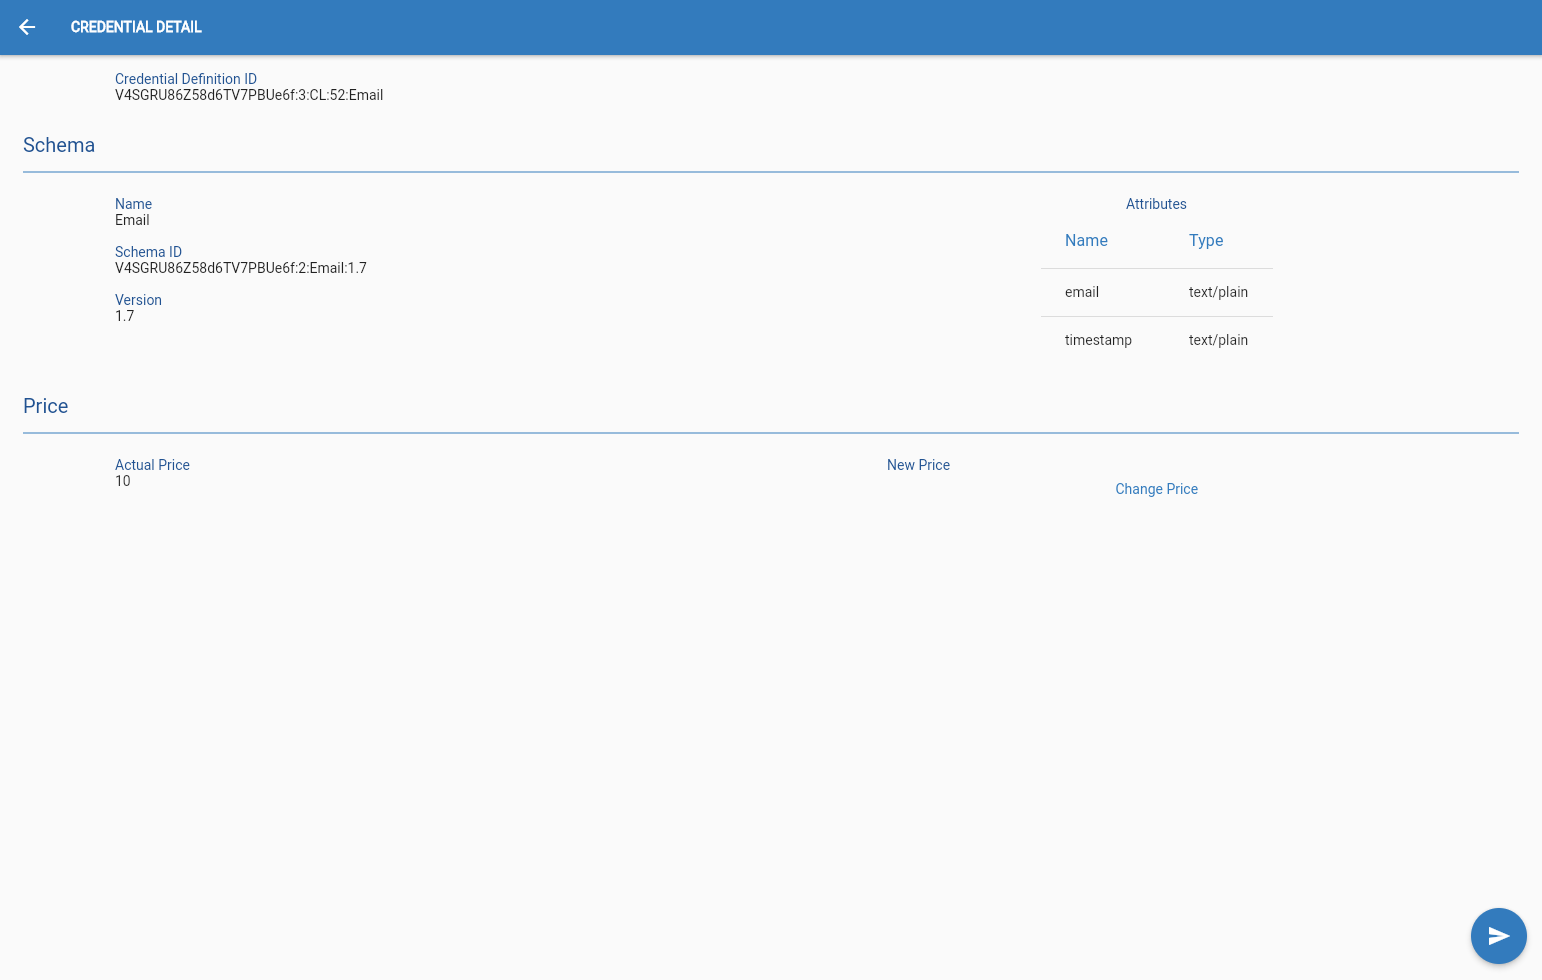
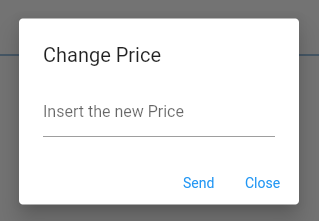
To change the price of a credential the OPERATOR must select the credential from the list and then click on the “Edit price” button of the "Credential view" page, this will allow him/her to edit the price. This change will take a day to be applied.
Credential Offer
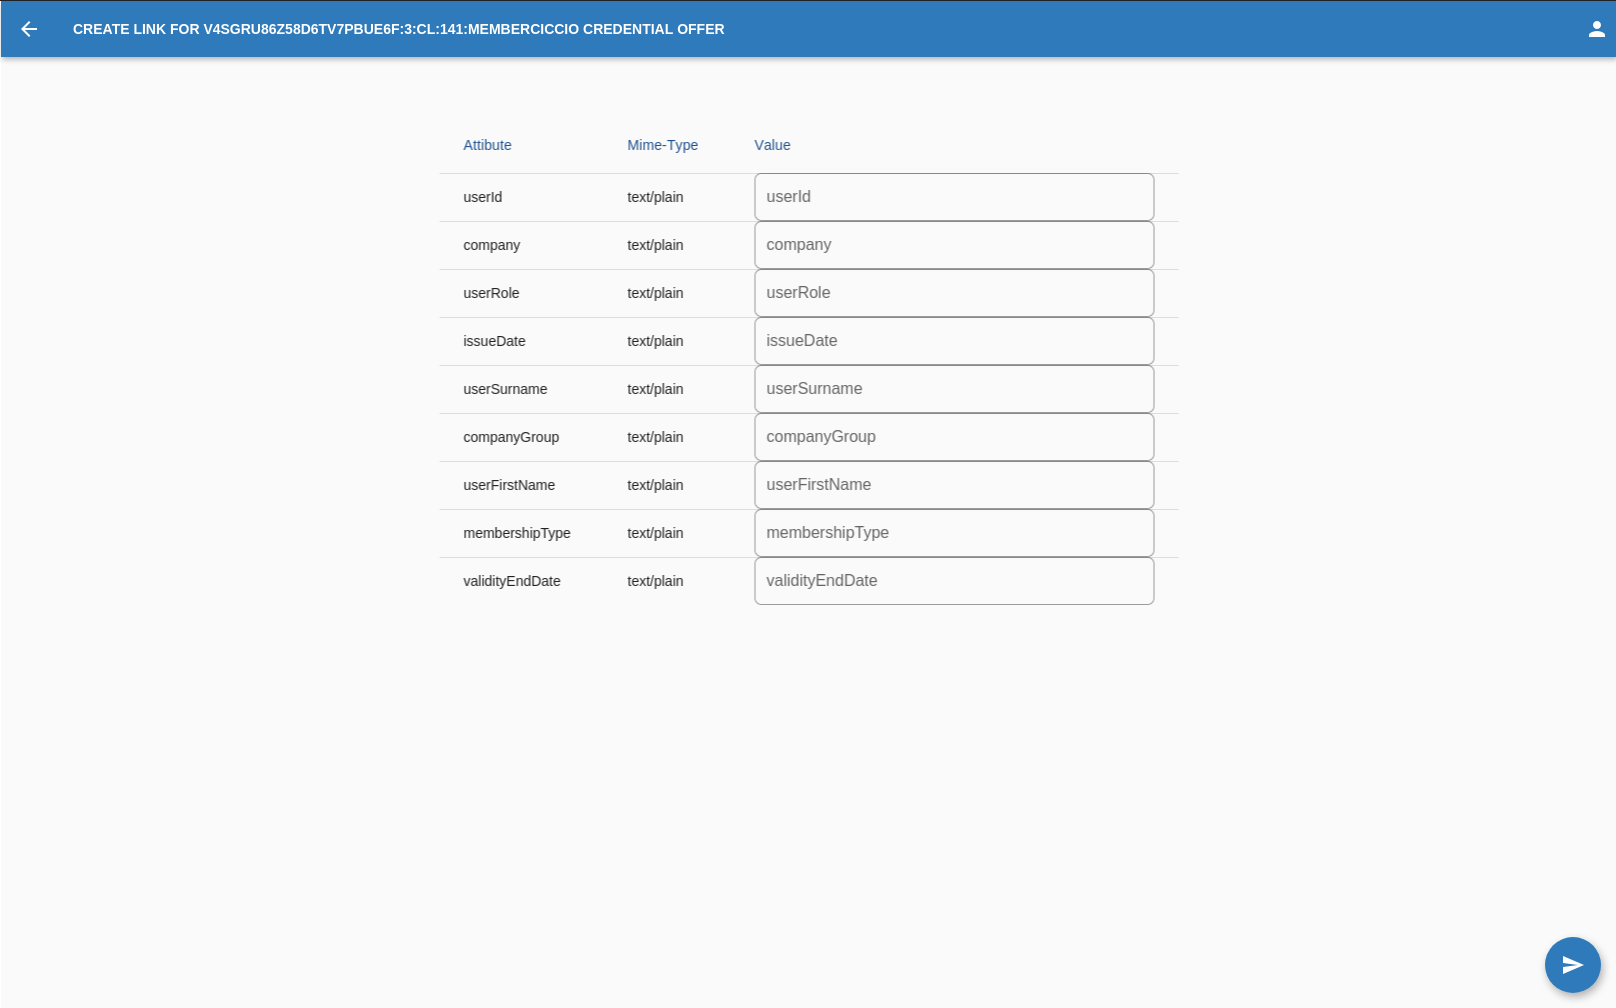
Once a credential is defined the OPERATOR can get the credential offer link,
to do that the OPERATOR must select the credential from the list of credentials the OPERATOR
defined and then click on this button in the bottom right corner of the screen.

Once in the "Credential offer" page the OPERATOR must fill all the fields with the appropriate data type.
Once all fields are filled the OPERATOR must press on this button in the bottom right corner of the screen.

The OPERATOR will see a pop-up on his screen with the link.
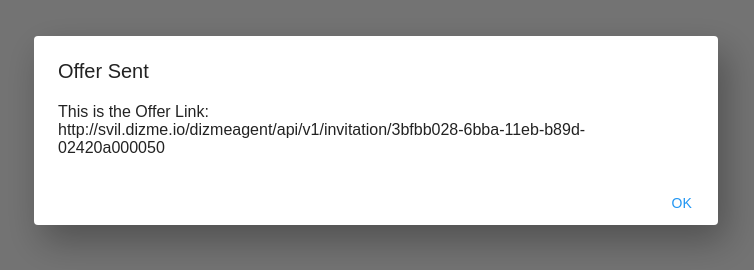
P.S.:If image file are requested they must be in jpg format.
Proof Template
The Proof is the answer SSI of the owner to a proof request,if credentials are digital representation of an ID a proof is the certification that the
OPERATOR has the right credentials needed for the proof request. Holder of credentials can generate verifiable representations (informally named Proof) once a verifier creates a
Proof request.
Proof requests can be composed by 2 different attributes:
- Restricted
- Self-attested
Restricted attibutes are taken from schemes or credentials connected to the organization. Restricted attributes can be REVEALED or UNREVEALED. Revealed attributes will notify the USER that the proof will request and check that field, meaning that the USER will send to the verify the knowledge of that credential. Unrevealed, also known as zero-knowledge, won’t show up during the process of proof for the USER and the verify will only know the result he need, like:
Self-attested attributes are not conntected to schemas or credentials, this type of attributes are a certification that the USER vouch for without the need for a specific credential. Self-attested can have different type and the could be mandatory or not. If a self-attested attribute is mandatory the USER is force to fill the field in the proof request. If a self-attested attribute is not mandatory it won’t be necessary fill this field during the proof request.
Proof Create
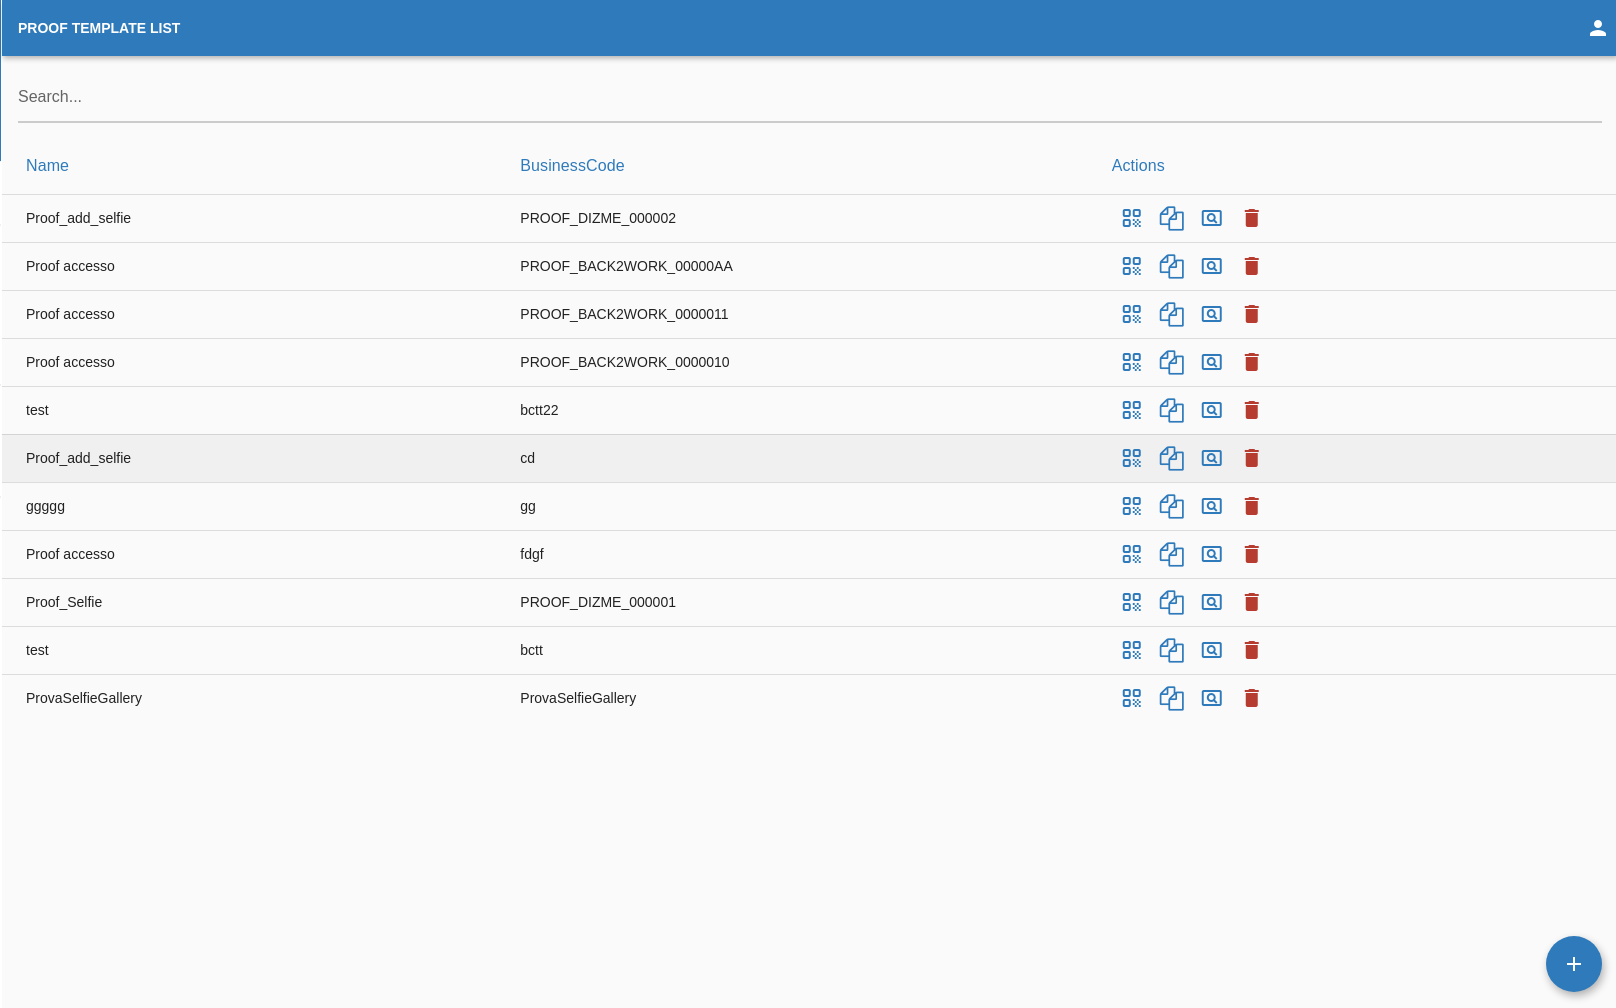
Once the OPERATOR navigate in the "Proof list" page he can decide to create a new proof template by clicking on this button in the bottom right corner of the screen.

The OPERATOR will be redirected in the "Proof Create" page.
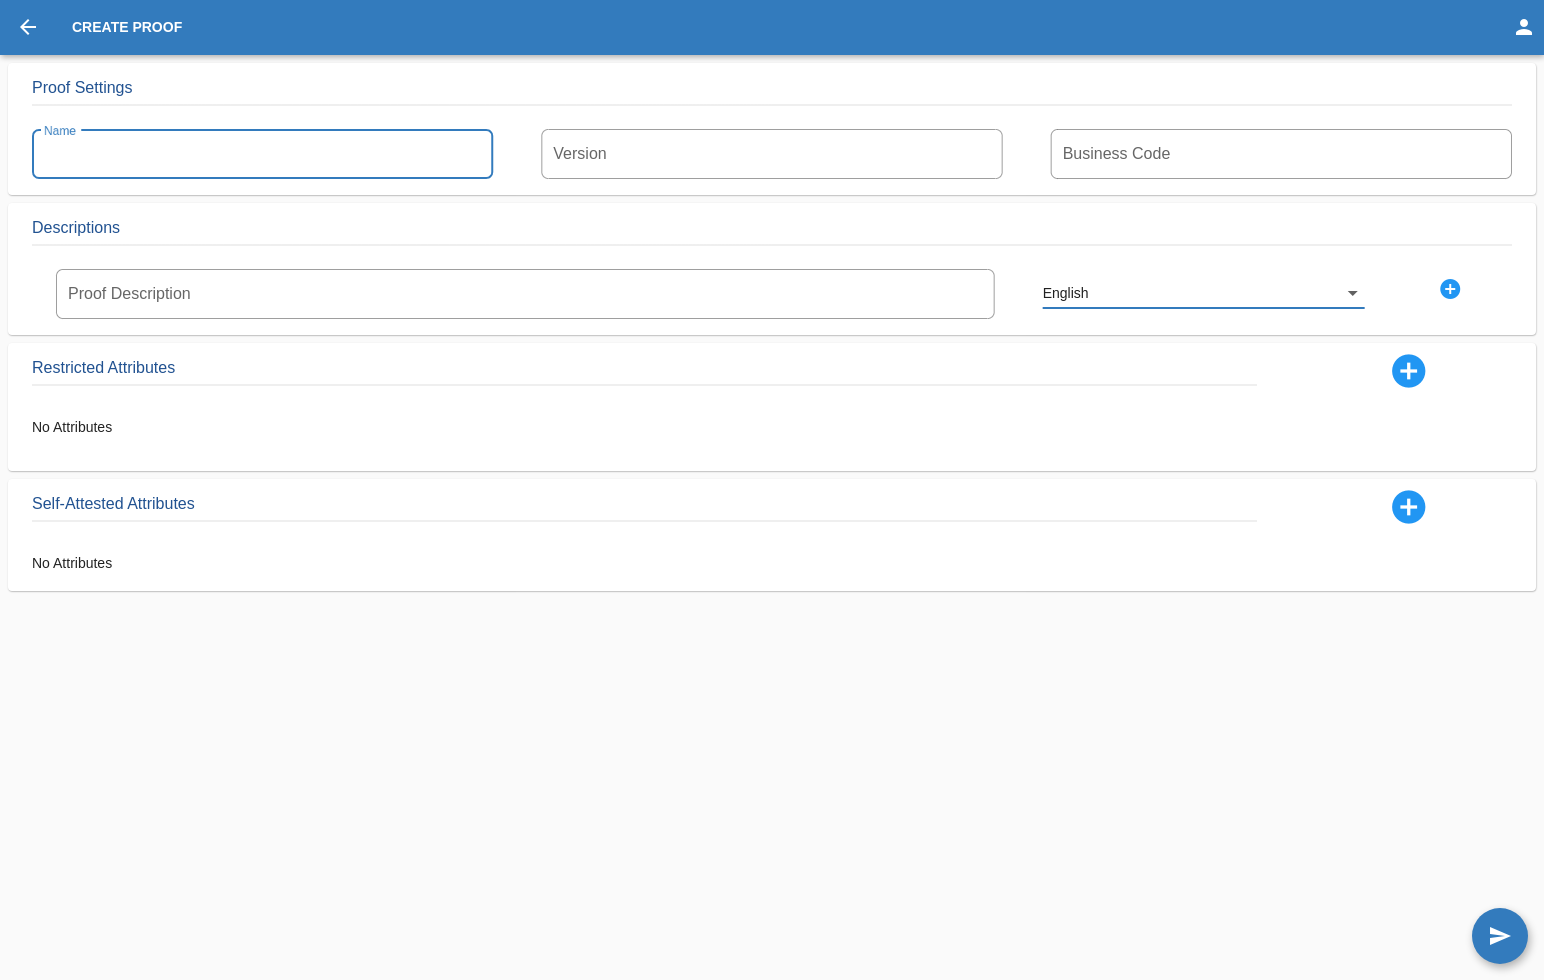
The OPERATOR will need to add all of the attributes and data to the proof:
- Name
- Version
- Business Code
- at least 1 Description in a language of his choice
- Attributes
- Self-attested
- Restricted from Schemes
- Restricted from Credentials
Proof Attributes
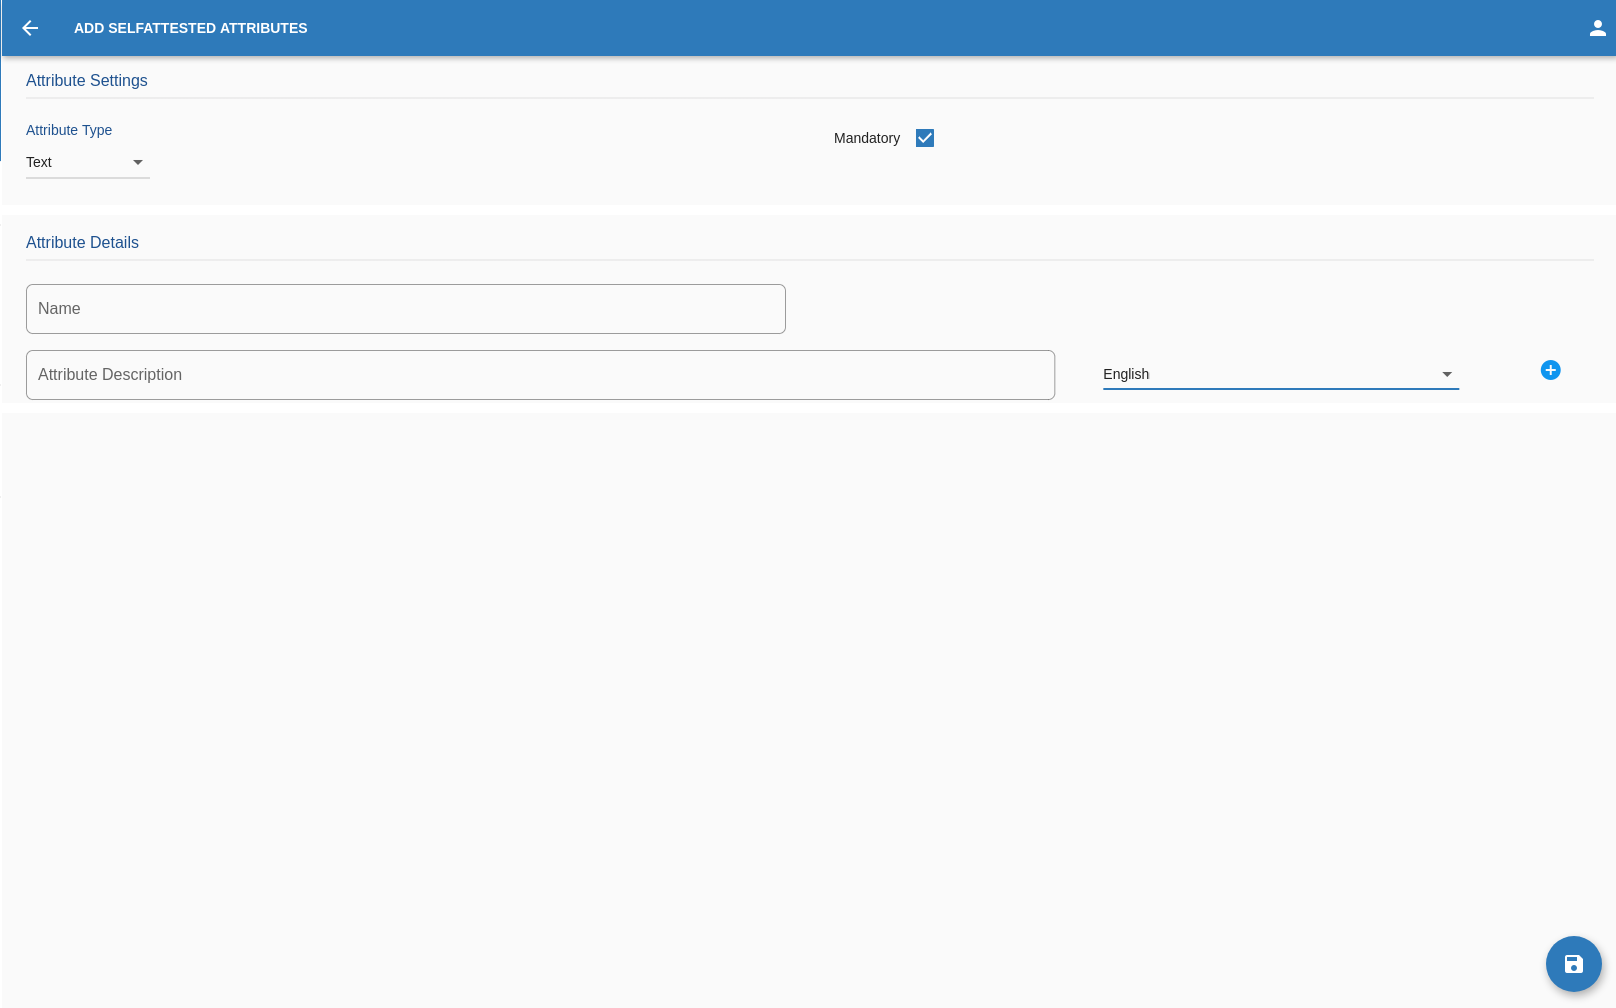
The attributes of a proof can be created in multiple ways:
- Self-attested
- Restricted from Schemes
- Restricted from Credentials
- Select the attribute type
- Text
- Selfie
- Document scan
- Choice
- Upload File
- Image
- Photo
- If it’s Mandatory
- The Name
- and at least 1 Description for the attribute in a language of his choice
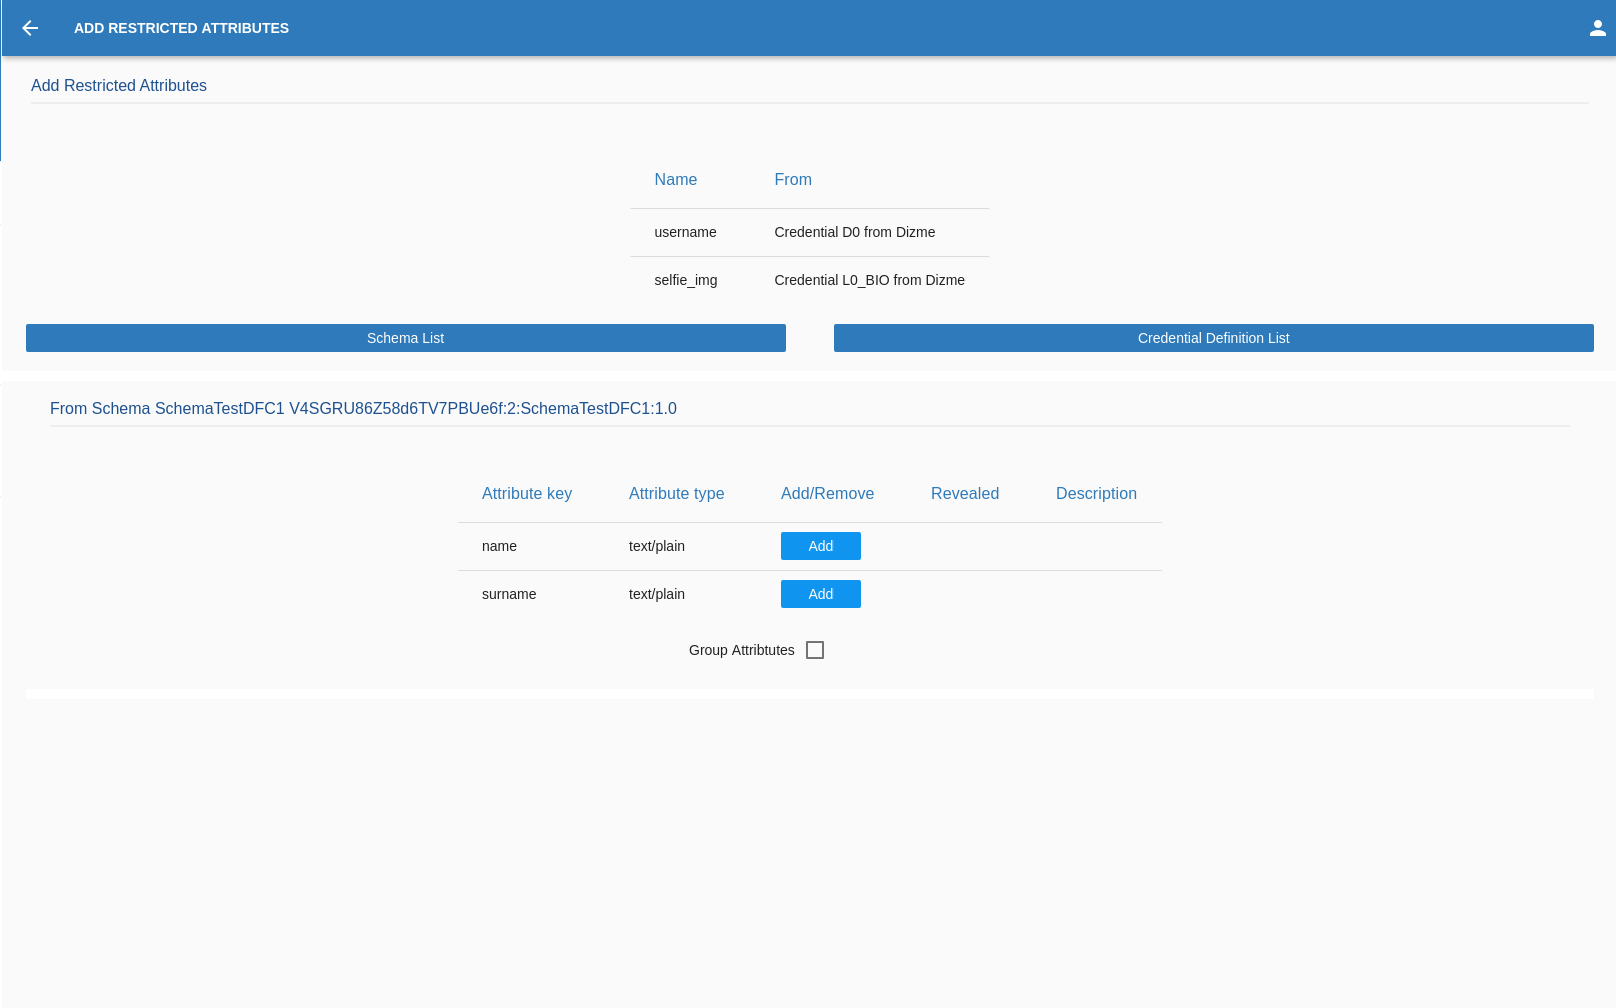
In the case of the RESTRICTED FROM SCHEME the OPERATOR will need to:
- Select the scheme form the list
- Select which of the attributes present in the scheme will be added into the proof then:
- Add at least 1 Description
- Tell if the attribute is Revealed or not.
- Decide if the attribute/s must be Grupped
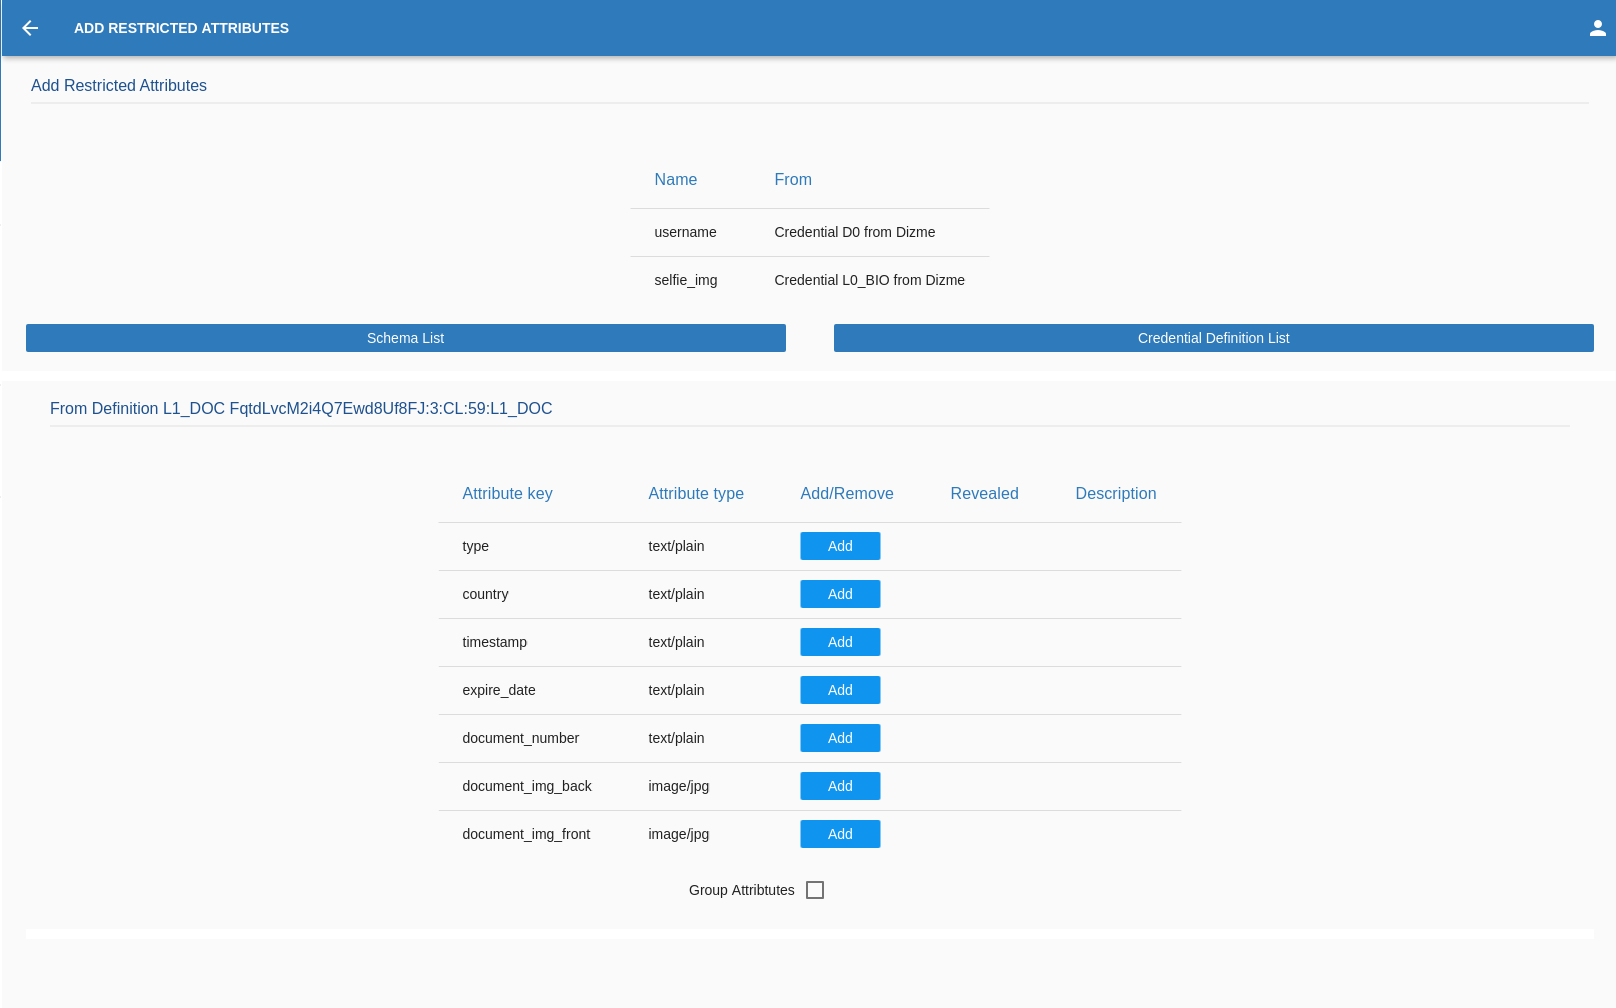
In the case of the RESTRICTED FROM CREDENTIAL the OPERATOR will need to:
- Select the credential form the list
- Select which of the attributes present in the credential will be added into the proof then:
- Add at least 1 Description
- Tell if the attribute is Revealed or not.
- Decide if the attribute/s must be Grupped
Once the OPERATOR is satisfied by the attributes, the OPERATOR must click on the arrow on the top left of the page to go back to the page where all the details and attributes are now showing.
If the OPERATOR is satisfied with the proof OPERATOR can go on and click on this button in the bottom right corner of the screen.

Remember that every field must be filled.
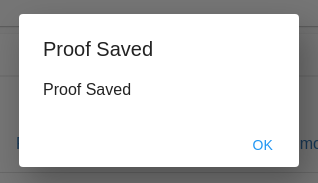
This pop-up will appear if the Proof was created successfully.
Proof Edit
Here the OPERATOR can edit every part of the proof. The varius step are the same of the proof create, The only part that
can't be modified is the Business Code.
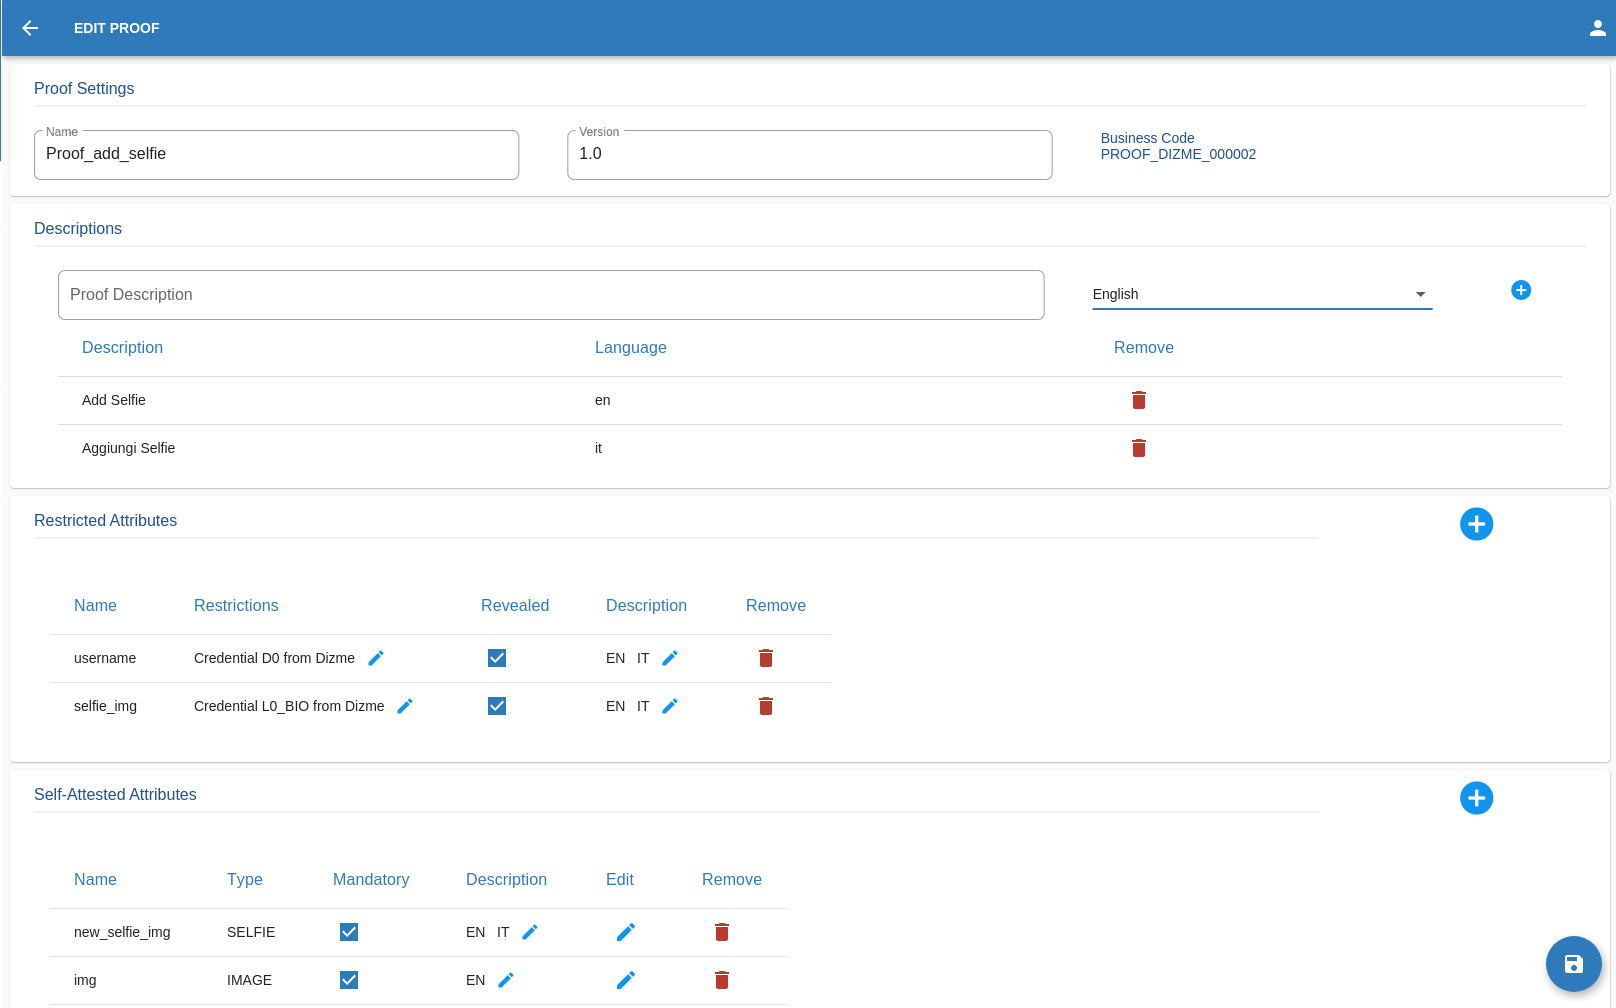
Remember that every field must be filled.
Once satisfied with the changes,the OPERATOR can go on and click on this button in the bottom right corner of the screen.

This pop-up will appear if the Proof was created successfully.

Proof QR
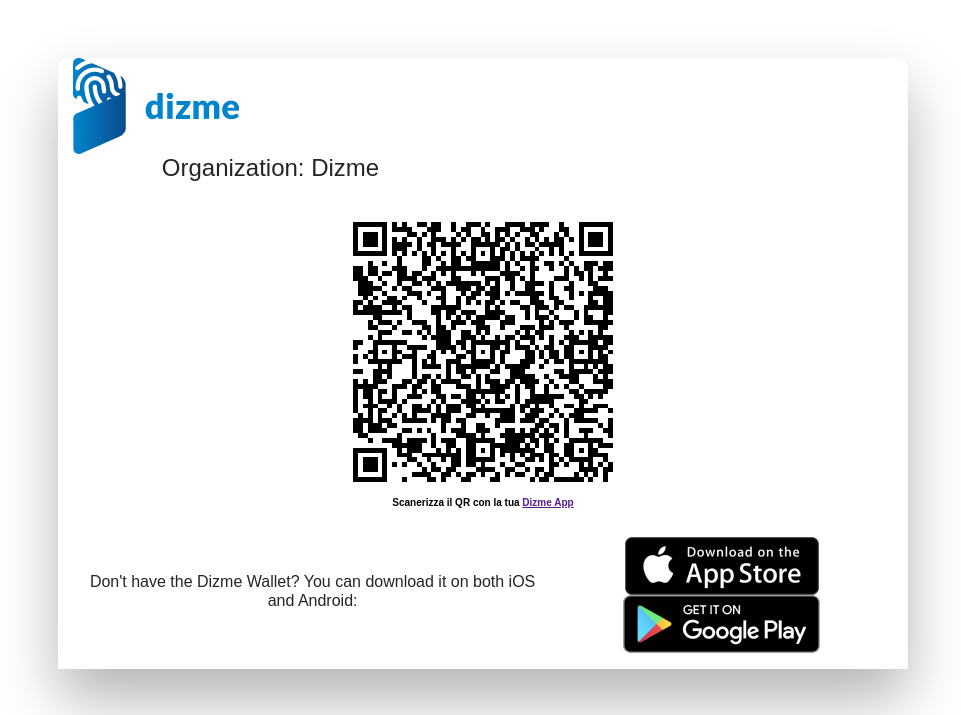
To get the Qr code of a Proof the OPERATOR must click on this button next to chosen proof.

Once clicked the OPERATOR will be redirected on an other page where the Qr code will be visible and can be scan with the app.
Proof Delete
To get Delete a Proof the OPERATOR must click on this button in the bottom next to chosen proof.

Once clicked the OPERATOR will be shown a pop-up tha will make sure that the delete is intentional,
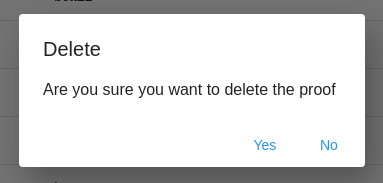
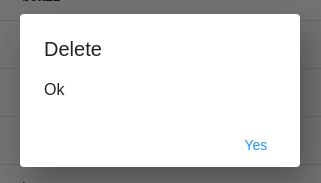
if the answer is yes the proof will be deleted.
Proof Duplicate

To Duplicate a Proof the OPERATOR must click on this button next to chosen proof.

Once clicked the OPERATOR will be redirected in the "Duplicate proof" Page where al the data is already
filled in.
All fields can be edited except the Business Code.
Remember that every field must be filled.

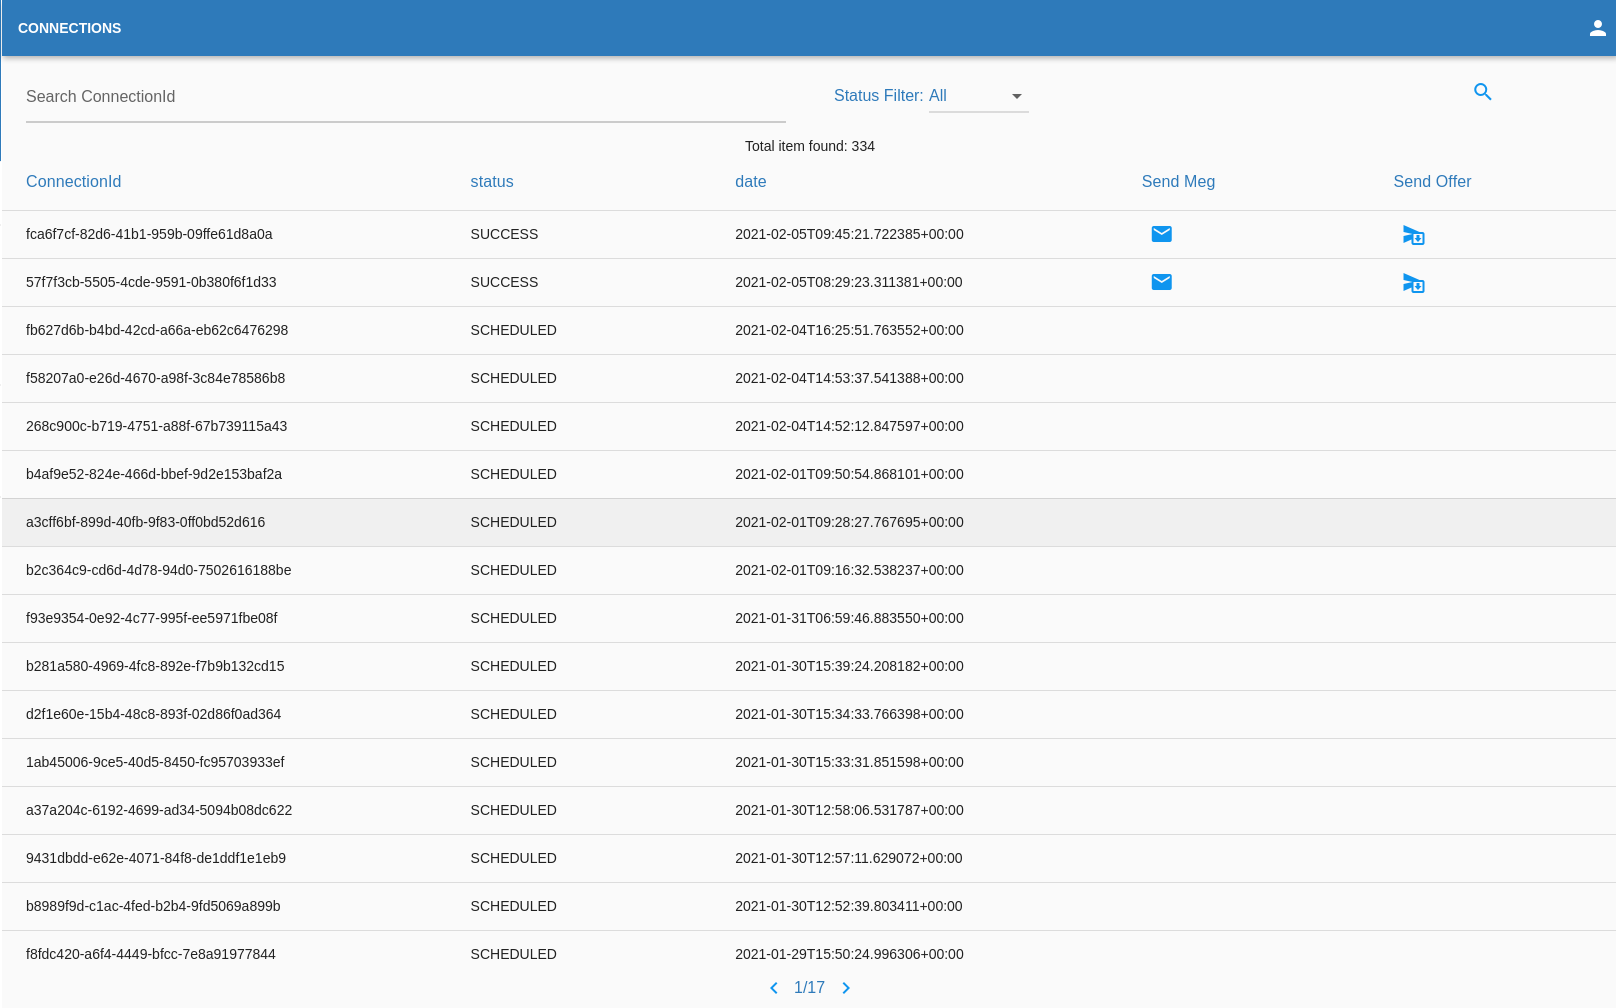
Connections
Everytime an USER interact with the organization for a credencial or a proof a connection will be created, this connection can be used to send the USER notification or credential offer. The OPERATOR can send a message to a "connected" USER. To do that the OPERATOR must click on this button next to chosen connection. Once here make sure to add at list 1 Message Title and 1 Message Body in a language of your choice. The OPERATOR can send an offer to a "connected" USER. To do that the OPERATOR must click on this button next to chosen connection. Once here make sure to fill all the fields. IMAGES MUST BE IN JPG FORMAT
The status SUCCESS will indicate that the USER successfully ended his request.
The status SCHEDULED will indicate that the USER still didn't his request.
In this page the organization can interact with the USER and send him notification through the button "Send message" or a credential offer through the button "Send offer".
Send Message
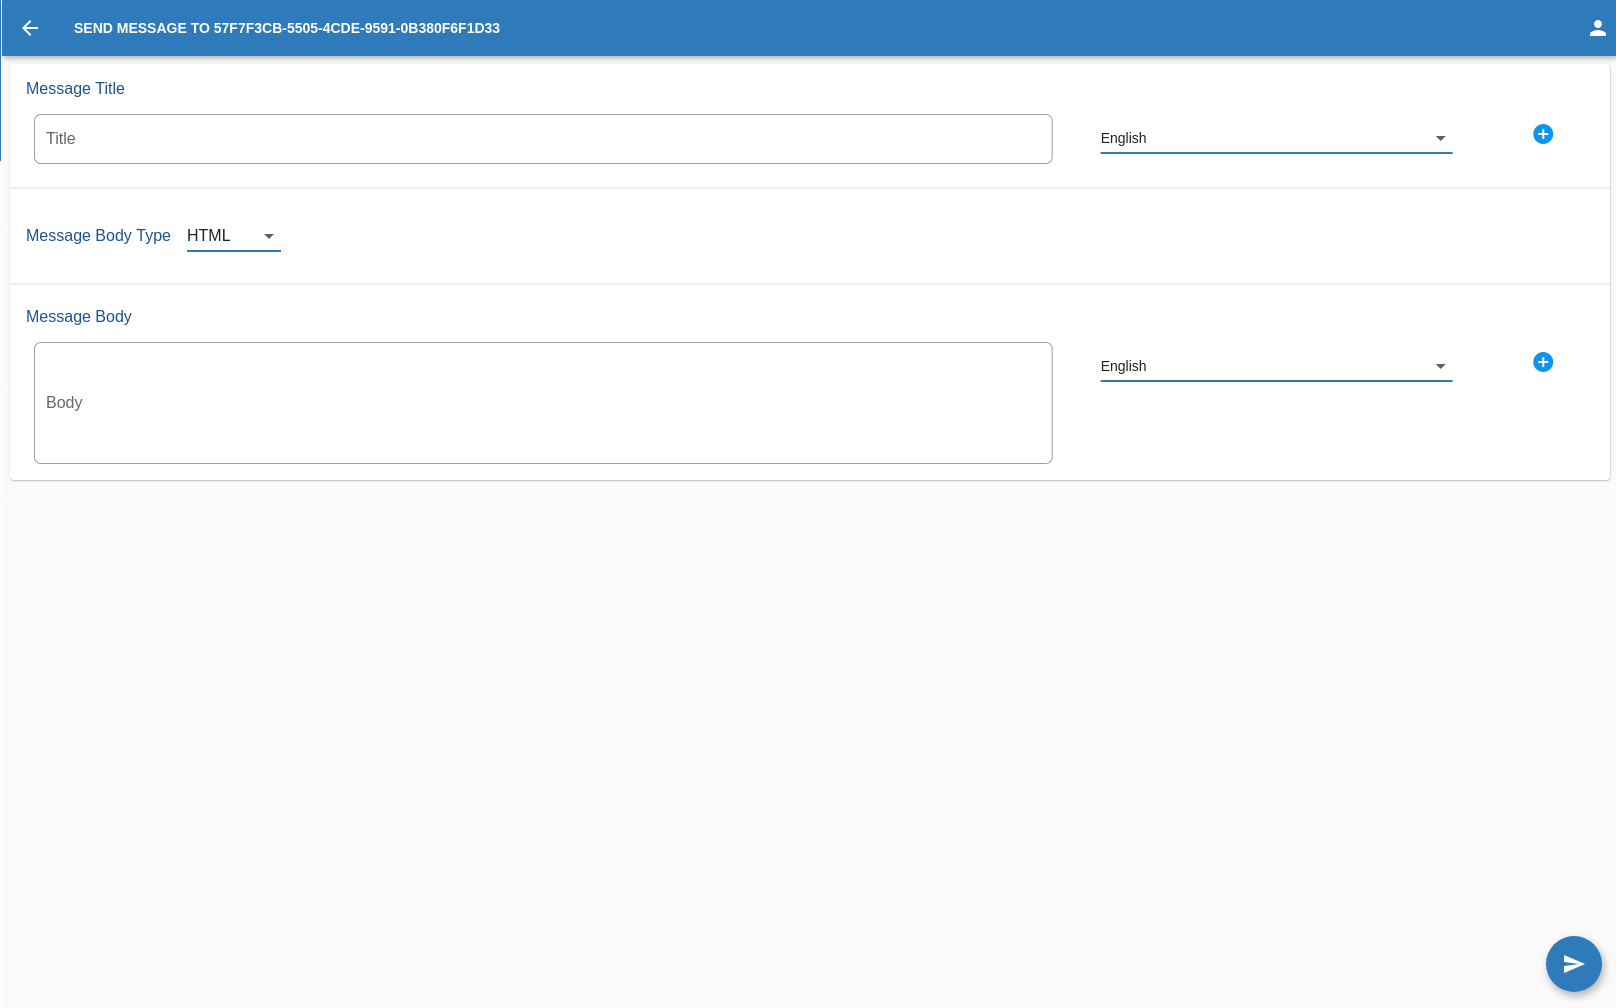

Remember to click this button on the rigth to add this 2 parameters

Once satisfied with the message,the OPERATOR can go on and click on this button in the bottom right corner of the screen.

Send Offer
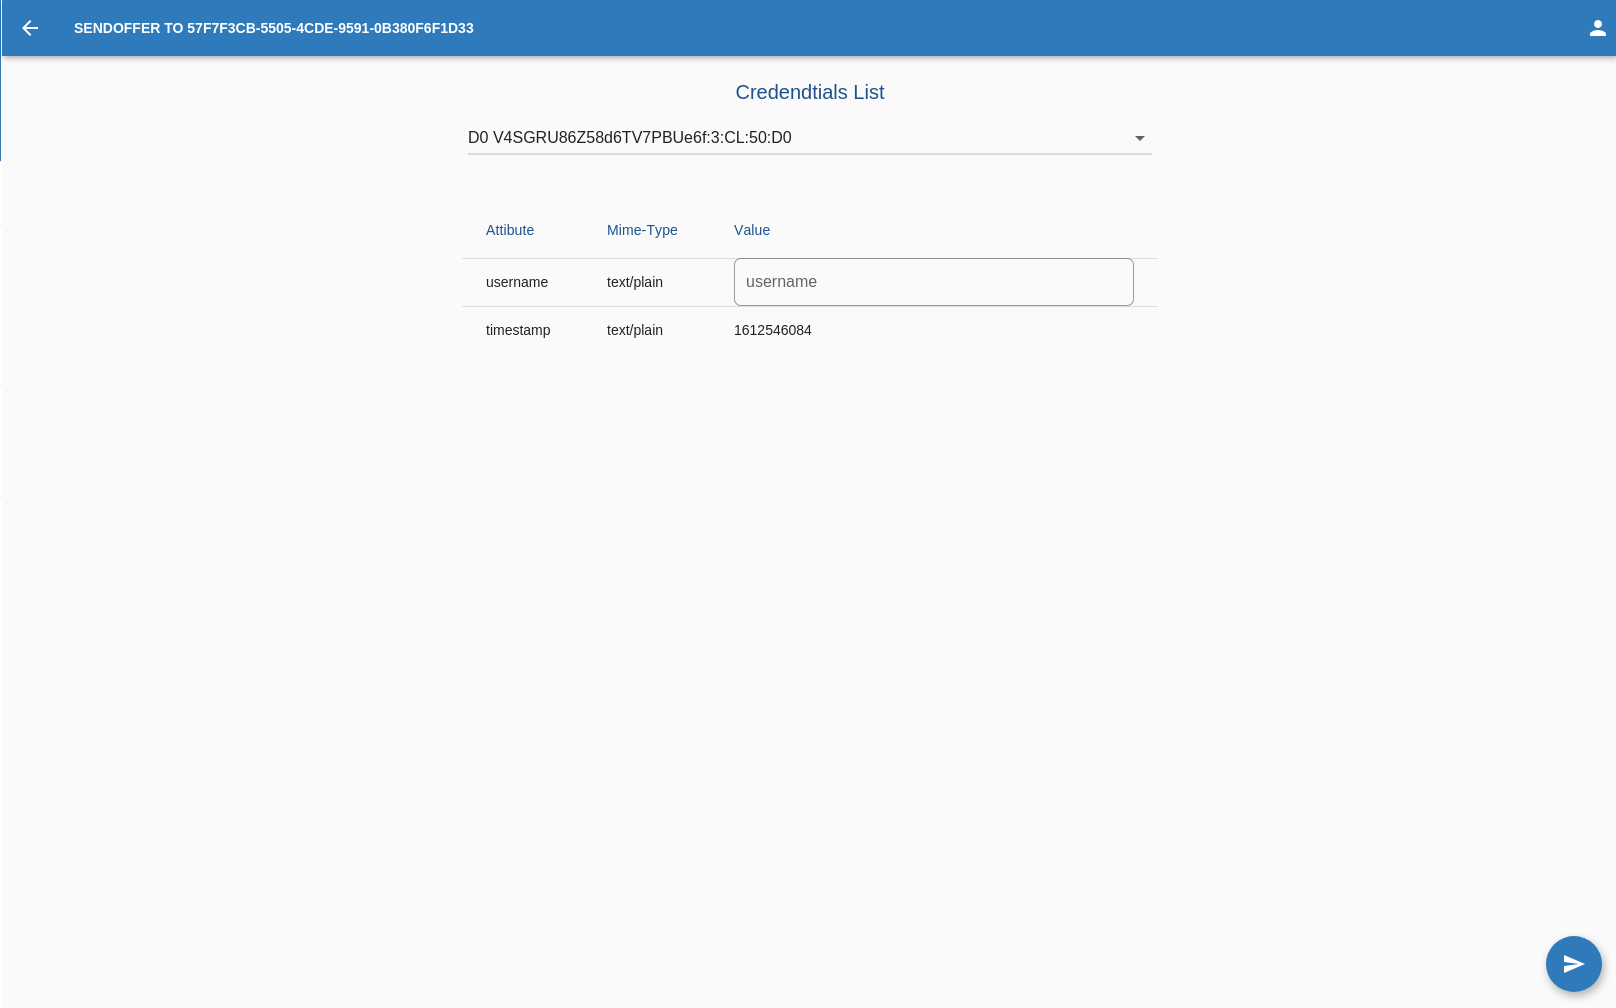

Once satisfied with the offer,the OPERATOR can go on and click on this button in the bottom right corner of the screen.

Issue Activity
This page shows the list of total Issue requests made by the organization.
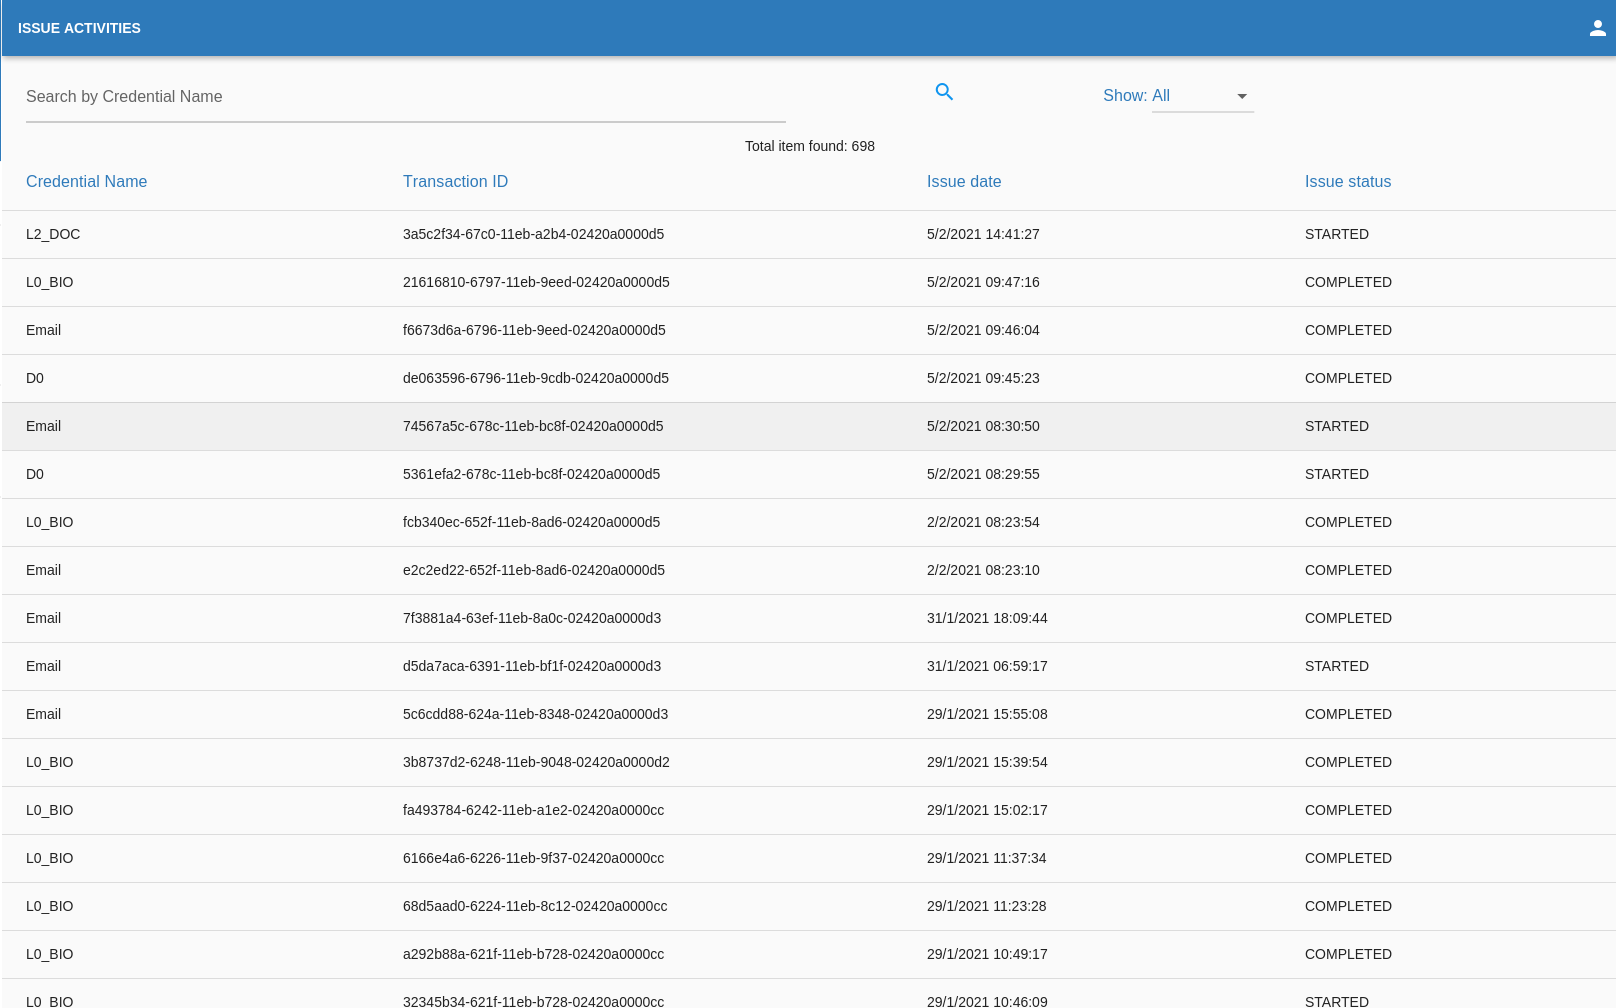
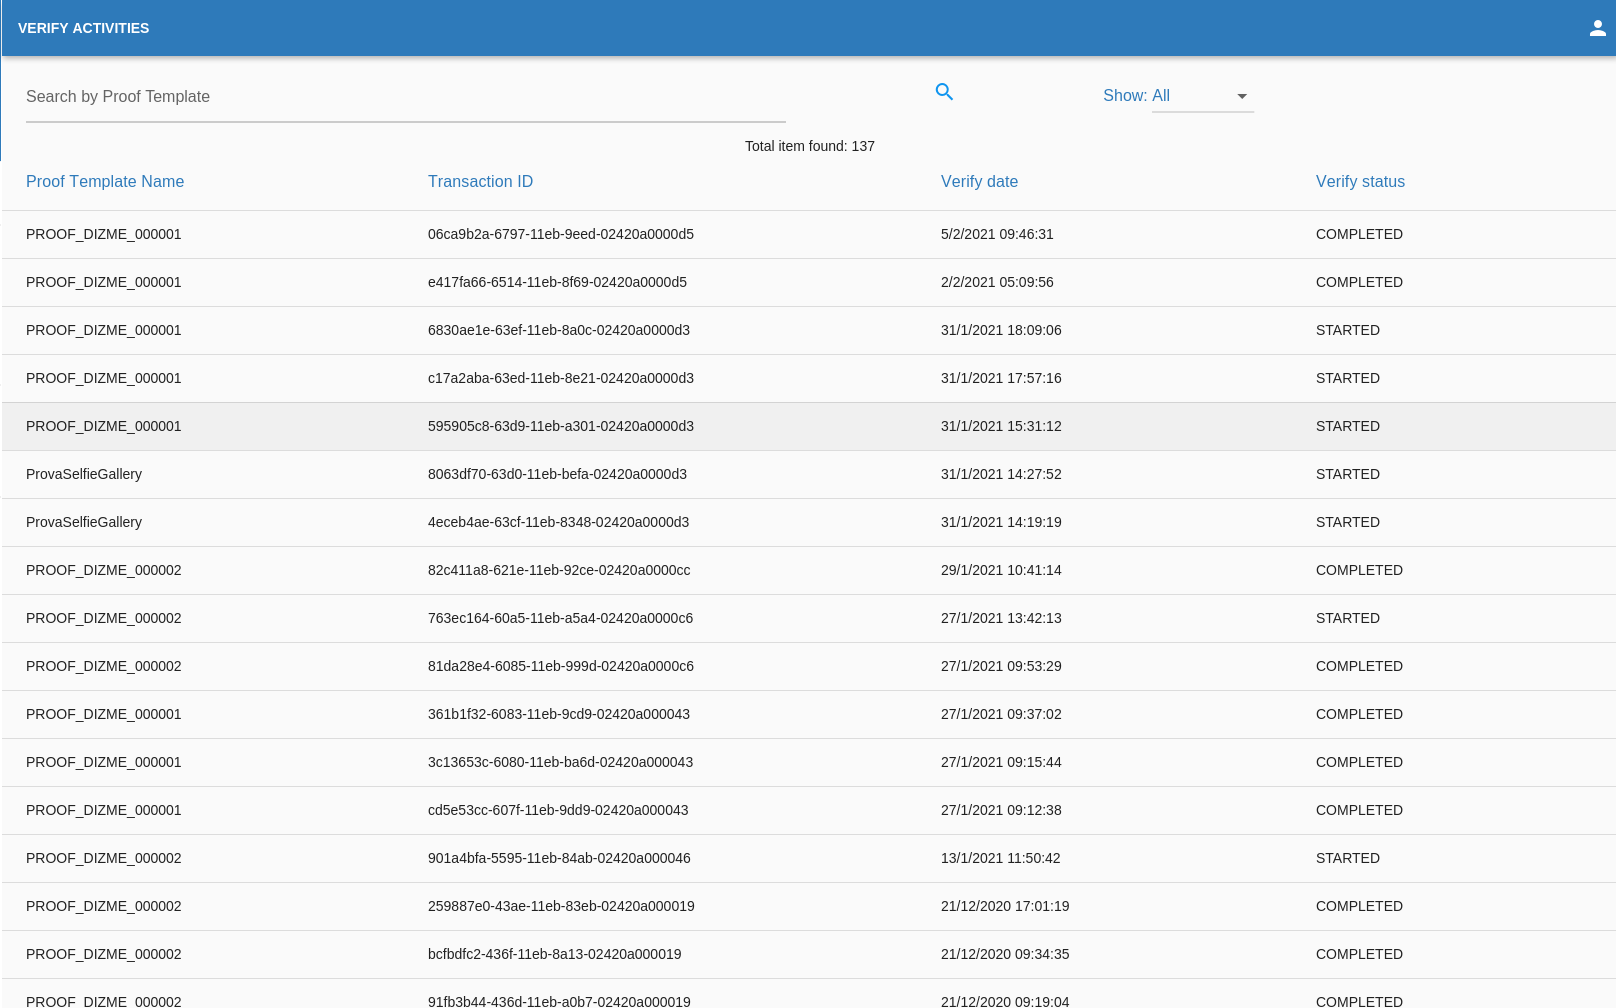
Verify Activity
This page shows the list of total Verified activity made by the organization.
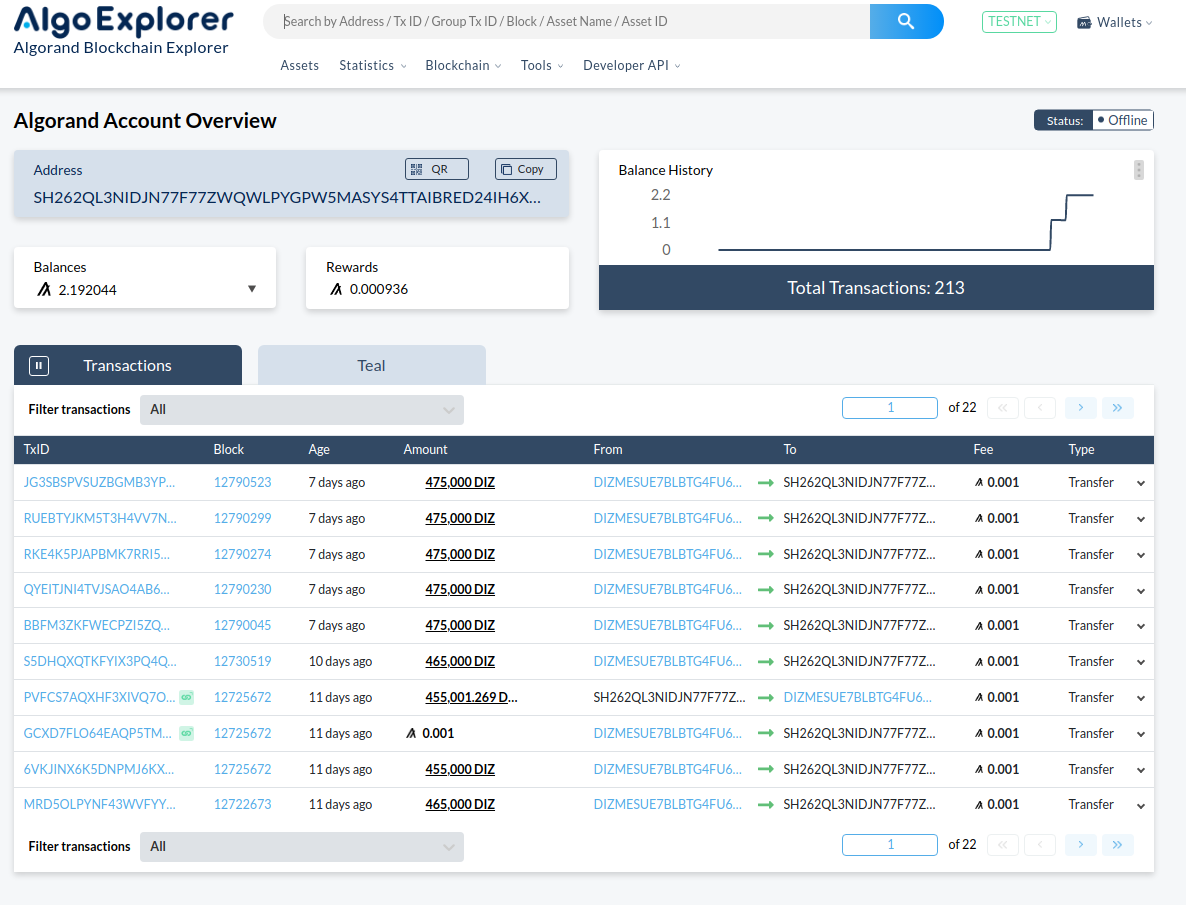
Payment Activity
This page will redirect the OPERATOR to the AlgoExplorer page connected to the account.
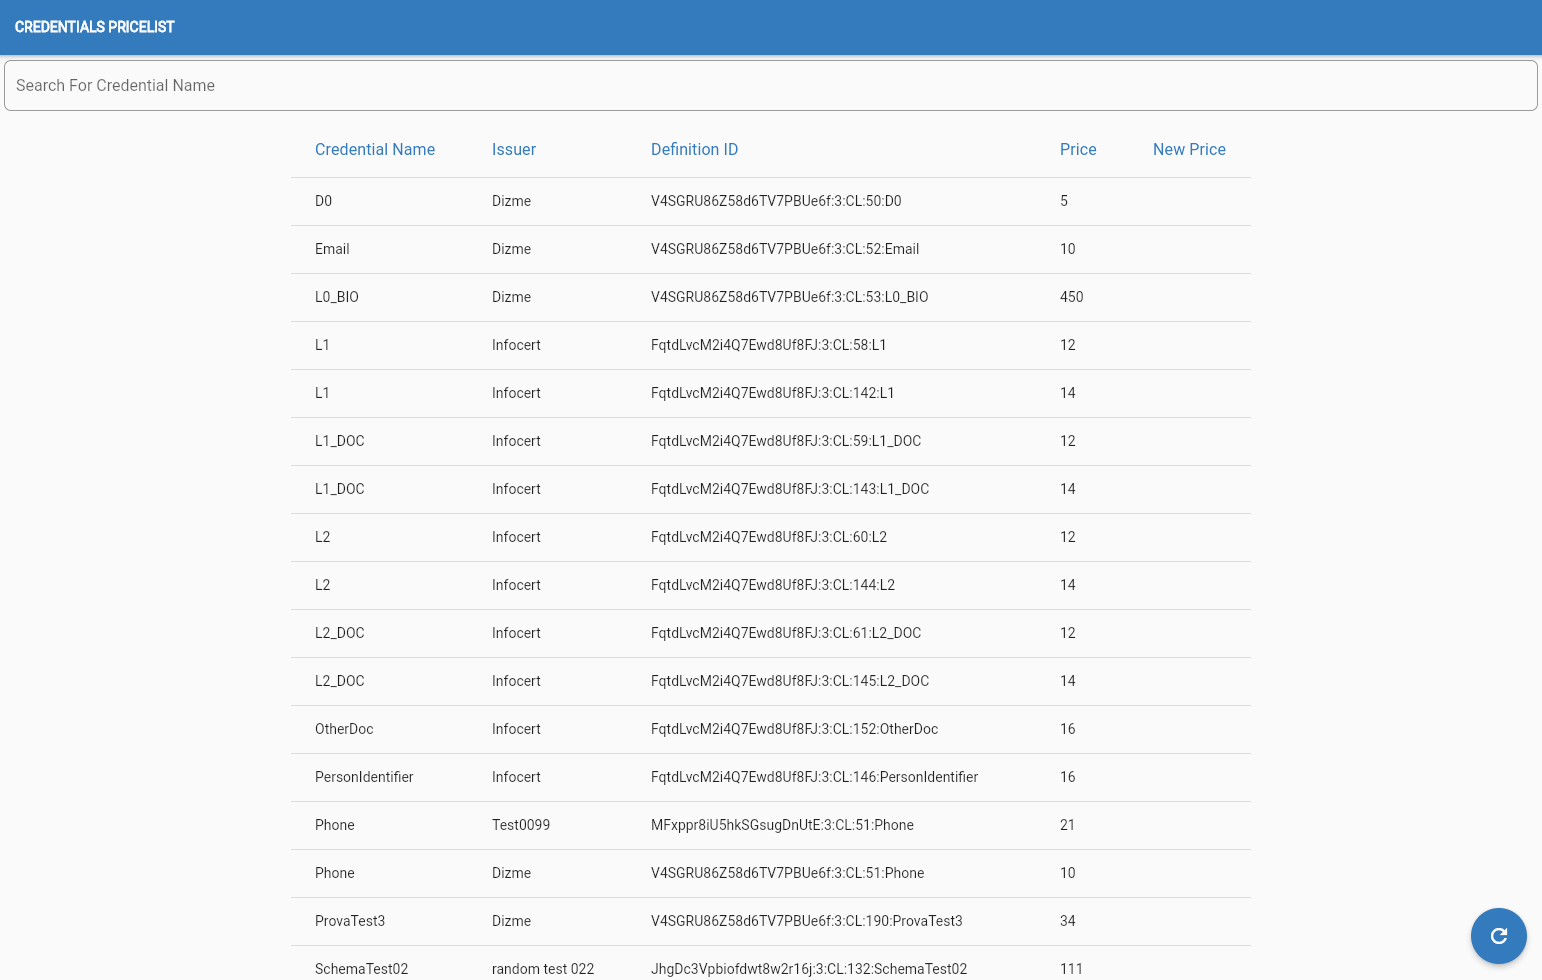
Pricelist
This page shows the list of all the credentials price changes.
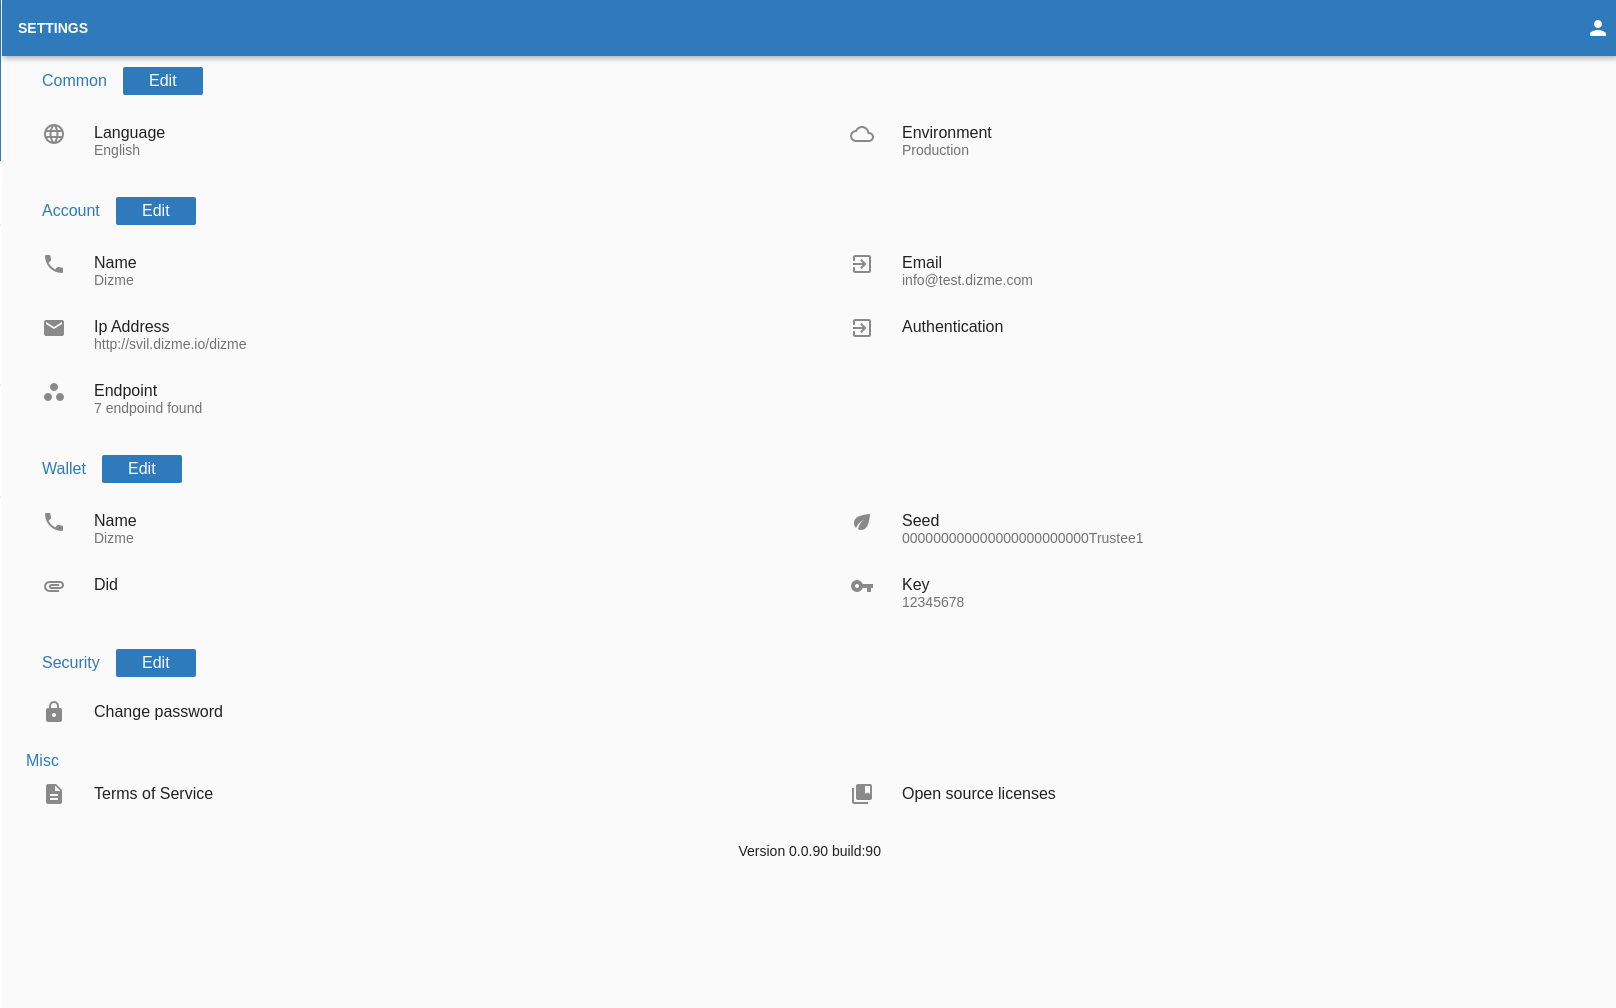
Settings
In the settings page the OPERATOR can edit the account information:
- Endpoint
- Autentication
- Ip Address
- Password
Edit Account
In the "Edit Account" page the OPERATOR can edit the account related information:
- Endpoint
- Ip Address
- Autentication
The autentication can have setting can be:
- No Auth, no autentication
- BasicAuth, this will require an username and password
- ApiKey, where the OPERATOR can add one or multiple (name ,value) entry
- Bearer Token, this will require a string (token)
- Payload, this will require a string (payload)
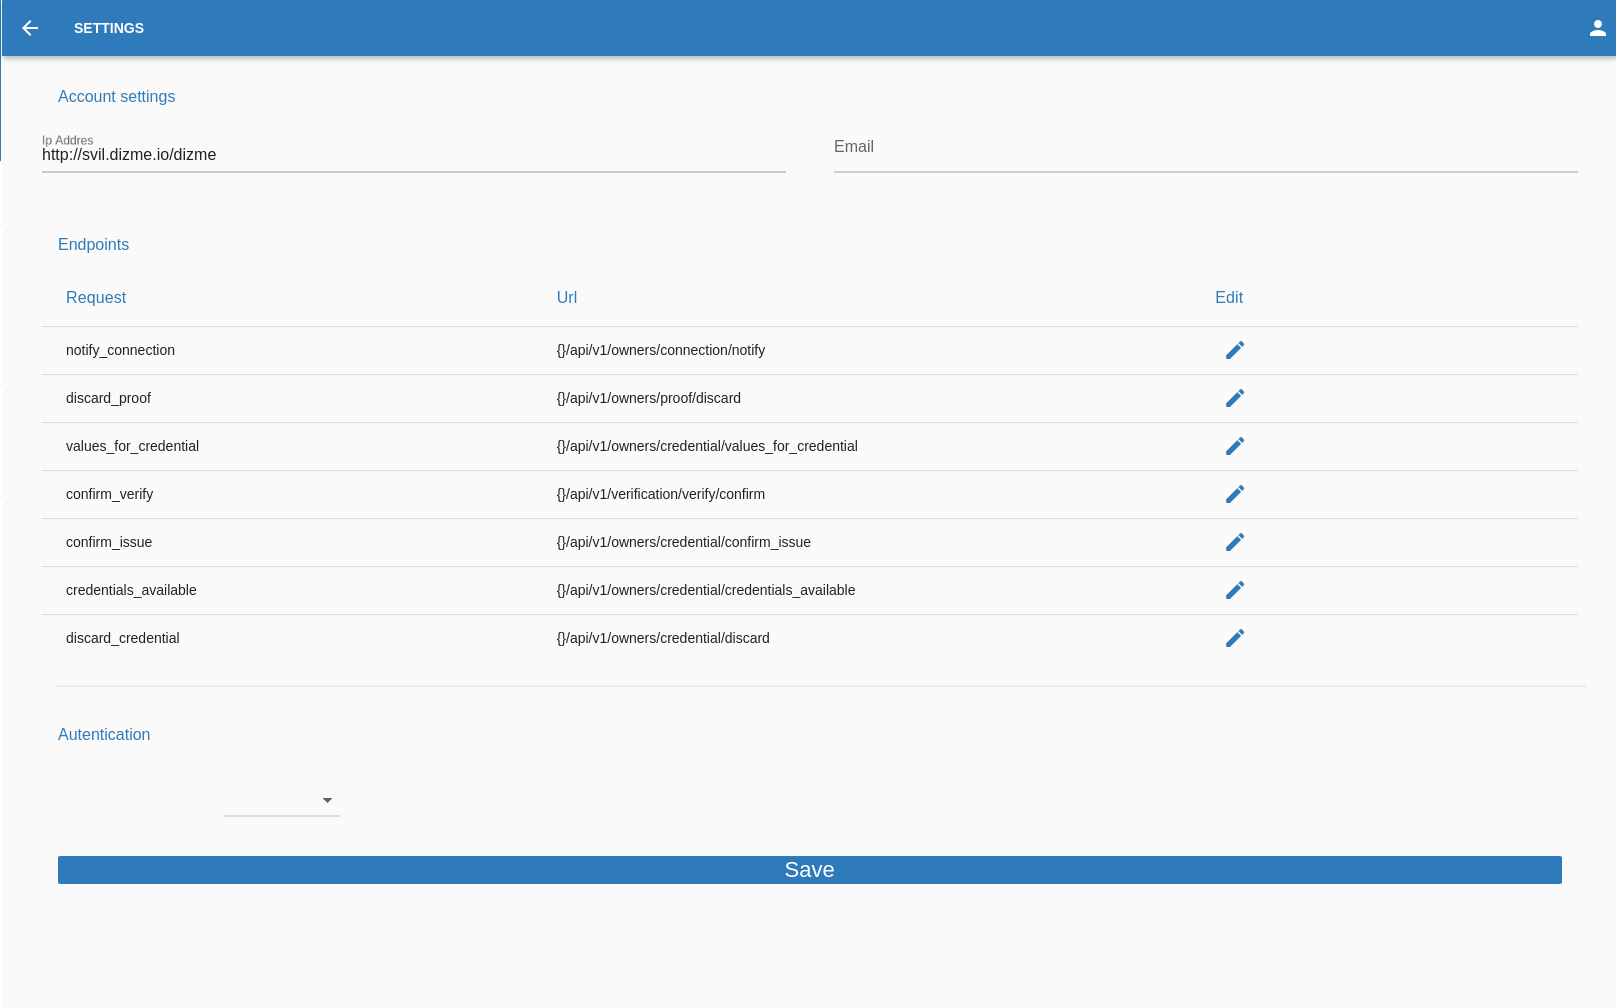
Once satisfied with the new settings,the OPERATOR can go on and click on this button in the bottom right corner of the screen.

Change Password
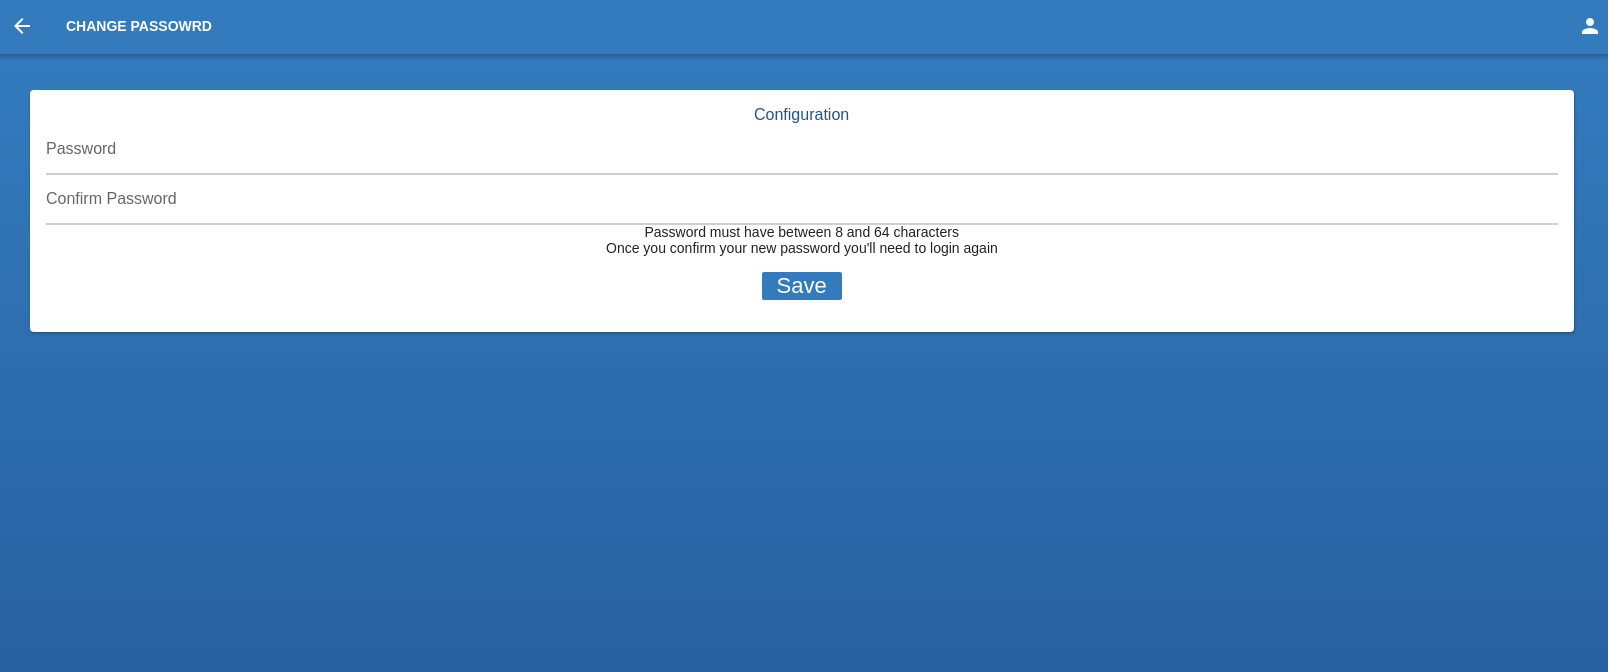
Here the OPERATOR can change the account password, the new password must have between 8 and 64 characters. Once the
Once satisfied with the new password,the OPERATOR can go on and click the button "SAVE".
PS: THIS ACTION WILL FORCE
THE OPERATOR TO LOGOUT
